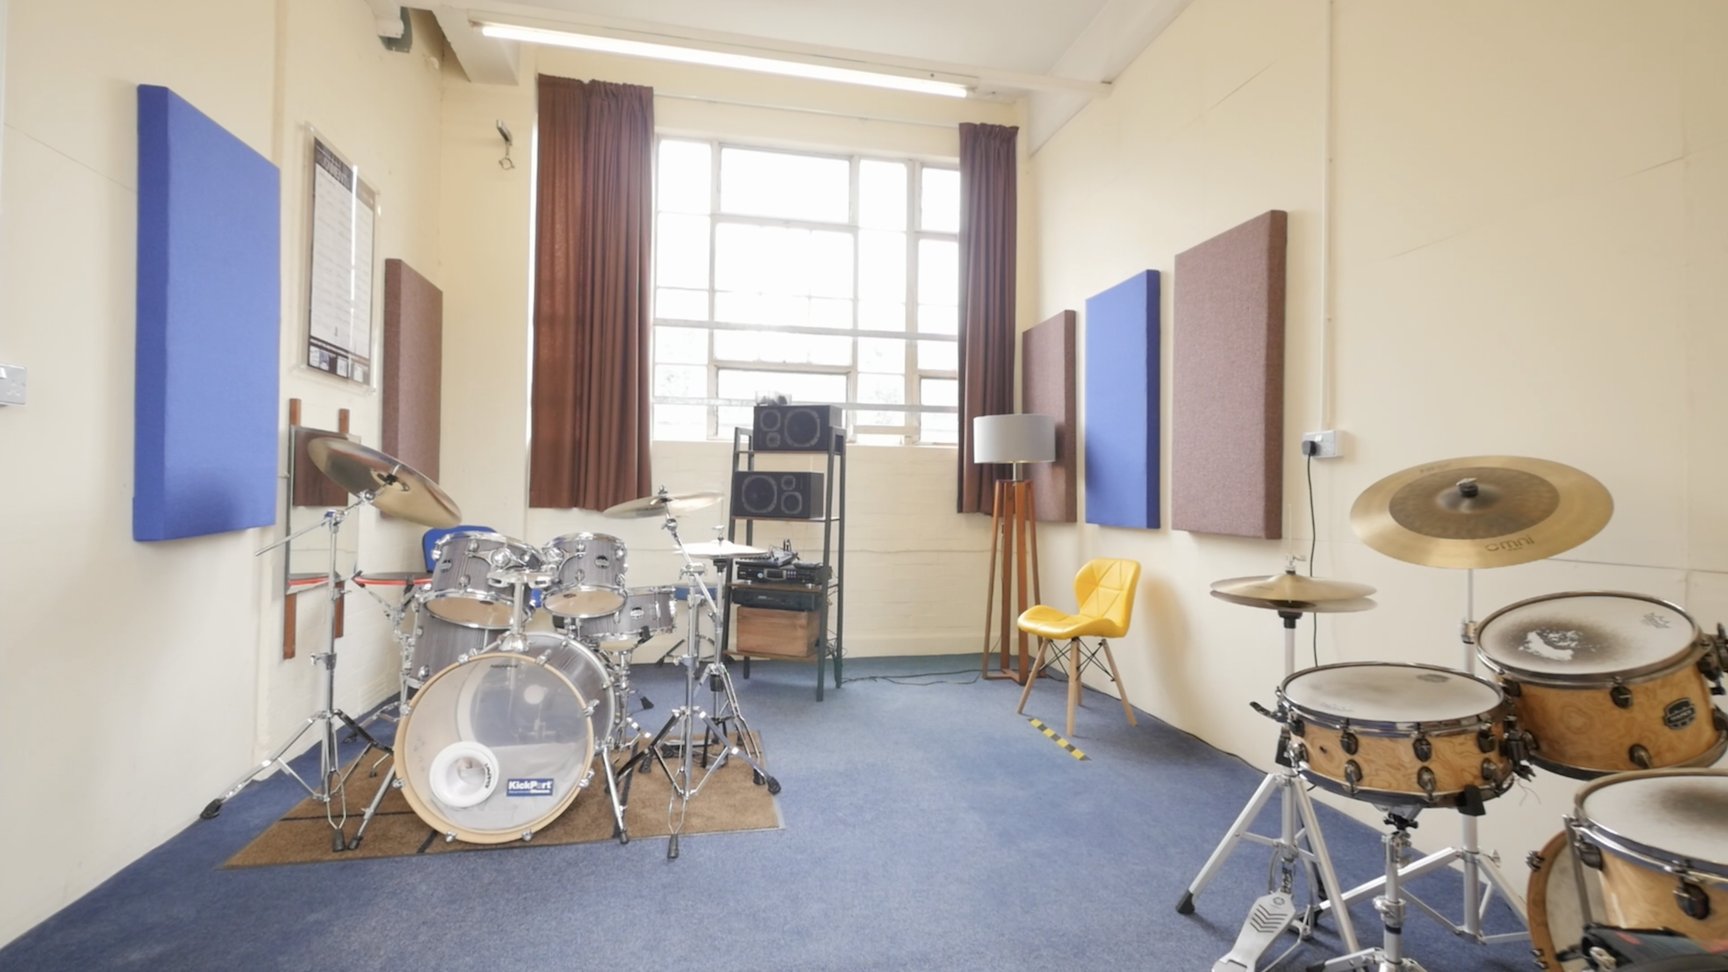
I bought this set of drums in 2023 as a potential practice kit to use at my studio. I hadn’t really considered renovation, as it was clear they would need a lot of work to get back to original. Leaving things ‘just as they were’ was my first consideration (complete with natural, *ahem* ‘characterful patina’). It’s a player’s kit, after all – and I don’t mind ‘ratty’!
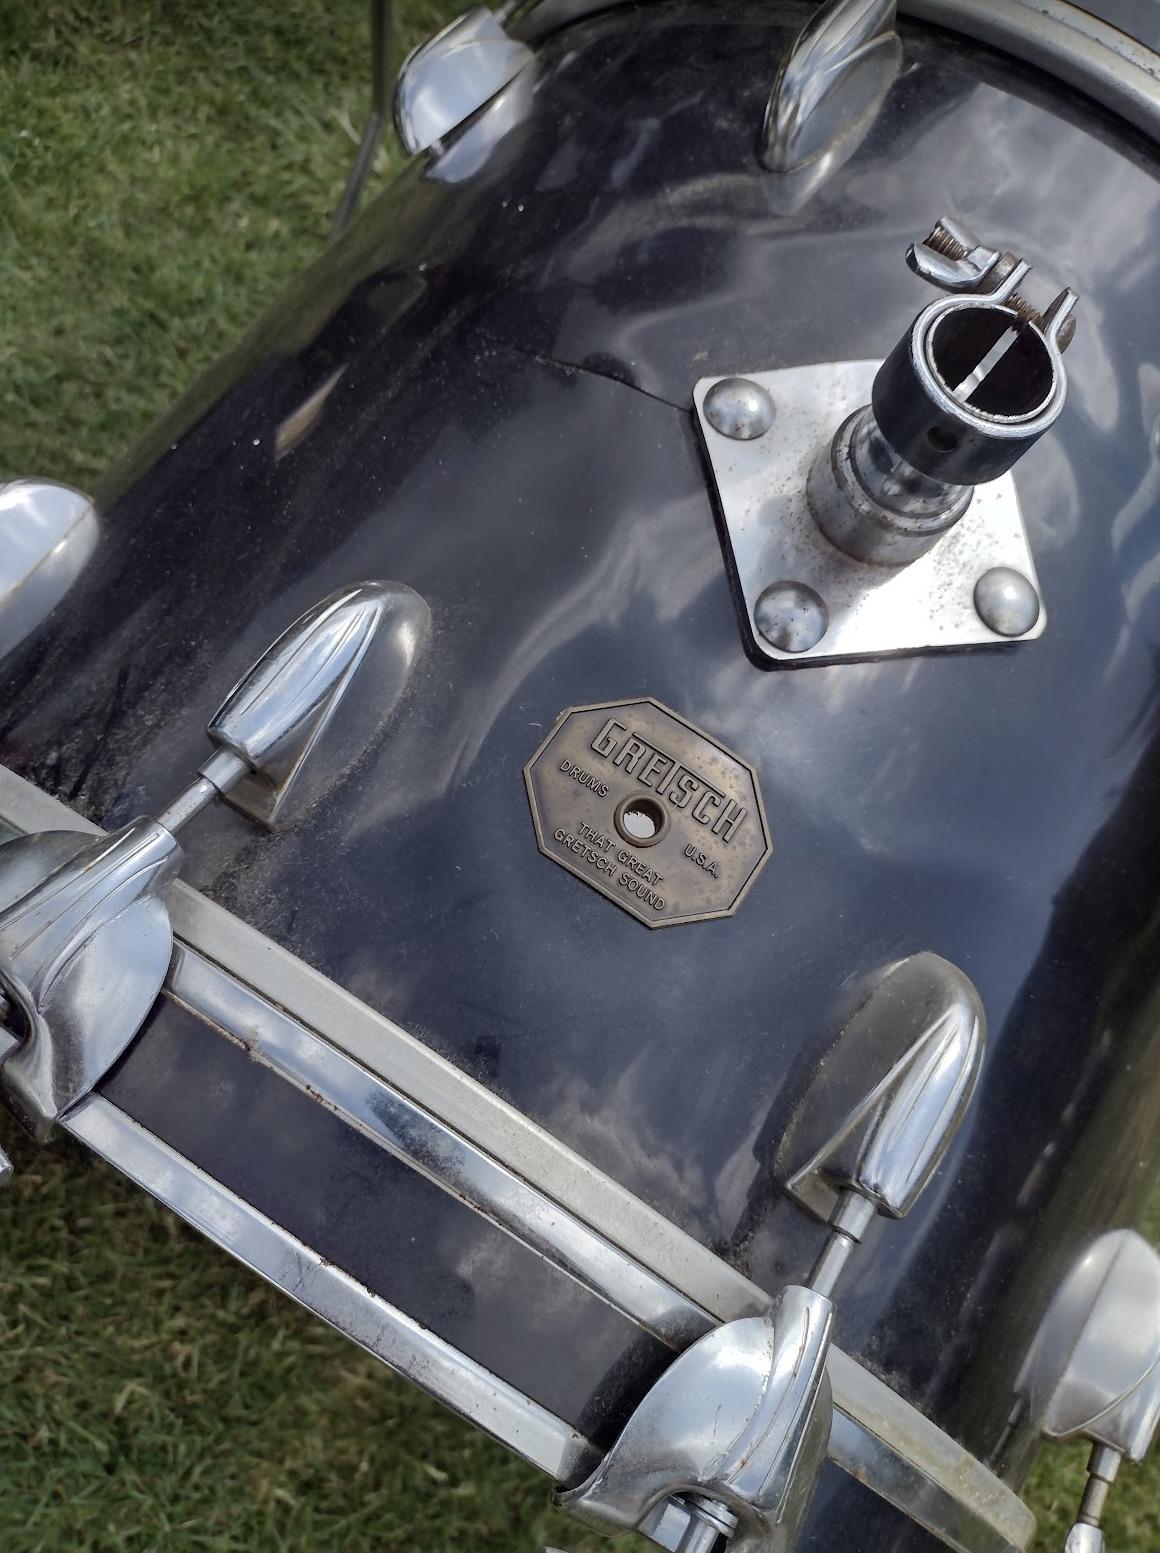
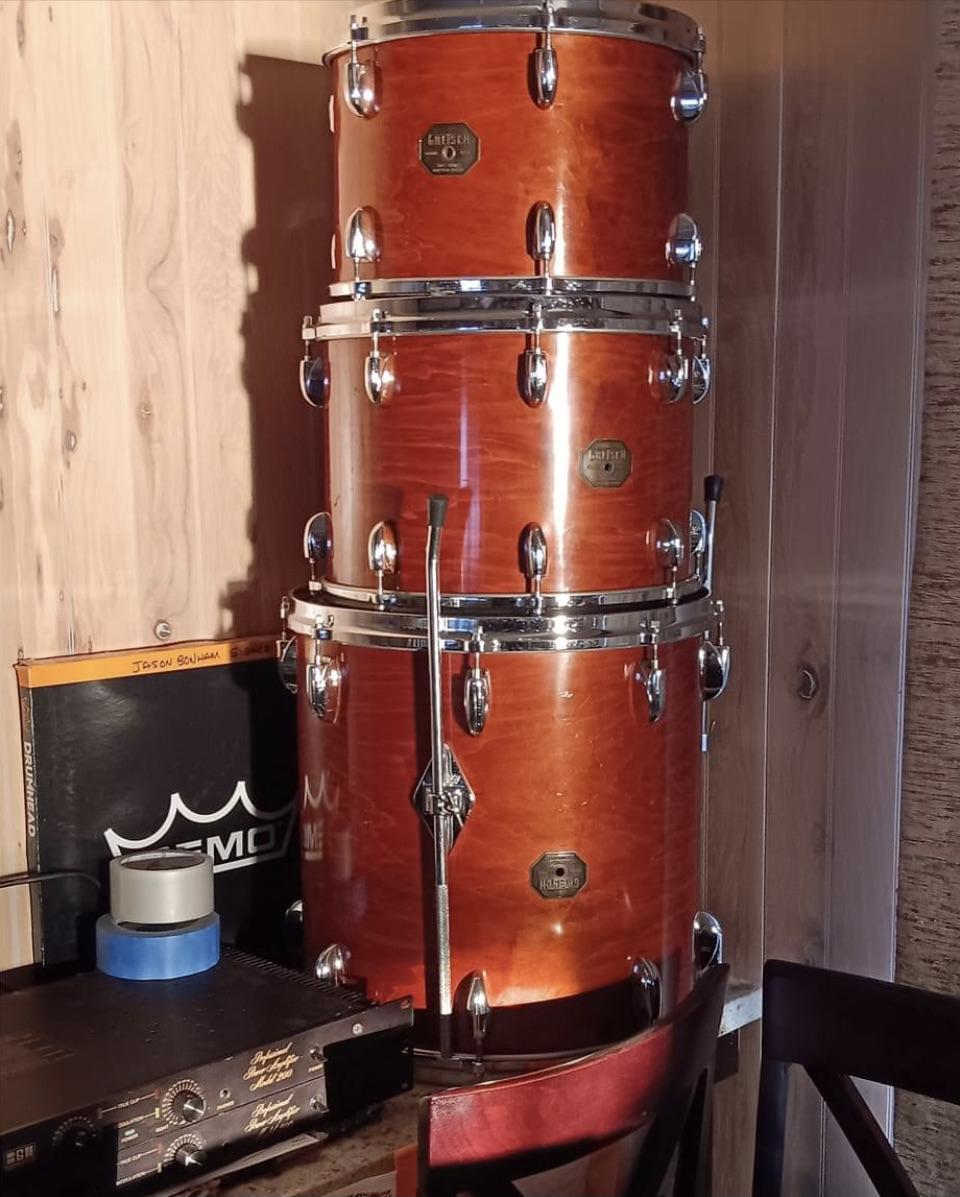
Back at my studio and after closer inspection, it became apparent that these drums had several surprises in store. The 12″ tom was a 5-lug drum converted to 6-lug; the original tom bracket mount hole had been filled with plastic, as had the redundant previous lug fixing holes. This job had been done quite well in all fairness and even the ‘Silver Sealer’ paint had been touched up. The Black Nitron wrap however, was another story! The 15″ floor tom had been a rack tom – converted to a floor tom: again, a nice job of the interior, though the wrap was better on this drum. The 18″ bass drum had originally been a floor tom: the leg bracket holes had been filled and the interior pained well – as the other drums.
After the visual assessment, I began to look at possible drum heads and consider more the sonic qualities of the kit. The drums came with a disparate mix of Remo fibreskin, Evans G2 and Resonant, Premier Everplay (remember those!) and a CL Batter. I tried offering up some Remo Ambassadors and, put very simply, none of them fitted very well – if at all!
My initial instinct was maybe to just go back to the heads that it came with (at least they kind of fitted – or had been forced to!) but even with protracted sessions of tuning, I couldn’t get any kind of sound out of drum and head combinations that I liked. This is where my research turned toward issues with oversized drums and reading frightening tales of ‘hammers’ and ‘cutting the collars of drum heads’. I got to thinking: “there has to be a better way?”
I came to the verdict that I couldn’t use the kit as it was, so took the difficult decision to renovate: not ‘restore’ – let’s make that distinction clear: I was considering not only refinishing the kit, but also developing a plan to re-profile the bearing edges – and to an extent, the outer edges of the shell (and possibly, even the new bass drum hoops – I shall go into that later). This was to be quite drastic work – and sacrilege in the minds of some collectors and purists, I’m sure, but I wanted a kit to play, which had full scope for drum head options and sounded great. This was all theory. It was a huge gamble!
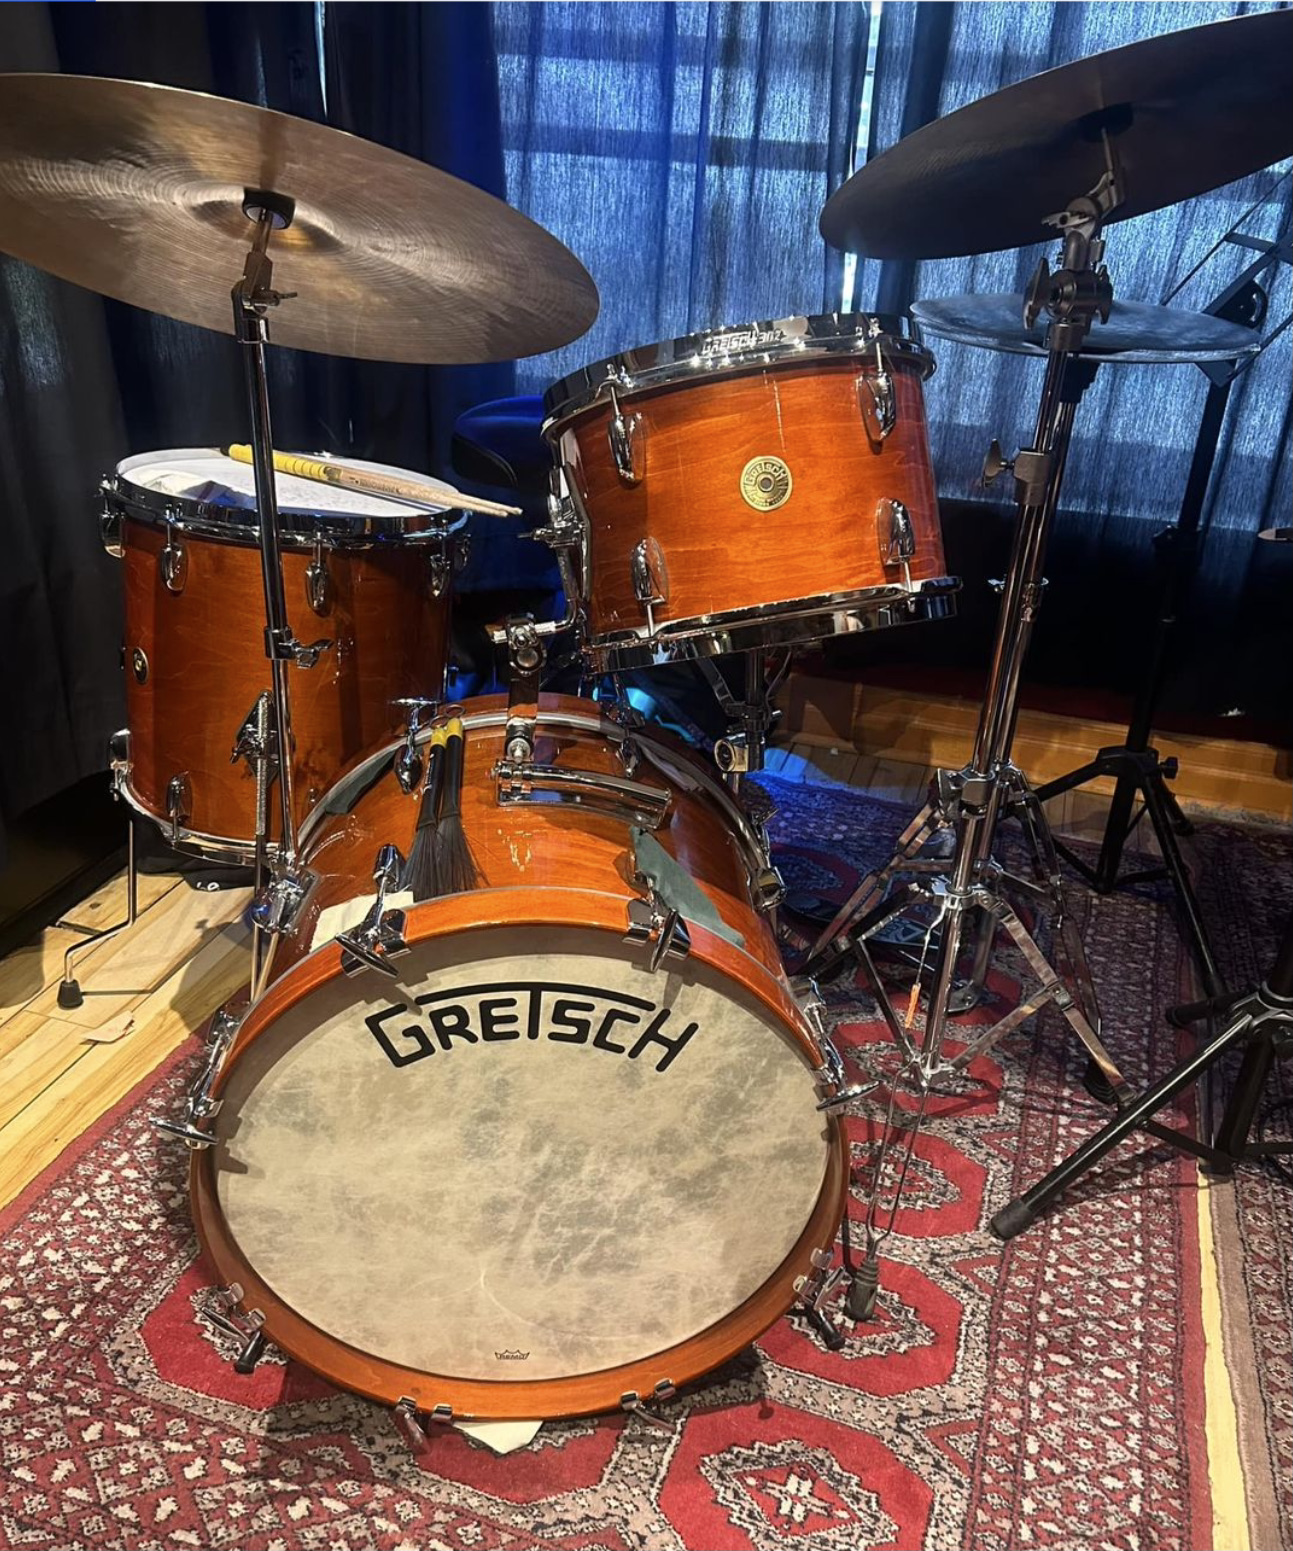
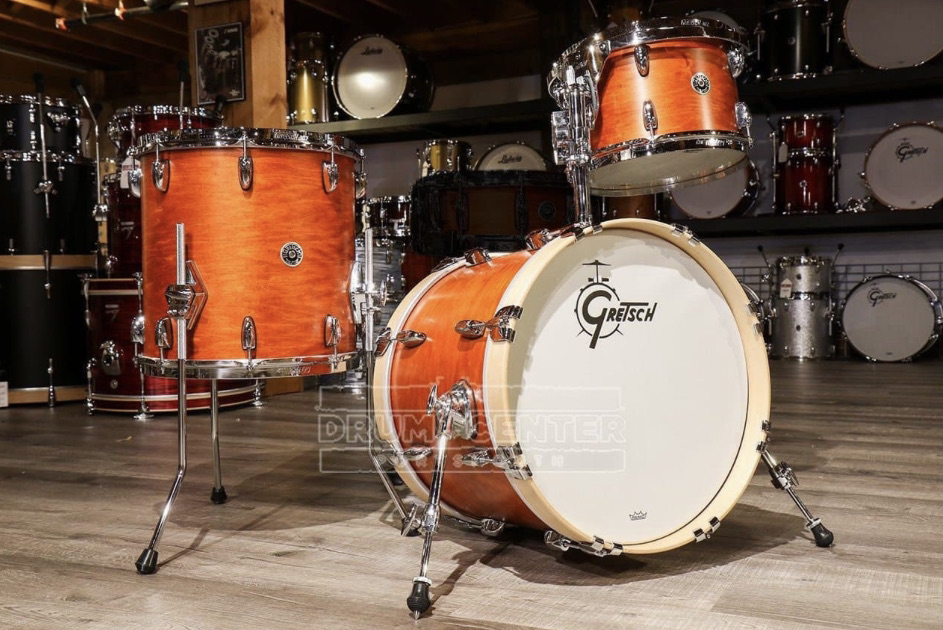
I remembered one of the first Gretsch kits I had ever seen in the flesh was in ‘Burnt Orange’, or some similar colour. It too was a bebop set and for some reason, this memory had comfortably made the colour decision for me. I had also seen pictures of aged or sun-bleached Walnut finish Gretsch drums, which displayed a similar tone in their stain. I wanted the kit to look the right kind of age and I felt orange to be quite 70’s. Finding the photograph (below right) with the natural hoops also inspired another detail of my kit’s end finish: the bass drum was fitted with metal hoops and I knew that the fella I had bought the kit from had some 18″ natural maple hoops he wanted to offload. Result! I’ll ‘ave ’em!
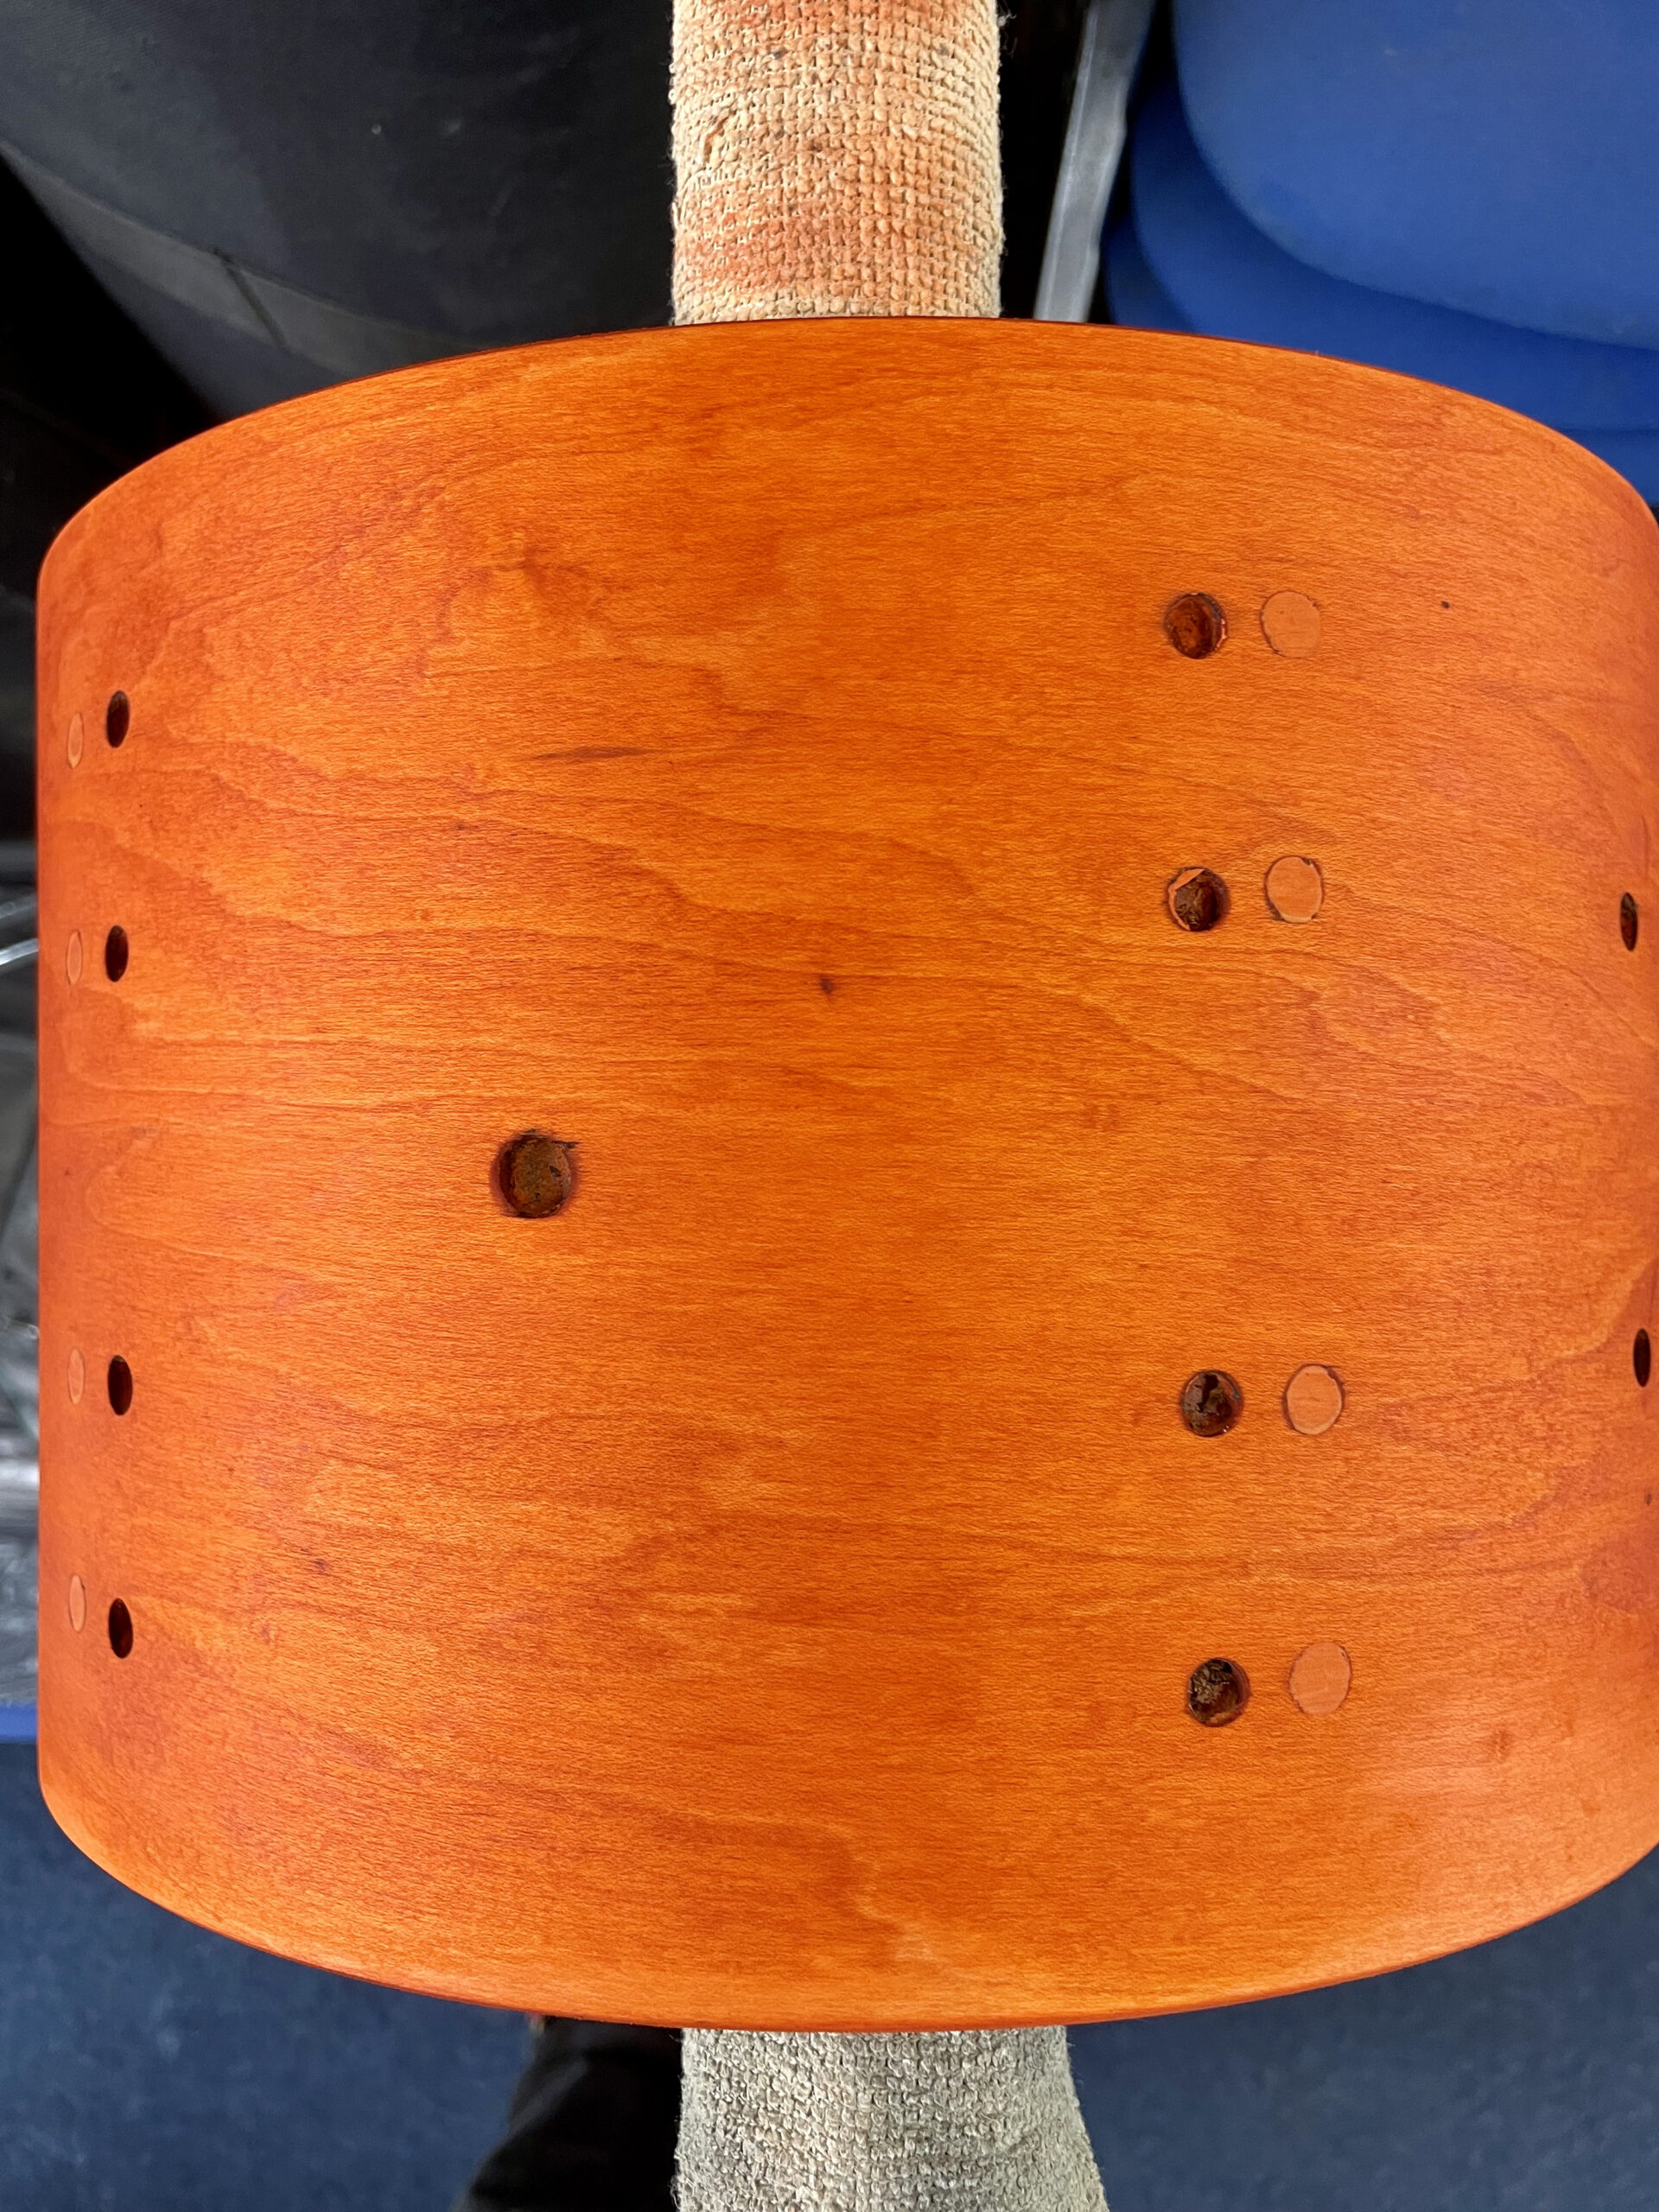
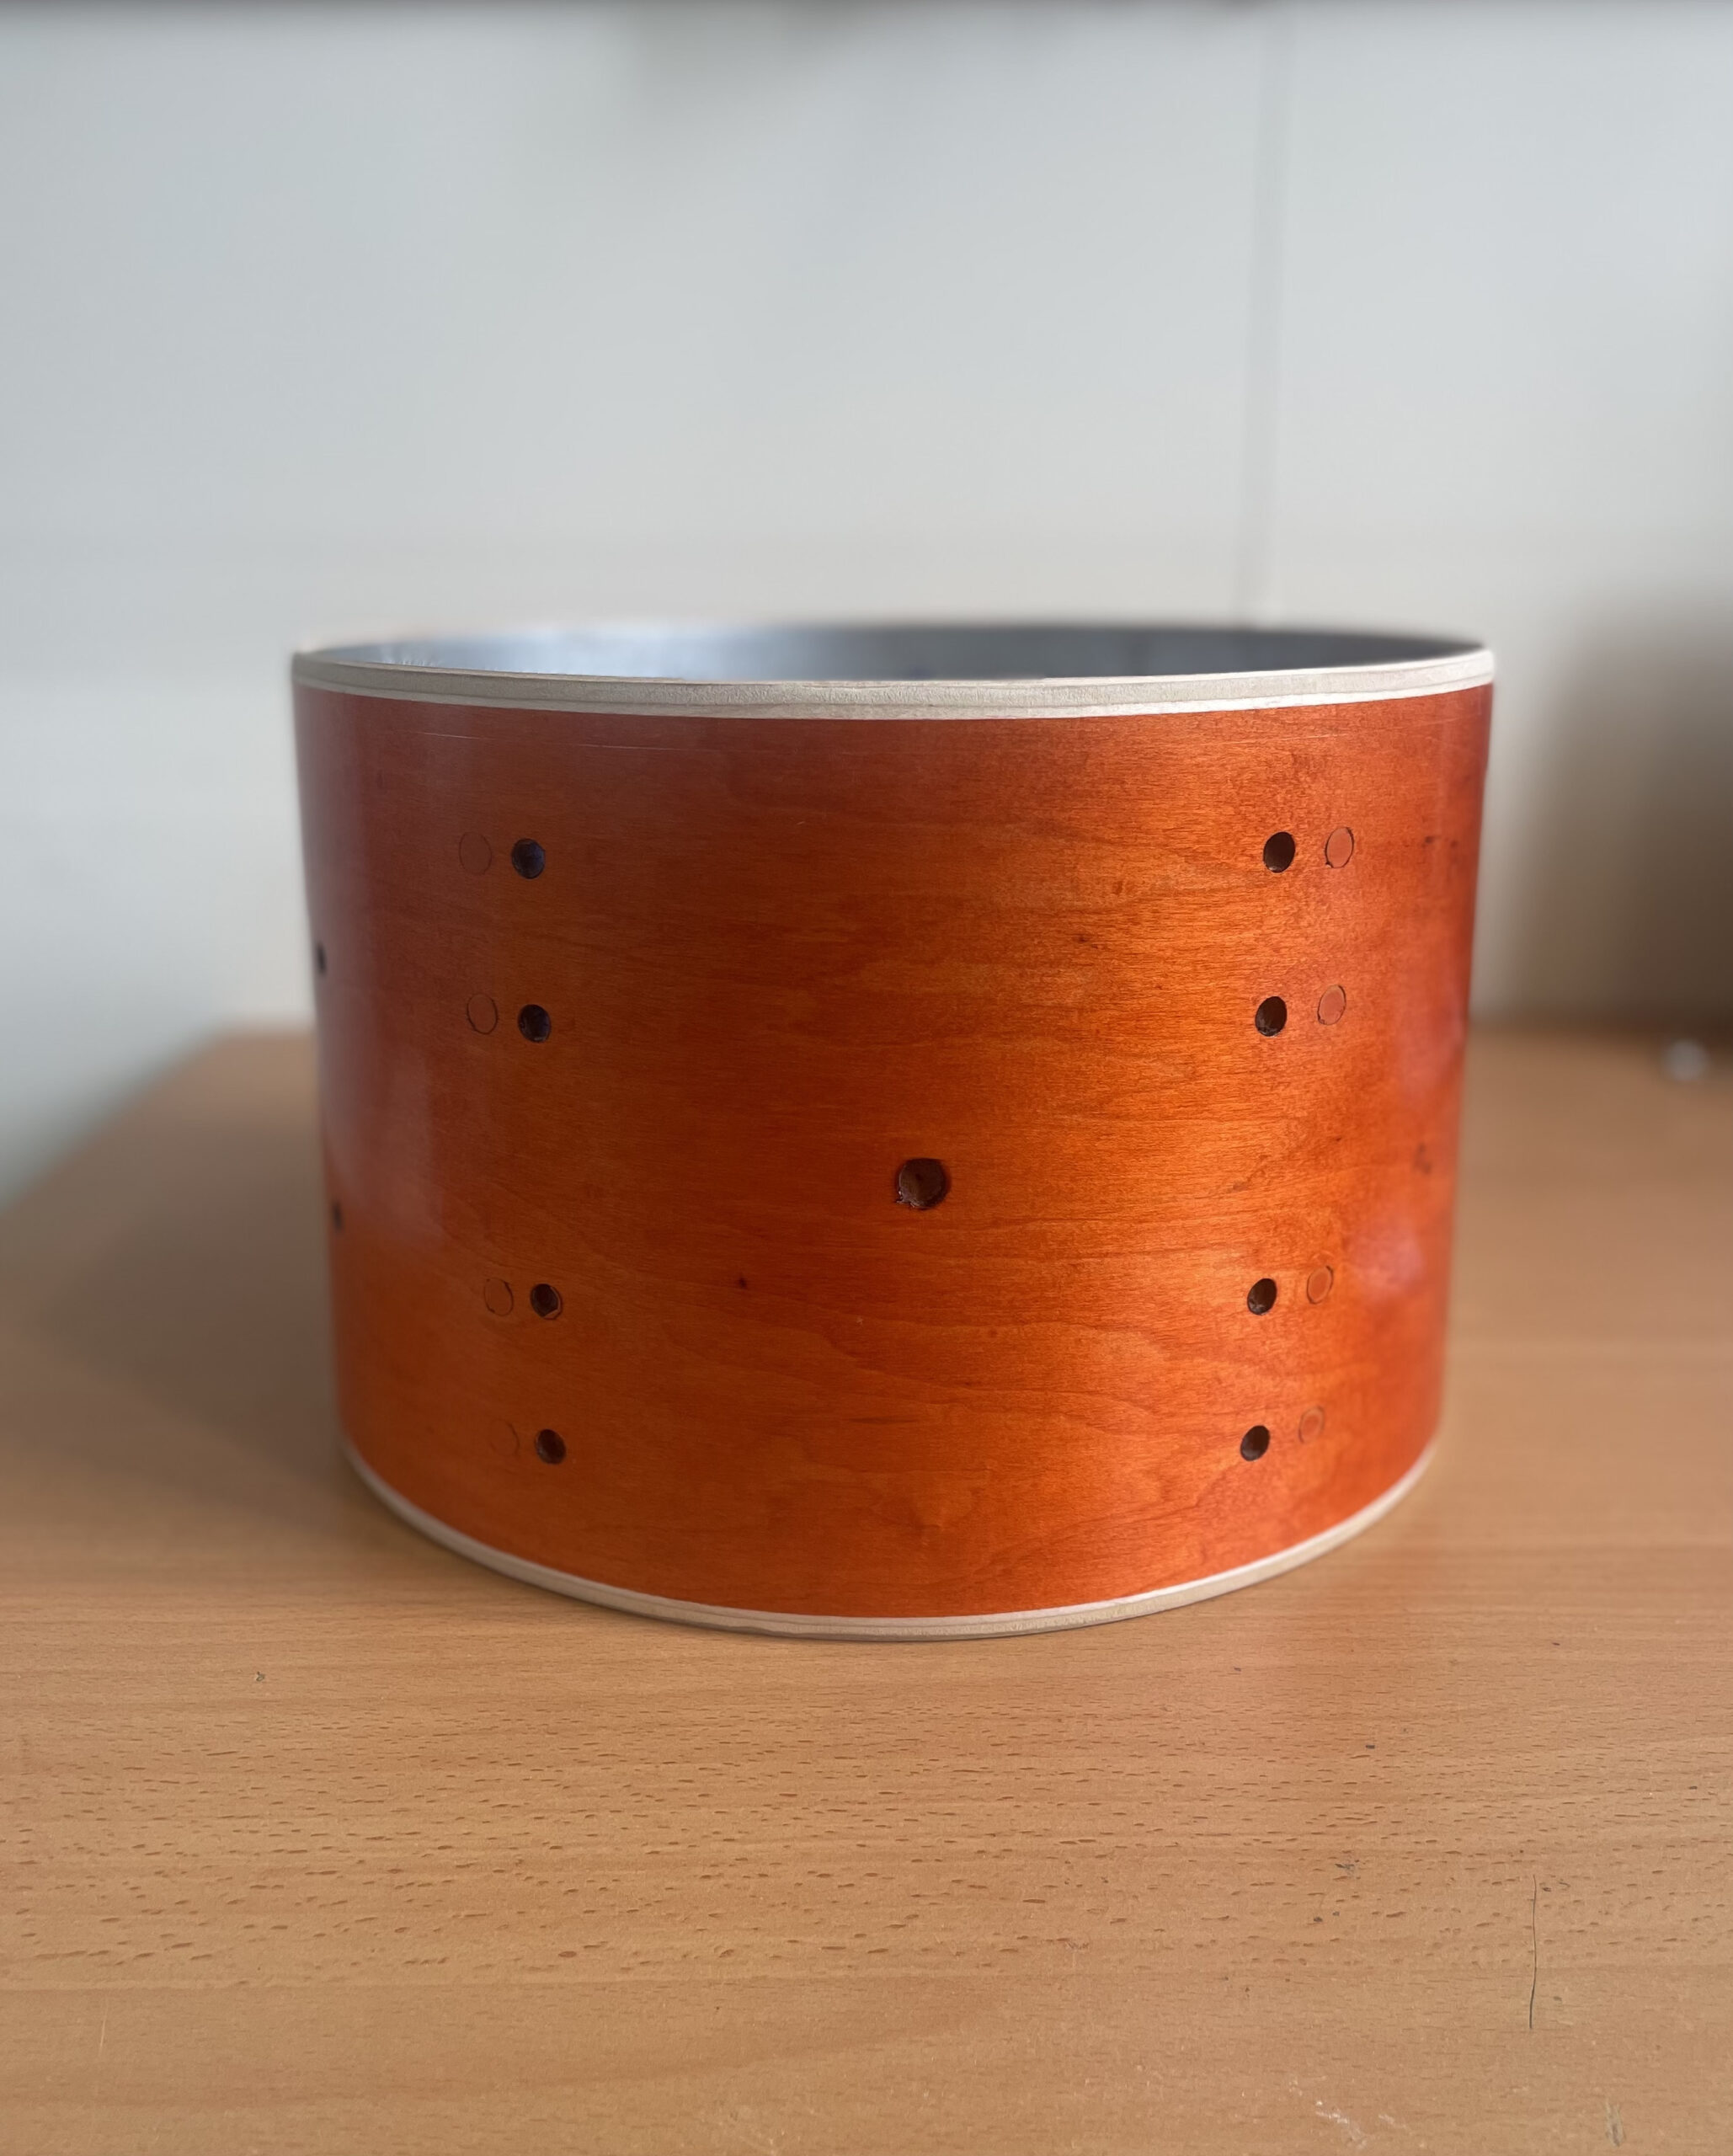
Renovation day 1: Removing hardware and Black Nitron Wrap. After a lot of research, I used a heat gun for freeing the wrap. Advice: you’re not burning off the plastic – merely heating the glue enough so that the covering comes off. To my complete surprise, each of the drums had a different finish underneath! The 12″ was (ironically) black lacquer; the 15″ had been walnut and the 18″ was natural, unfinished maple, so either had been Black Nitron from the start or re-covered. I used Nitromors to remove the glue residue and lacquers. There followed lots of sanding – especially in removal of the stained wood from the 15″. Don’t forget to plug any holes before using paint stripper, or you risk it running through to the inside of the drum and taking the Silver Sealer! Another great tip for later preparation of the wood for staining, is to apply water to the wood surface: This lifts the grain to be sanded back for a smoother finish. There were some minor dinks and holes which needed filling; I was also worried that the filler used on the holes where the 12″ tom bracket and fittings had previously been, might not take the stain, so I drilled back a little into the holes and surface filled these with Famowood.


I did a crazy amount of research into staining and had a great tip from from Gareth Healy at Highwood Drums about a company called ‘Stewmac’, who supply stains and all manner of customisation and project parts for the guitar industry. Their website is quite incredible with its breadth and depth of information. I would highly recommend you give it a look if you’re interested in this kind of task.
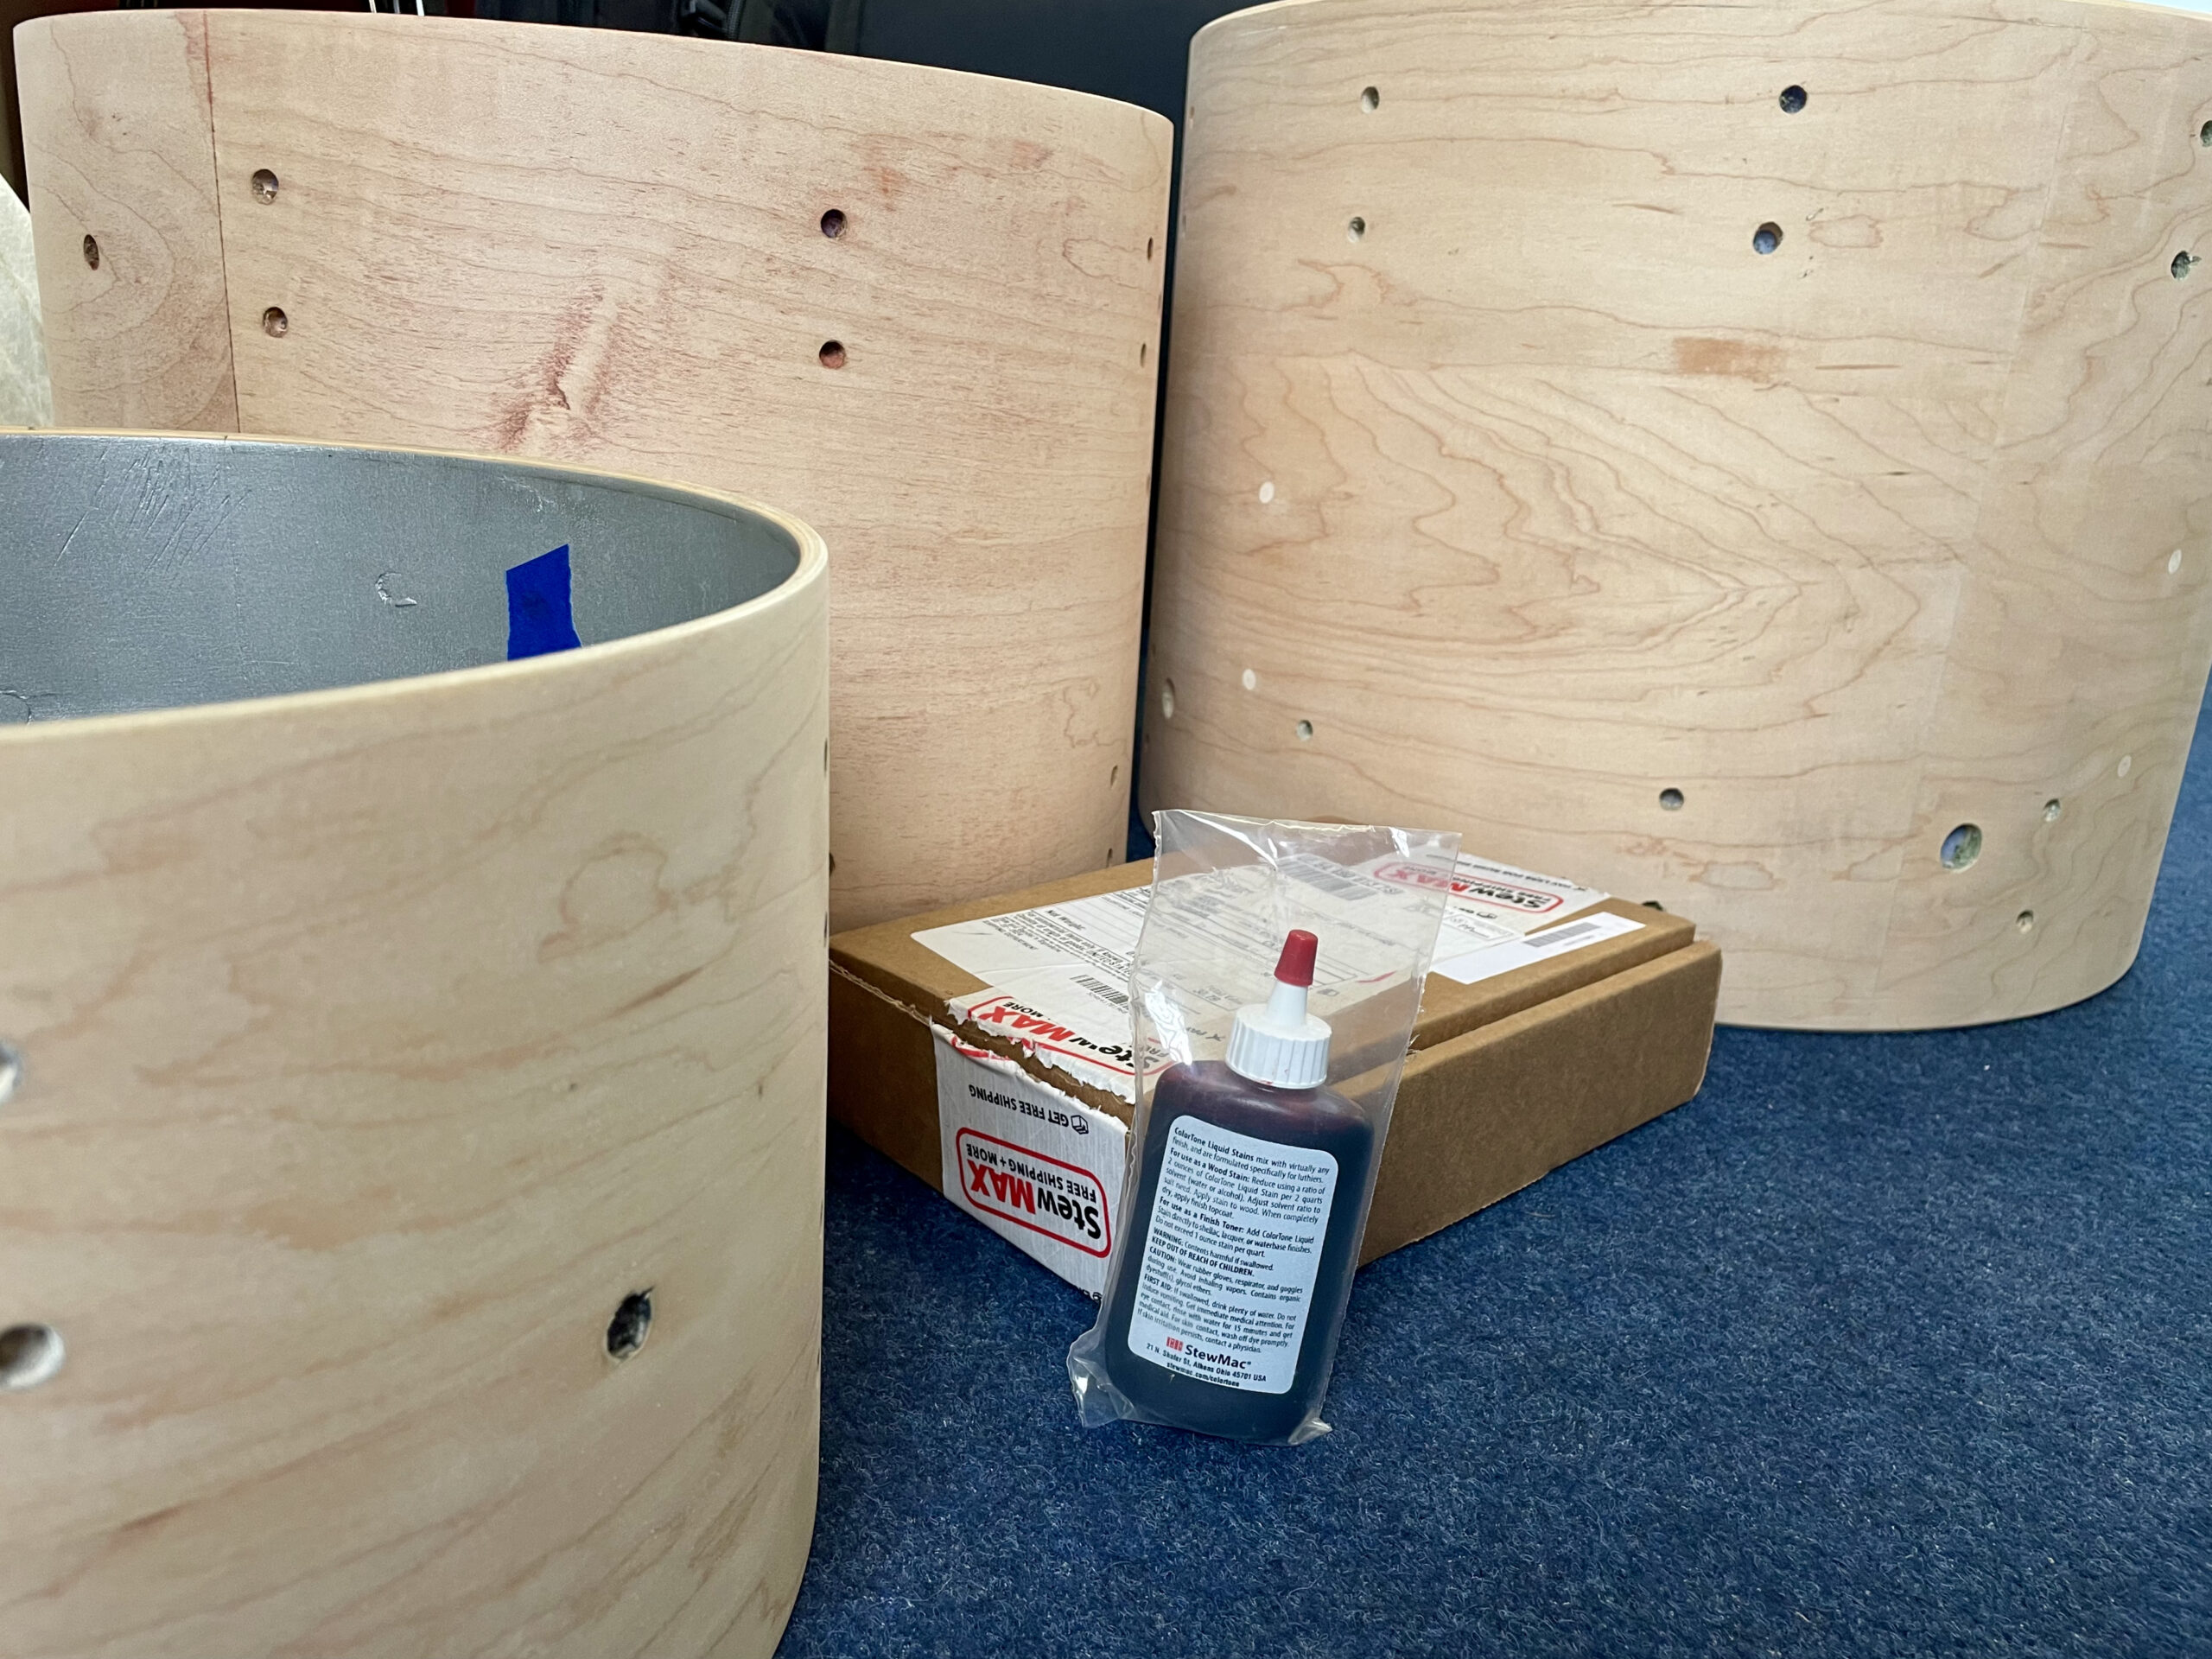
The Stewmac ColourTone Liquid Orange looked to be exactly what I was after and I decided to use their website’s ‘double dying’ technique. This is where an initial, heavier coat of stain is applied and then sanded back – almost completely – leaving it only in the most porous areas; then a second, lighter/more dilute stain is applied. This technique is said to add depth to the end colour effect.
I had read about various methods of applying stain and my initial question was “why wouldn’t you just use a brush?” It seemed like the most obvious tool for the job, but as I got into it, wiping with a cloth began to make sense: We don’t want to create any kind of ordered, lined movement within the staining process. What I found myself doing was way more randomly, following the grain patterns in the wood with a lint-free cloth loaded with stain. I felt it to be more of an intuitively artistic and creative process, rather than an exercise in neatness.
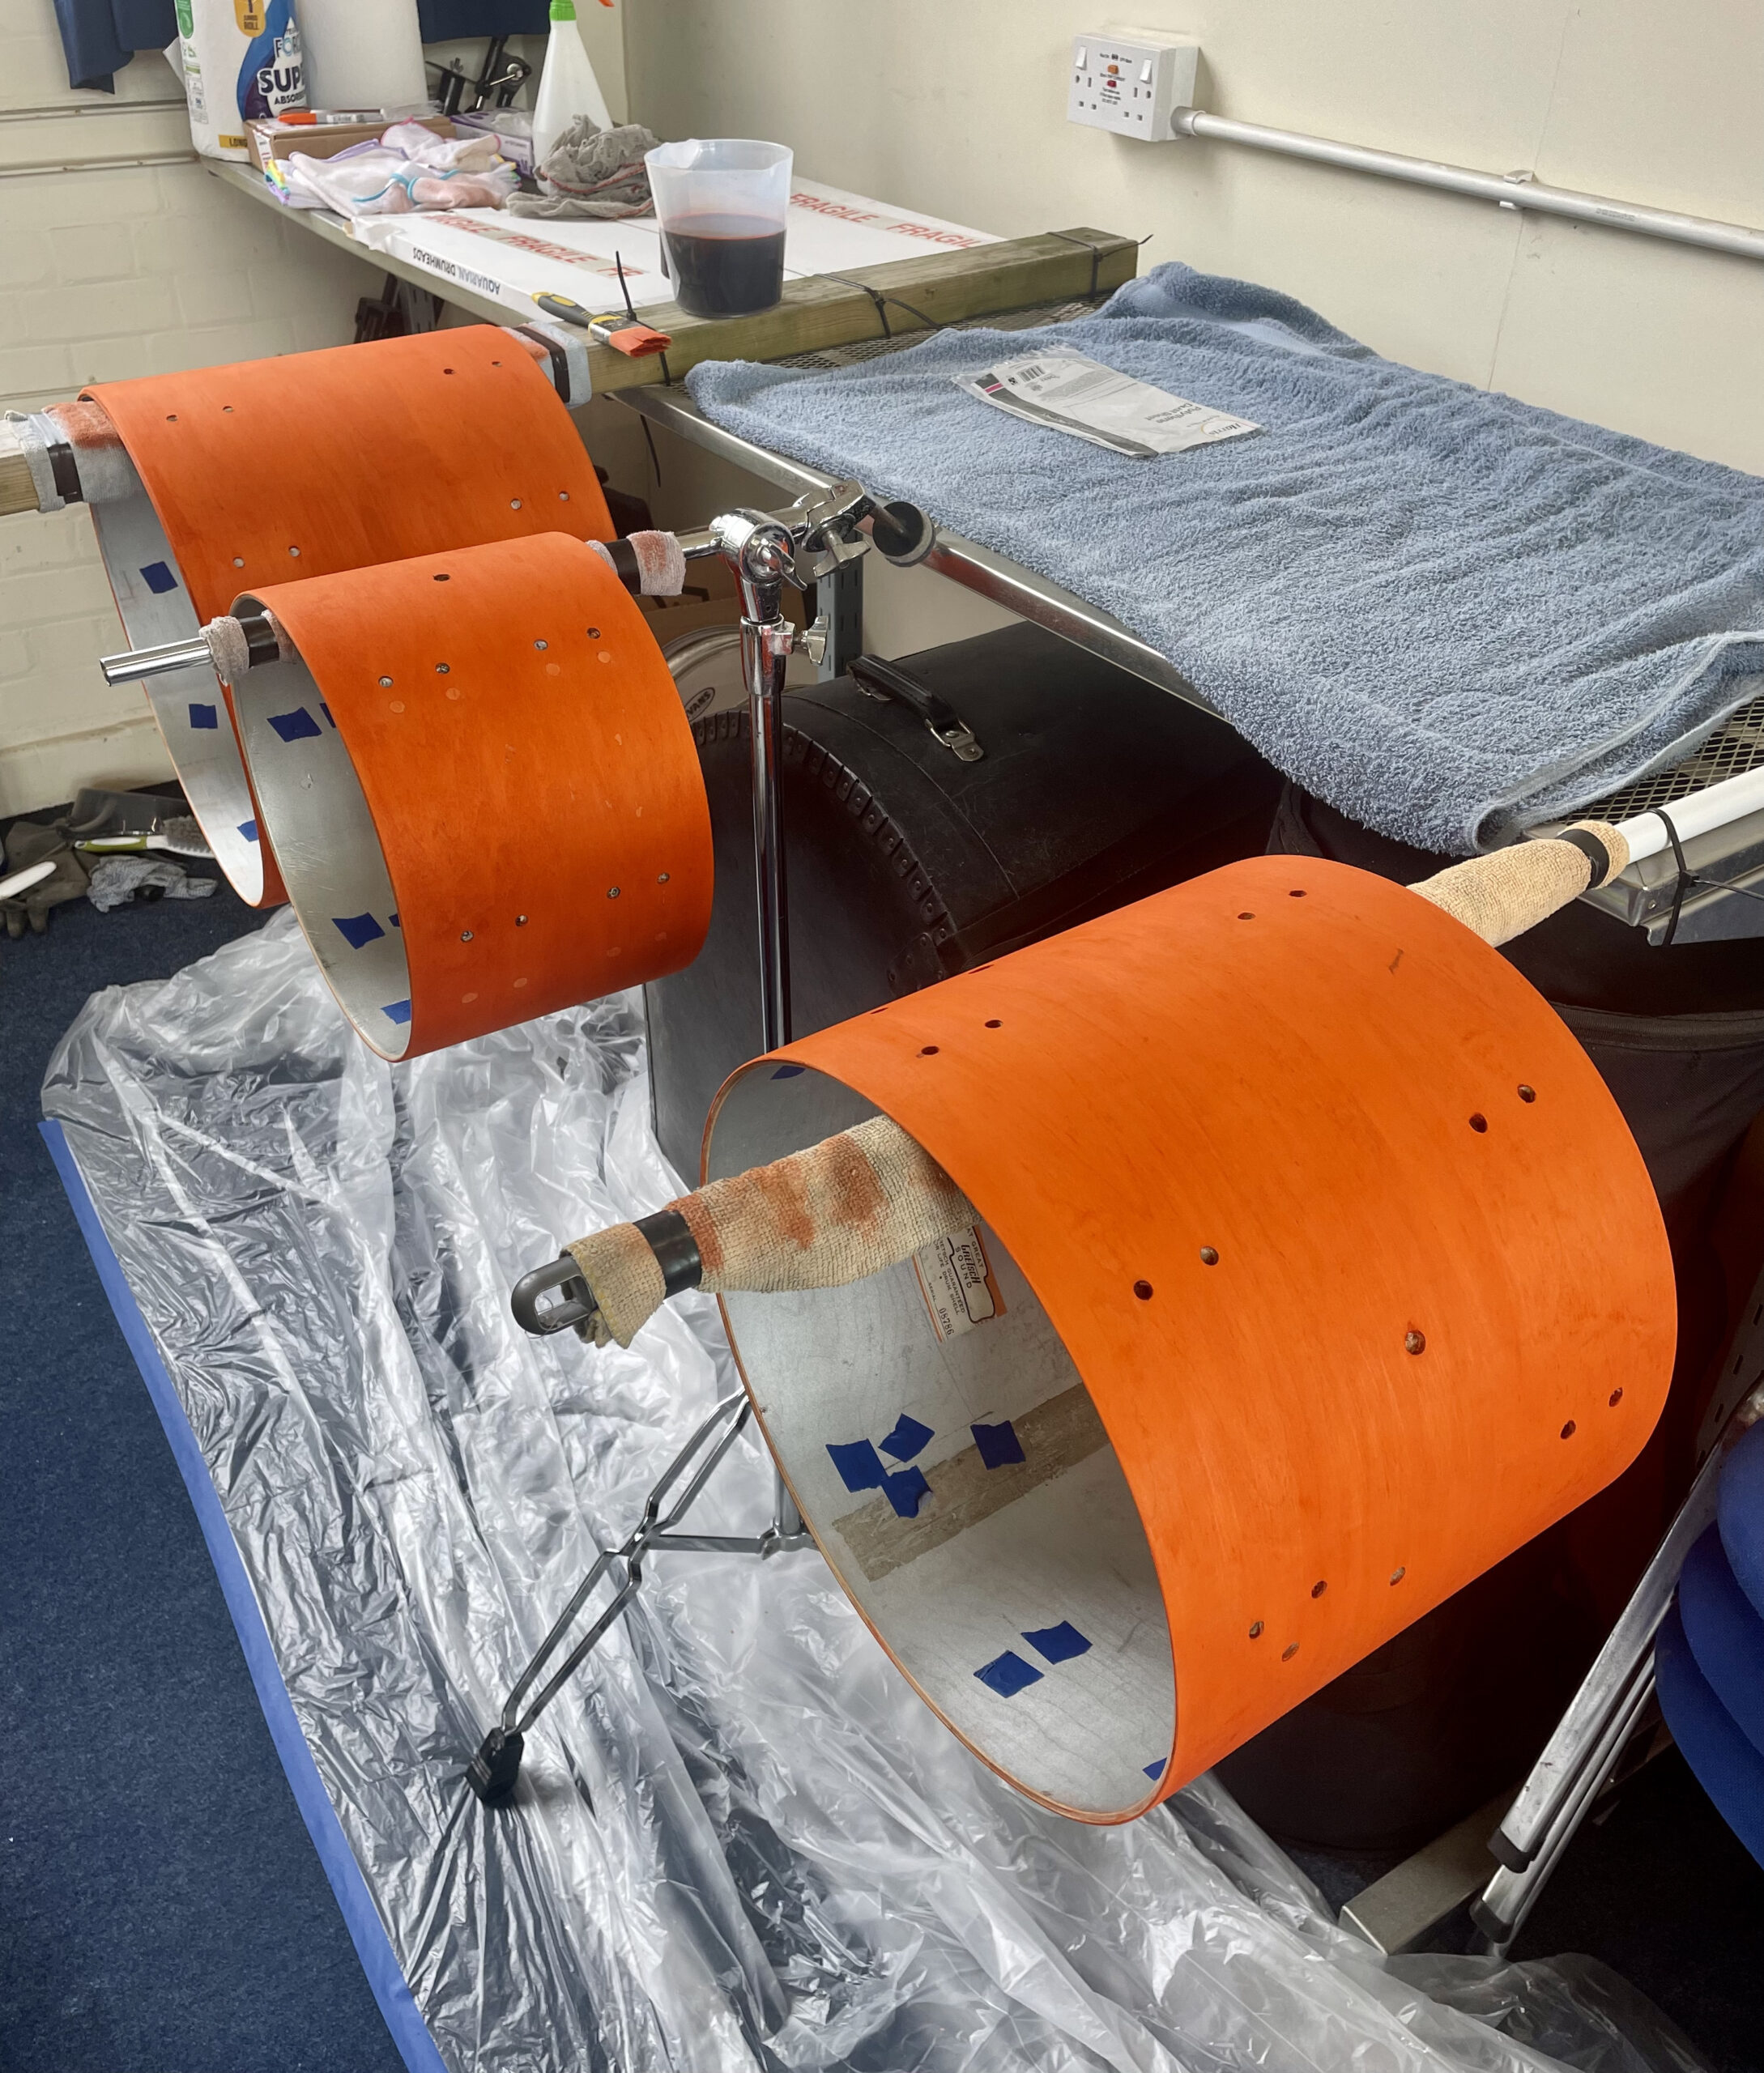
The drums were looking very orange! I was worried. But of course, we have to sand back this first coating of stain, which is not a heavy task.

In the end, I actually increased the double dying technique to triple dying. This proved to be a useful, precautionary method, as I could ‘live’ with the colour and get some outside feedback as I went along. I kept going back to my source inspiration pictures for reference and through the gradual process of staining and then sanding back, I discovered my happy blend of orange stain and wood texture. This method really did add to the depth of colour.
Once the drums had dried, it was time to look at top coat finishes and I had found a great YouTube video using wipe on polyurethane for drums. This stuff can be quite expensive, but I discovered that you can also make your own! Once again, there are many ways to go about applying it, but this time, you do want a uniform finish. I opted for wiping it on with a lint free cloth. There are many different methods out there for this, so I did plenty of research. Initially, I opted to try lots of thin coats, as this felt to be safest, but in lightly sanding back each coat, there wasn’t much varnish left on the shell, so I moved to a heavier mix. I did five coats of home made, wipe on polyurethane satin varnish, with a more dilute mix for the final two; very fine grit sanding and a wipe down with white spirit between each coat to take out any dust nubs.

One thing I should perhaps mention here, is my thought process between research and each stage of decision making. Simply put, I didn’t want to mess it up! In looking at the various ways different people were going about these tasks, I always had in mind “What could go wrong for me?” and “Which of these methods is the most fool proof; which are reversible – and how?”
Here, I discovered the difference between ‘drying’ and ‘curing’: this latter element is important, as curing is the chemical process which binds the coats of varnish together – which can take days or even weeks (I had to Email to ask Ronseal what their varnish curing time was. It didn’t say it on the tin!). While the varnish did its thing, I got onto preparing the hardware.
Some of the lugs had very tight mounting bolt threads and one had a broken spigot, so I checked some specialist social media groups and Ebay. Watch out folks – it’s an ever more cunning minefield! I had a very plausible scammer trying to ‘sell’ a set of Gretsch lugs via a dedicated specialist page and on Ebay, a seller using photo’s of proper Gretsch USA vintage parts to sell the Japanese Hoshino copies! There are as many robbers and naiive amateurs out there as there are dedicated and helpful experts. Please be very careful!
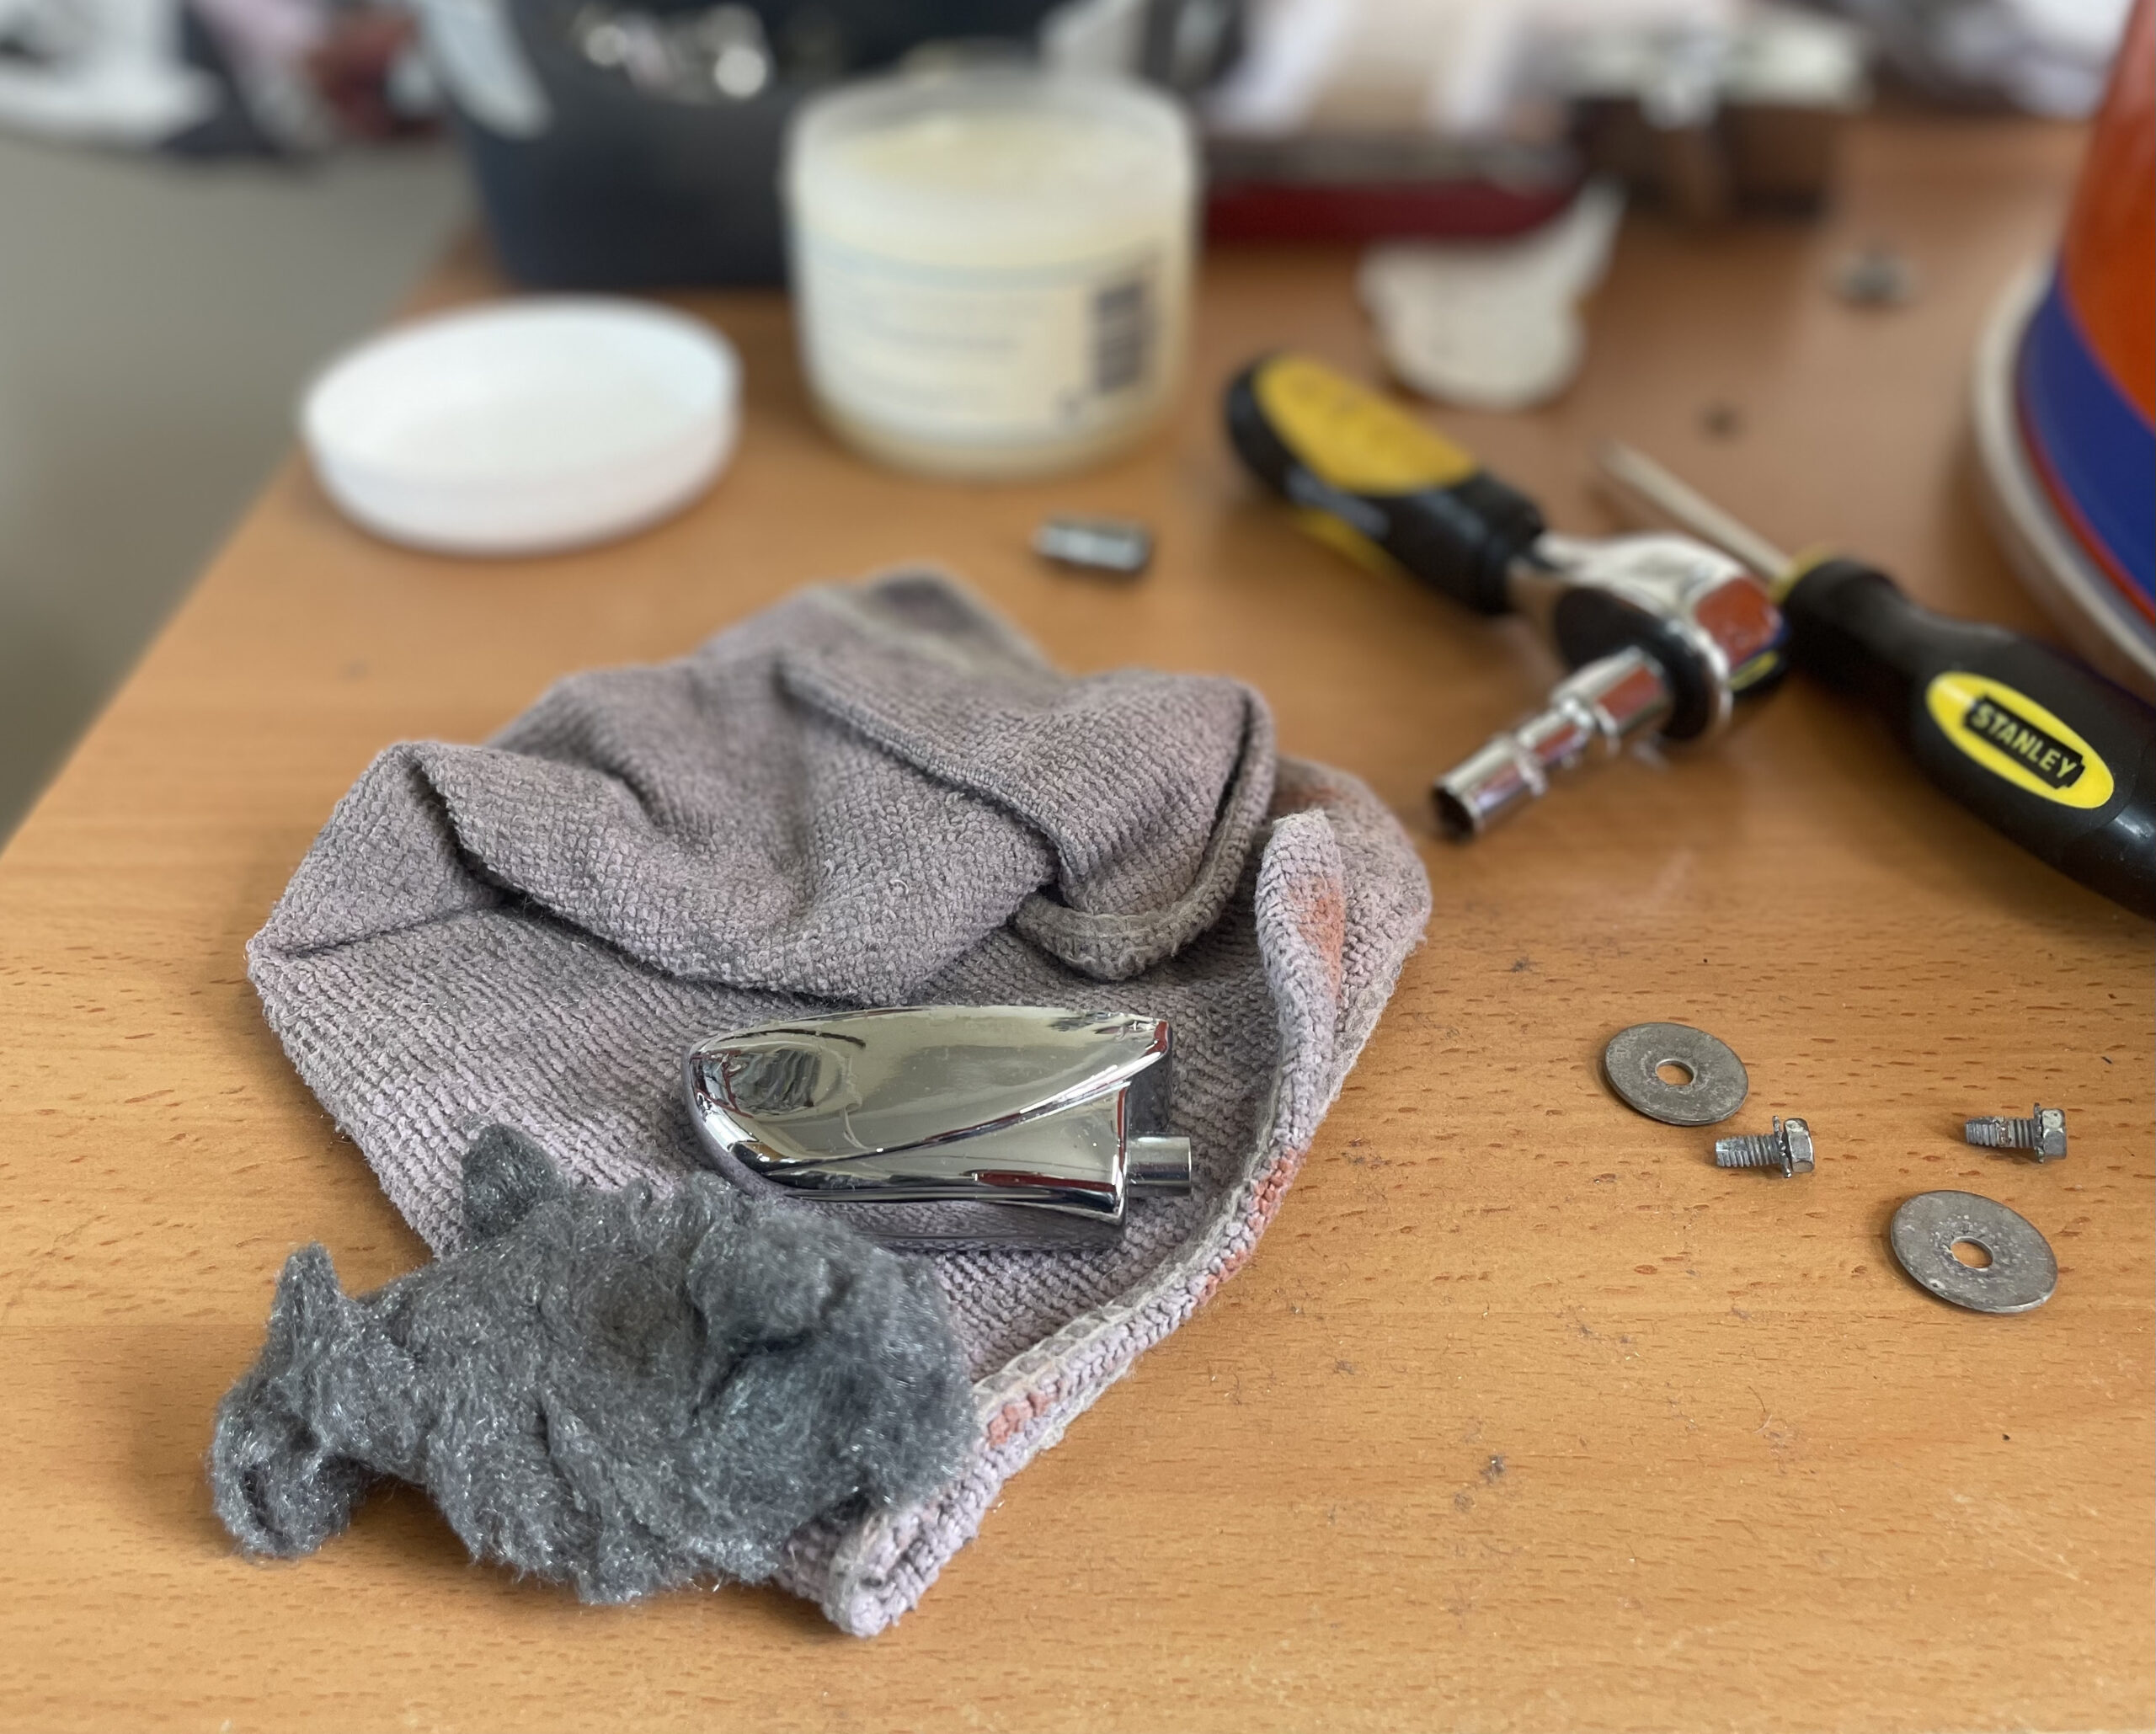
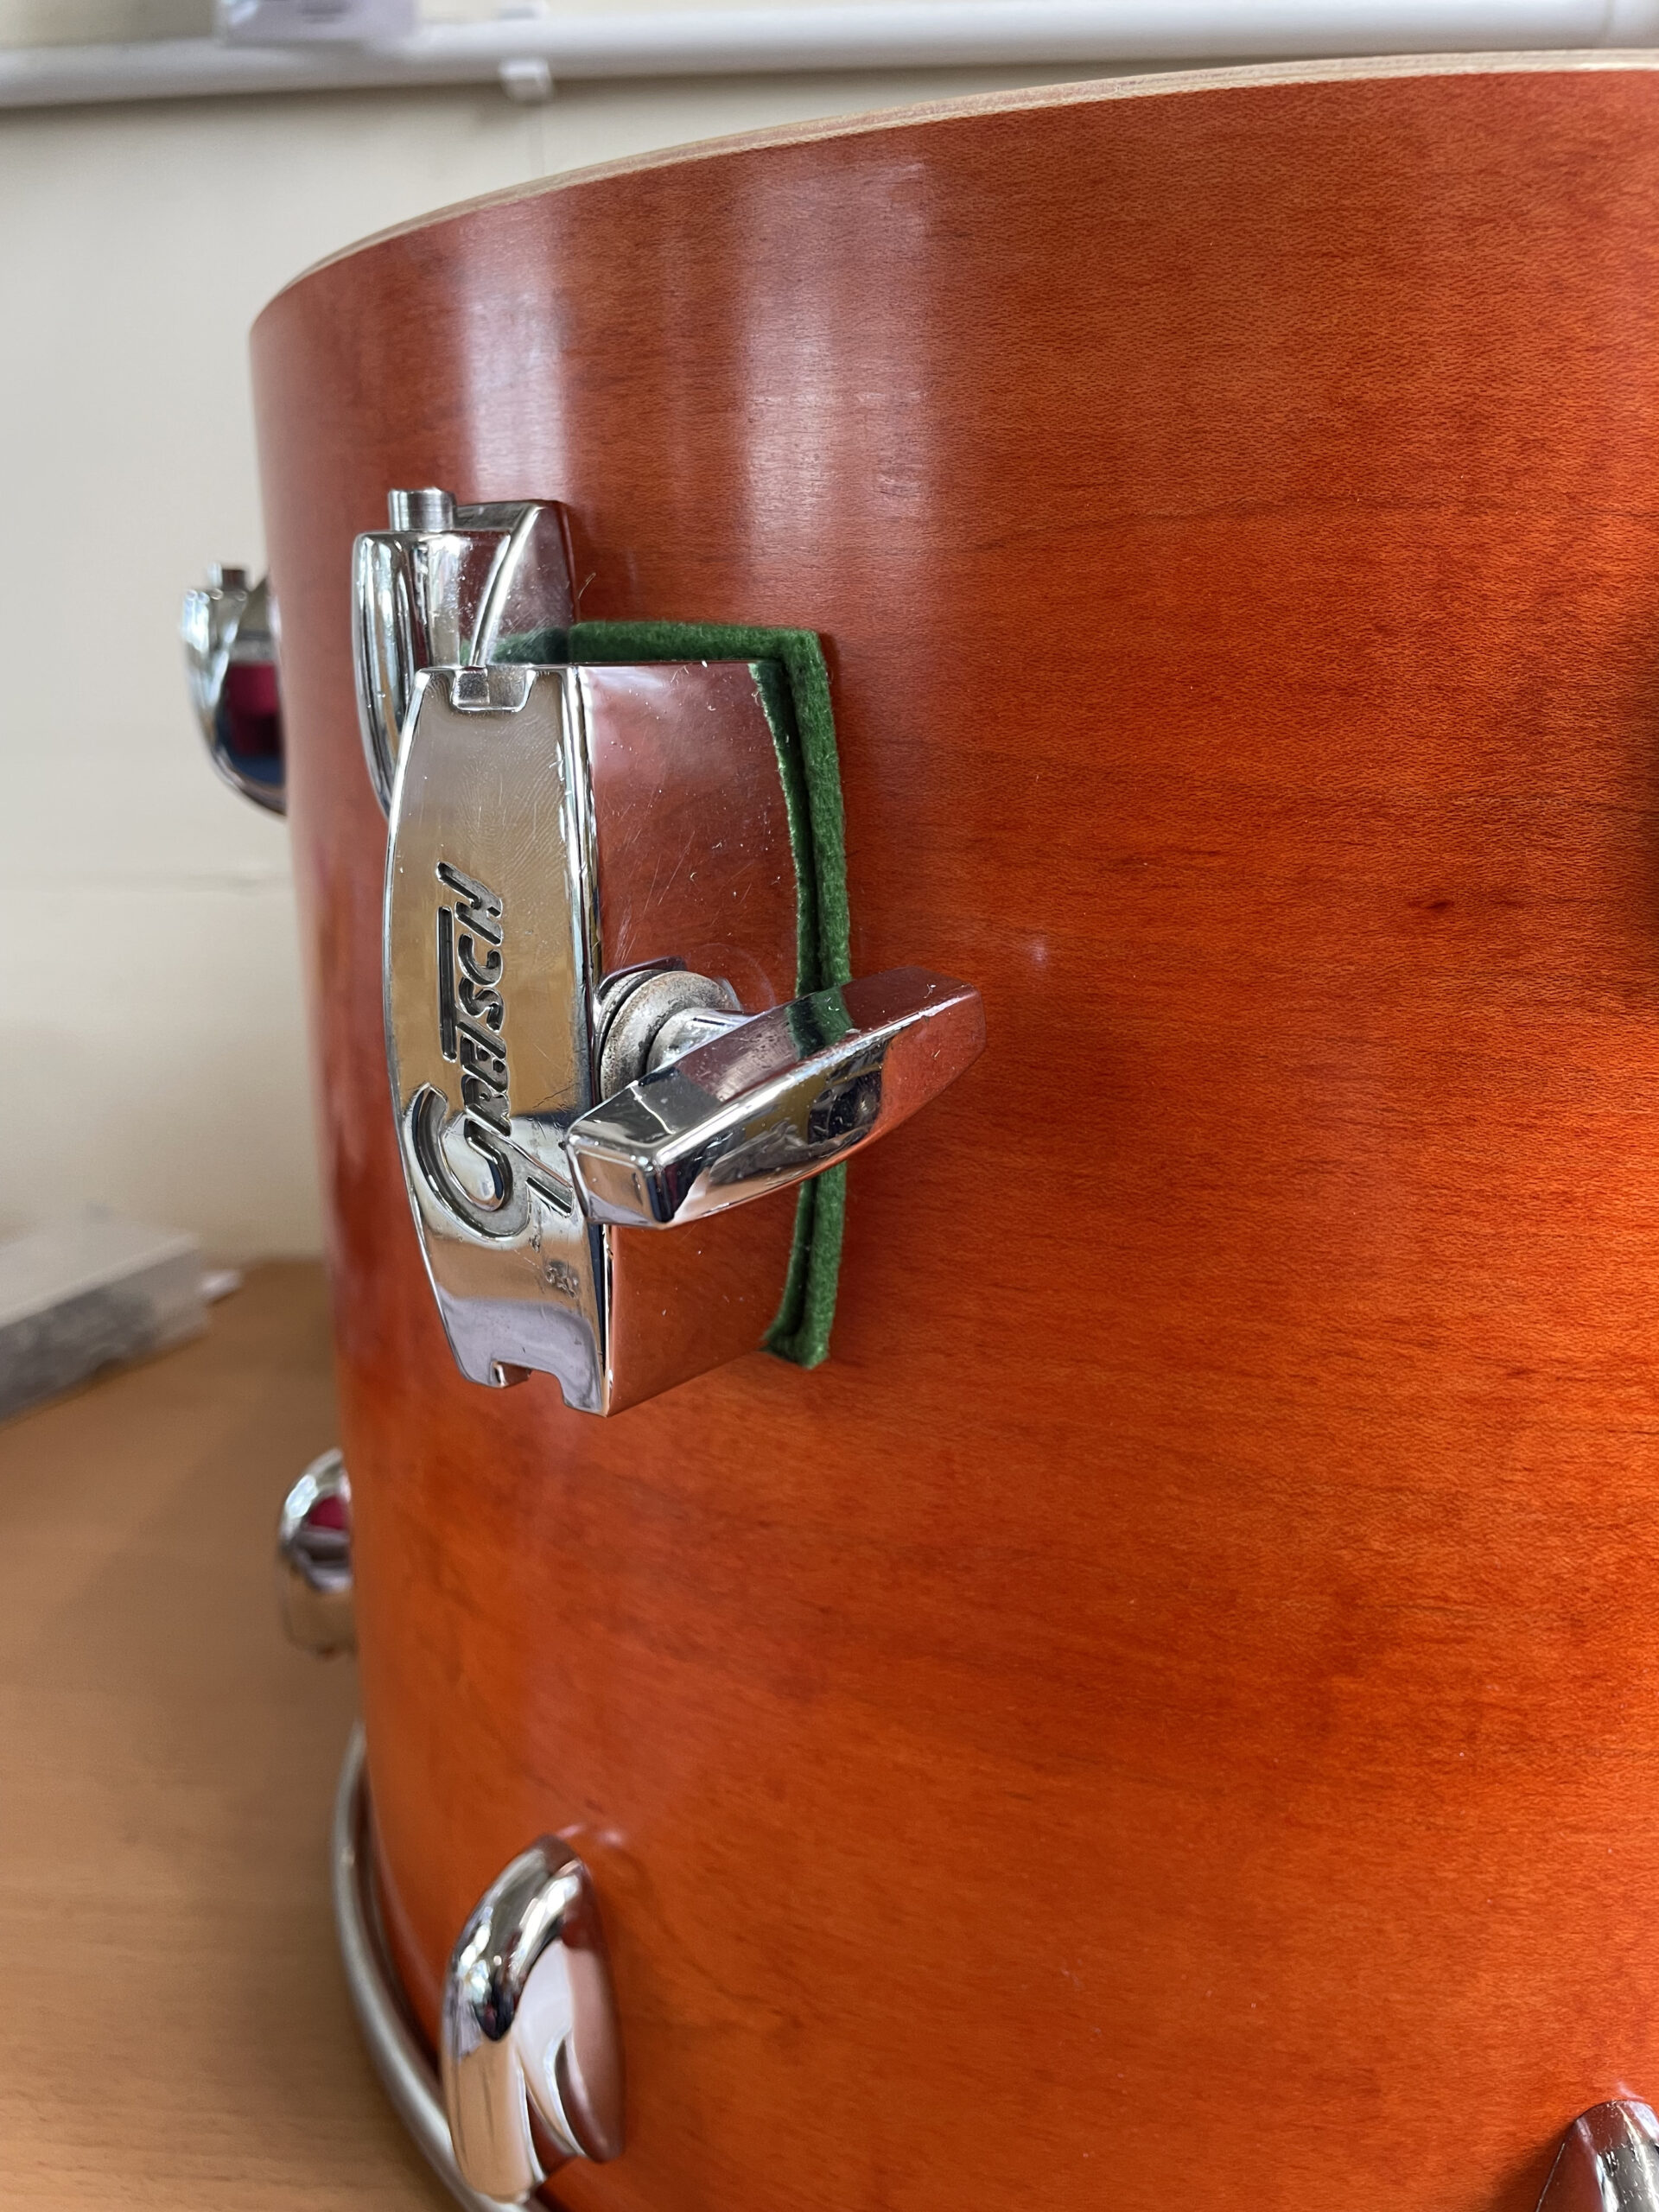
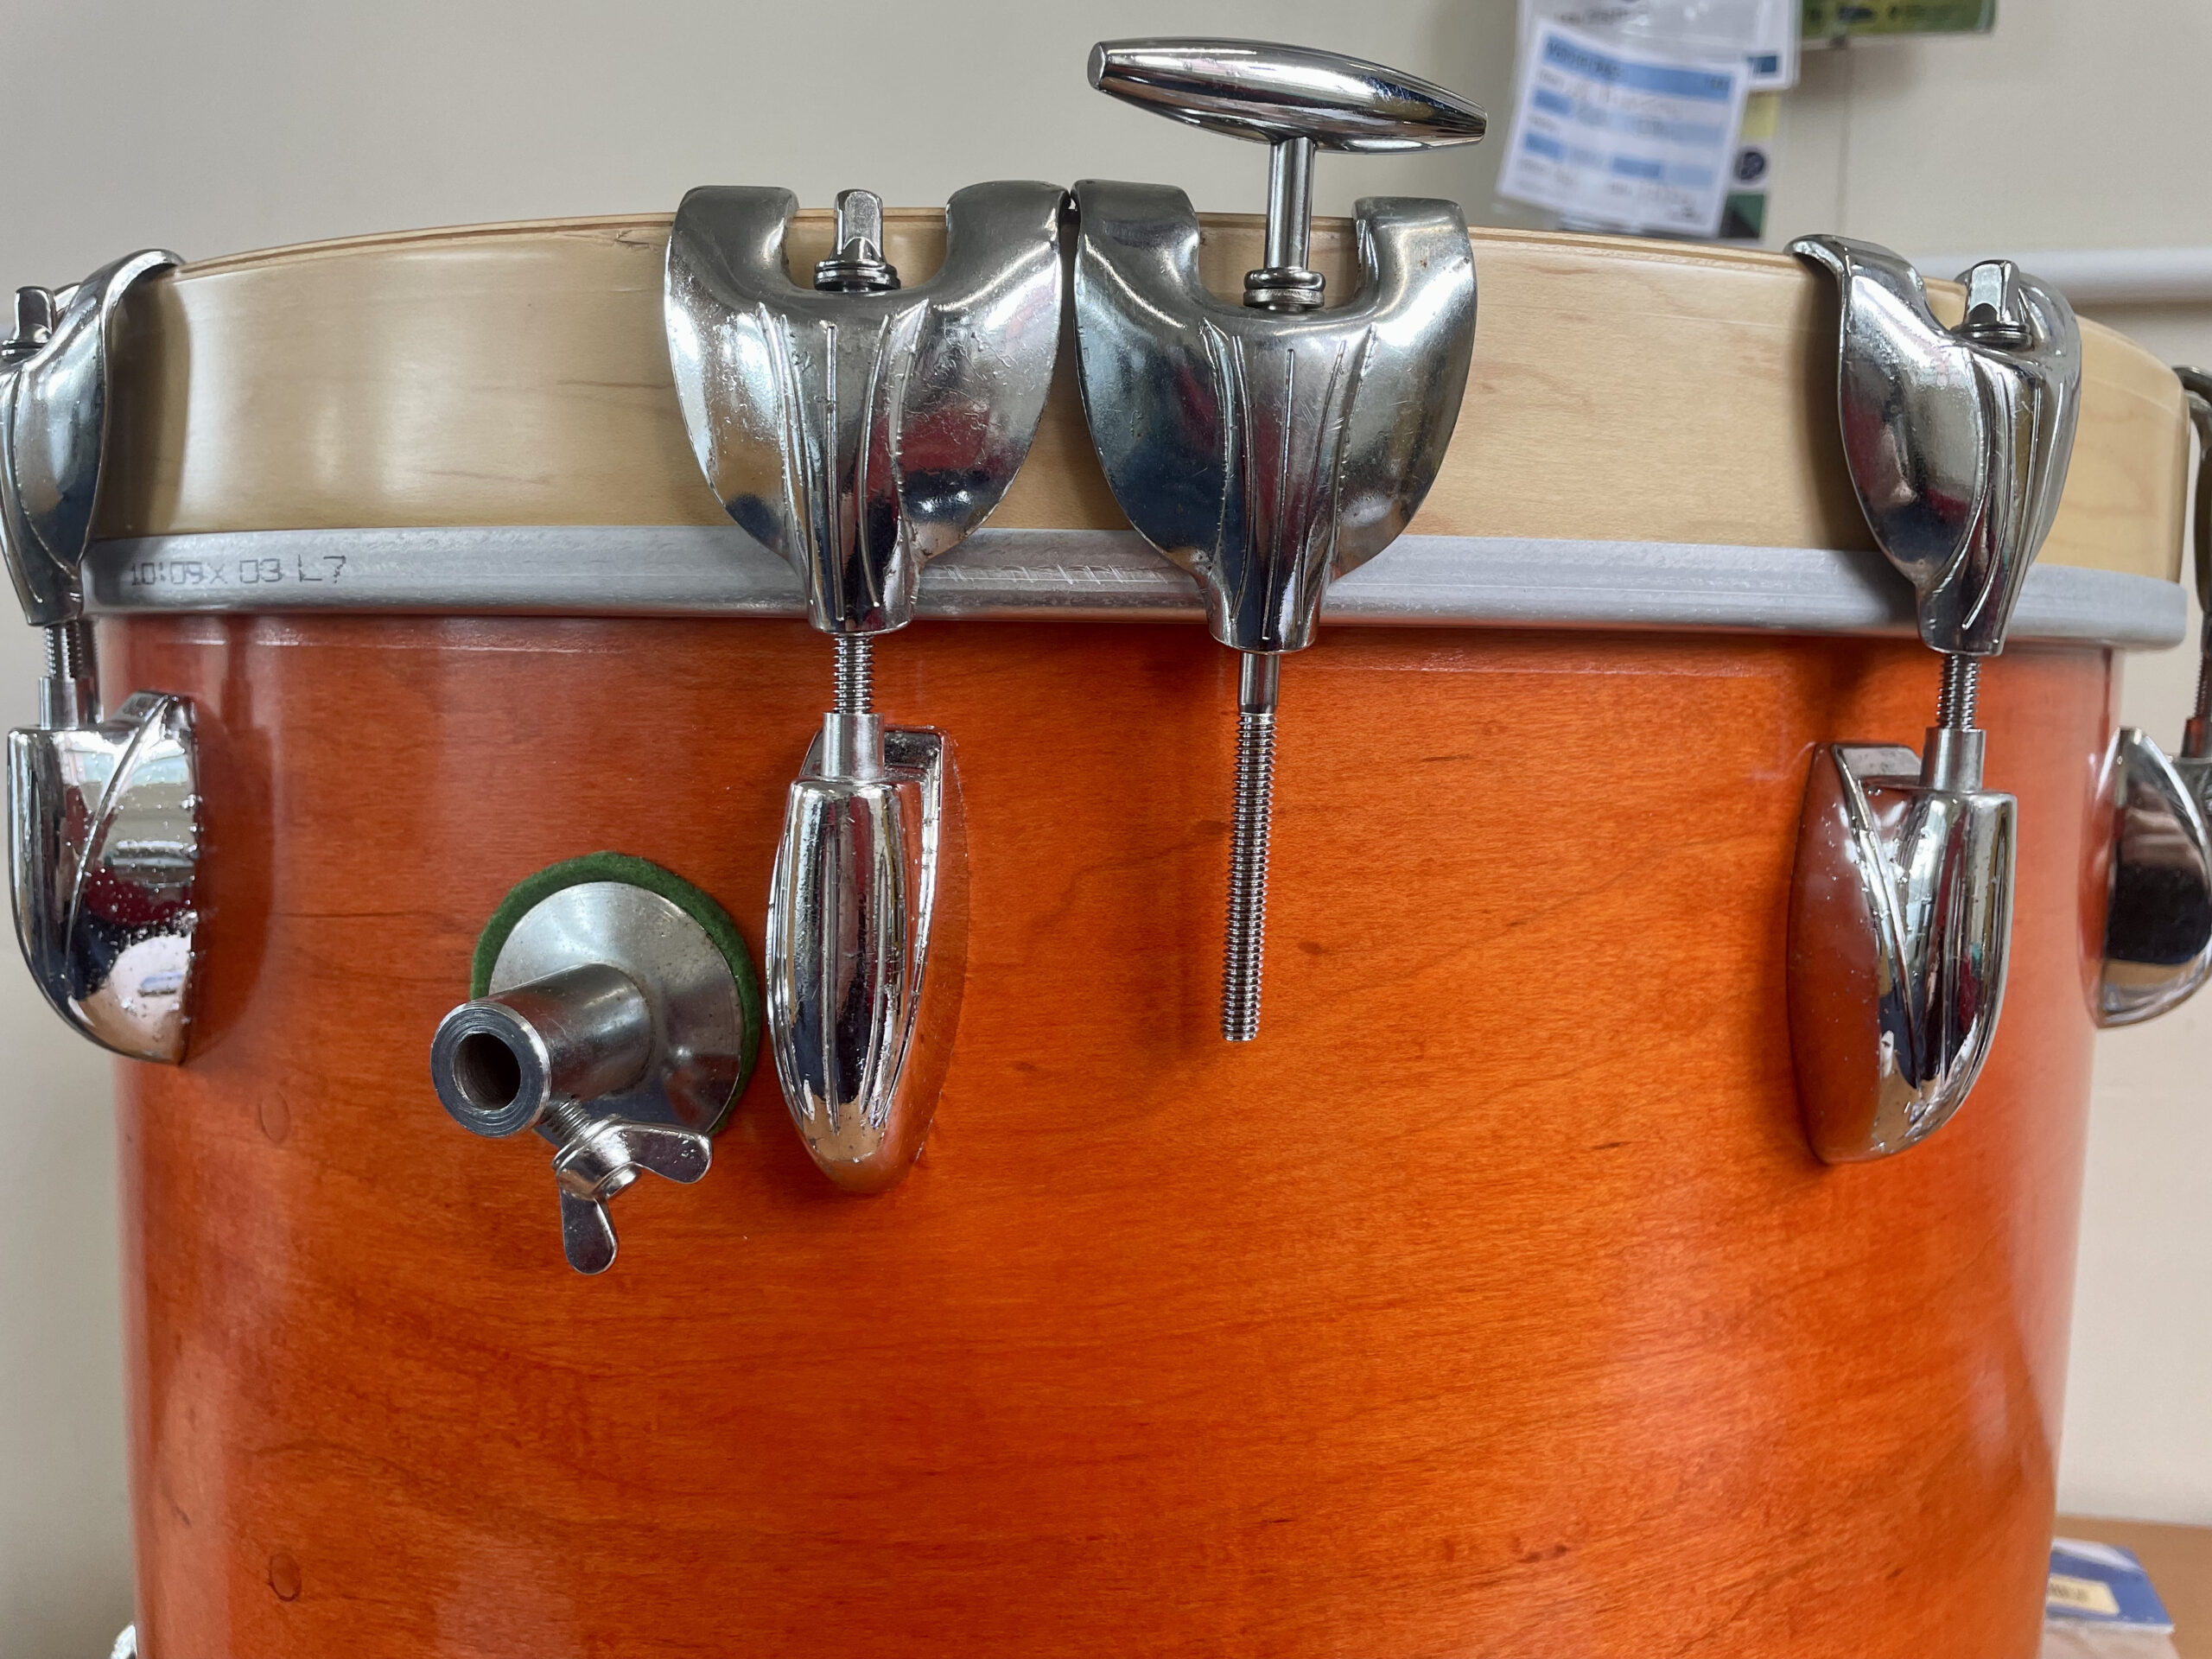
Packing the lugs: About half of the lugs I had were packed with heavy felt, which looked like it was probably original. I got to thinking about just how necessary this lug packing was, so I picked up an unpacked lug by the spigot and gave it a tap: it rang out like a glockenspiel! I suspect a lot of this could be from the spring? Either way, I found some foam and packed them all. Another great tip you’ll find online is ‘0000’ steel wool for cleaning hardware. Use it. It really works well. I used Liberon Paint & Varnish Grade 0000 Ultra Fine Steel Wool. In the UK, you can get it from Screwfix.
Another aesthetic detail to consider alongside the hardware was the gaskets for the tom mounts and brackets. The kit came with very thin black felts and these were now worn and misshapen with age. I decided to source some new and heavier felt in a colour to contrast and ‘set off’ the orange stain – and beautiful redheads look great in green!

Back to the drum shells and the pivotal discovery which led to this whole renovation project: Making the drumheads fit properly.
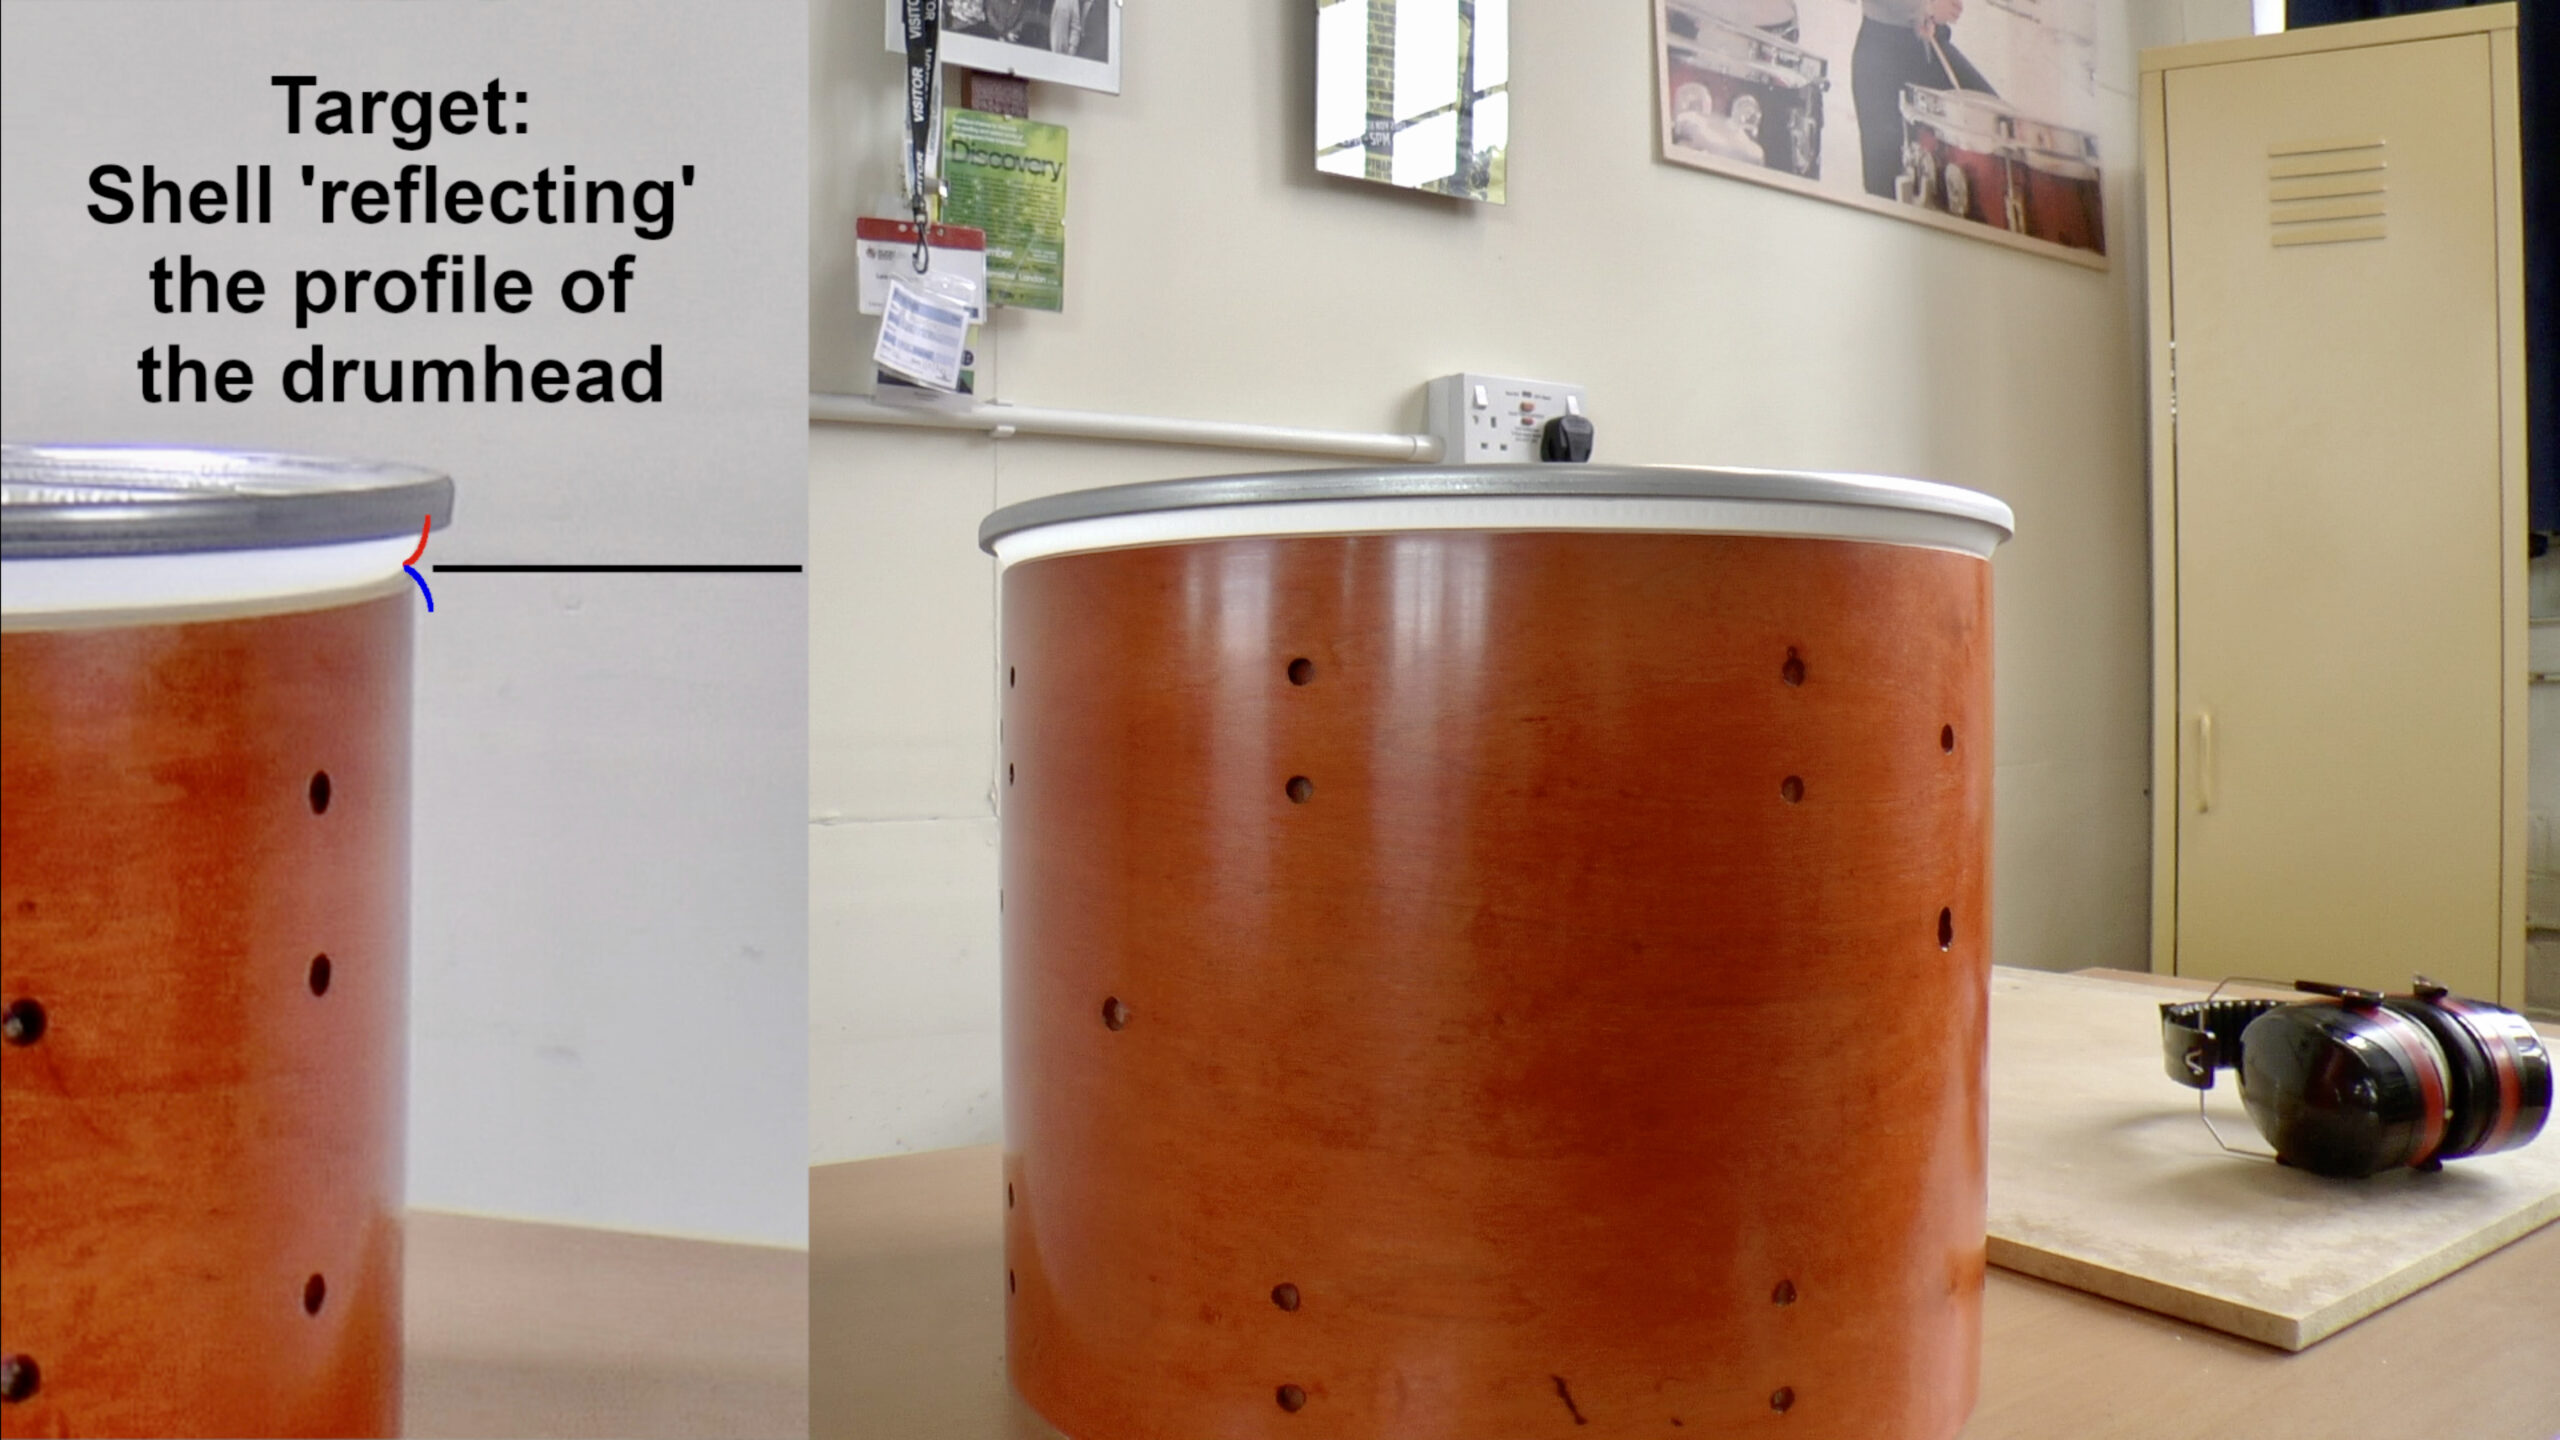
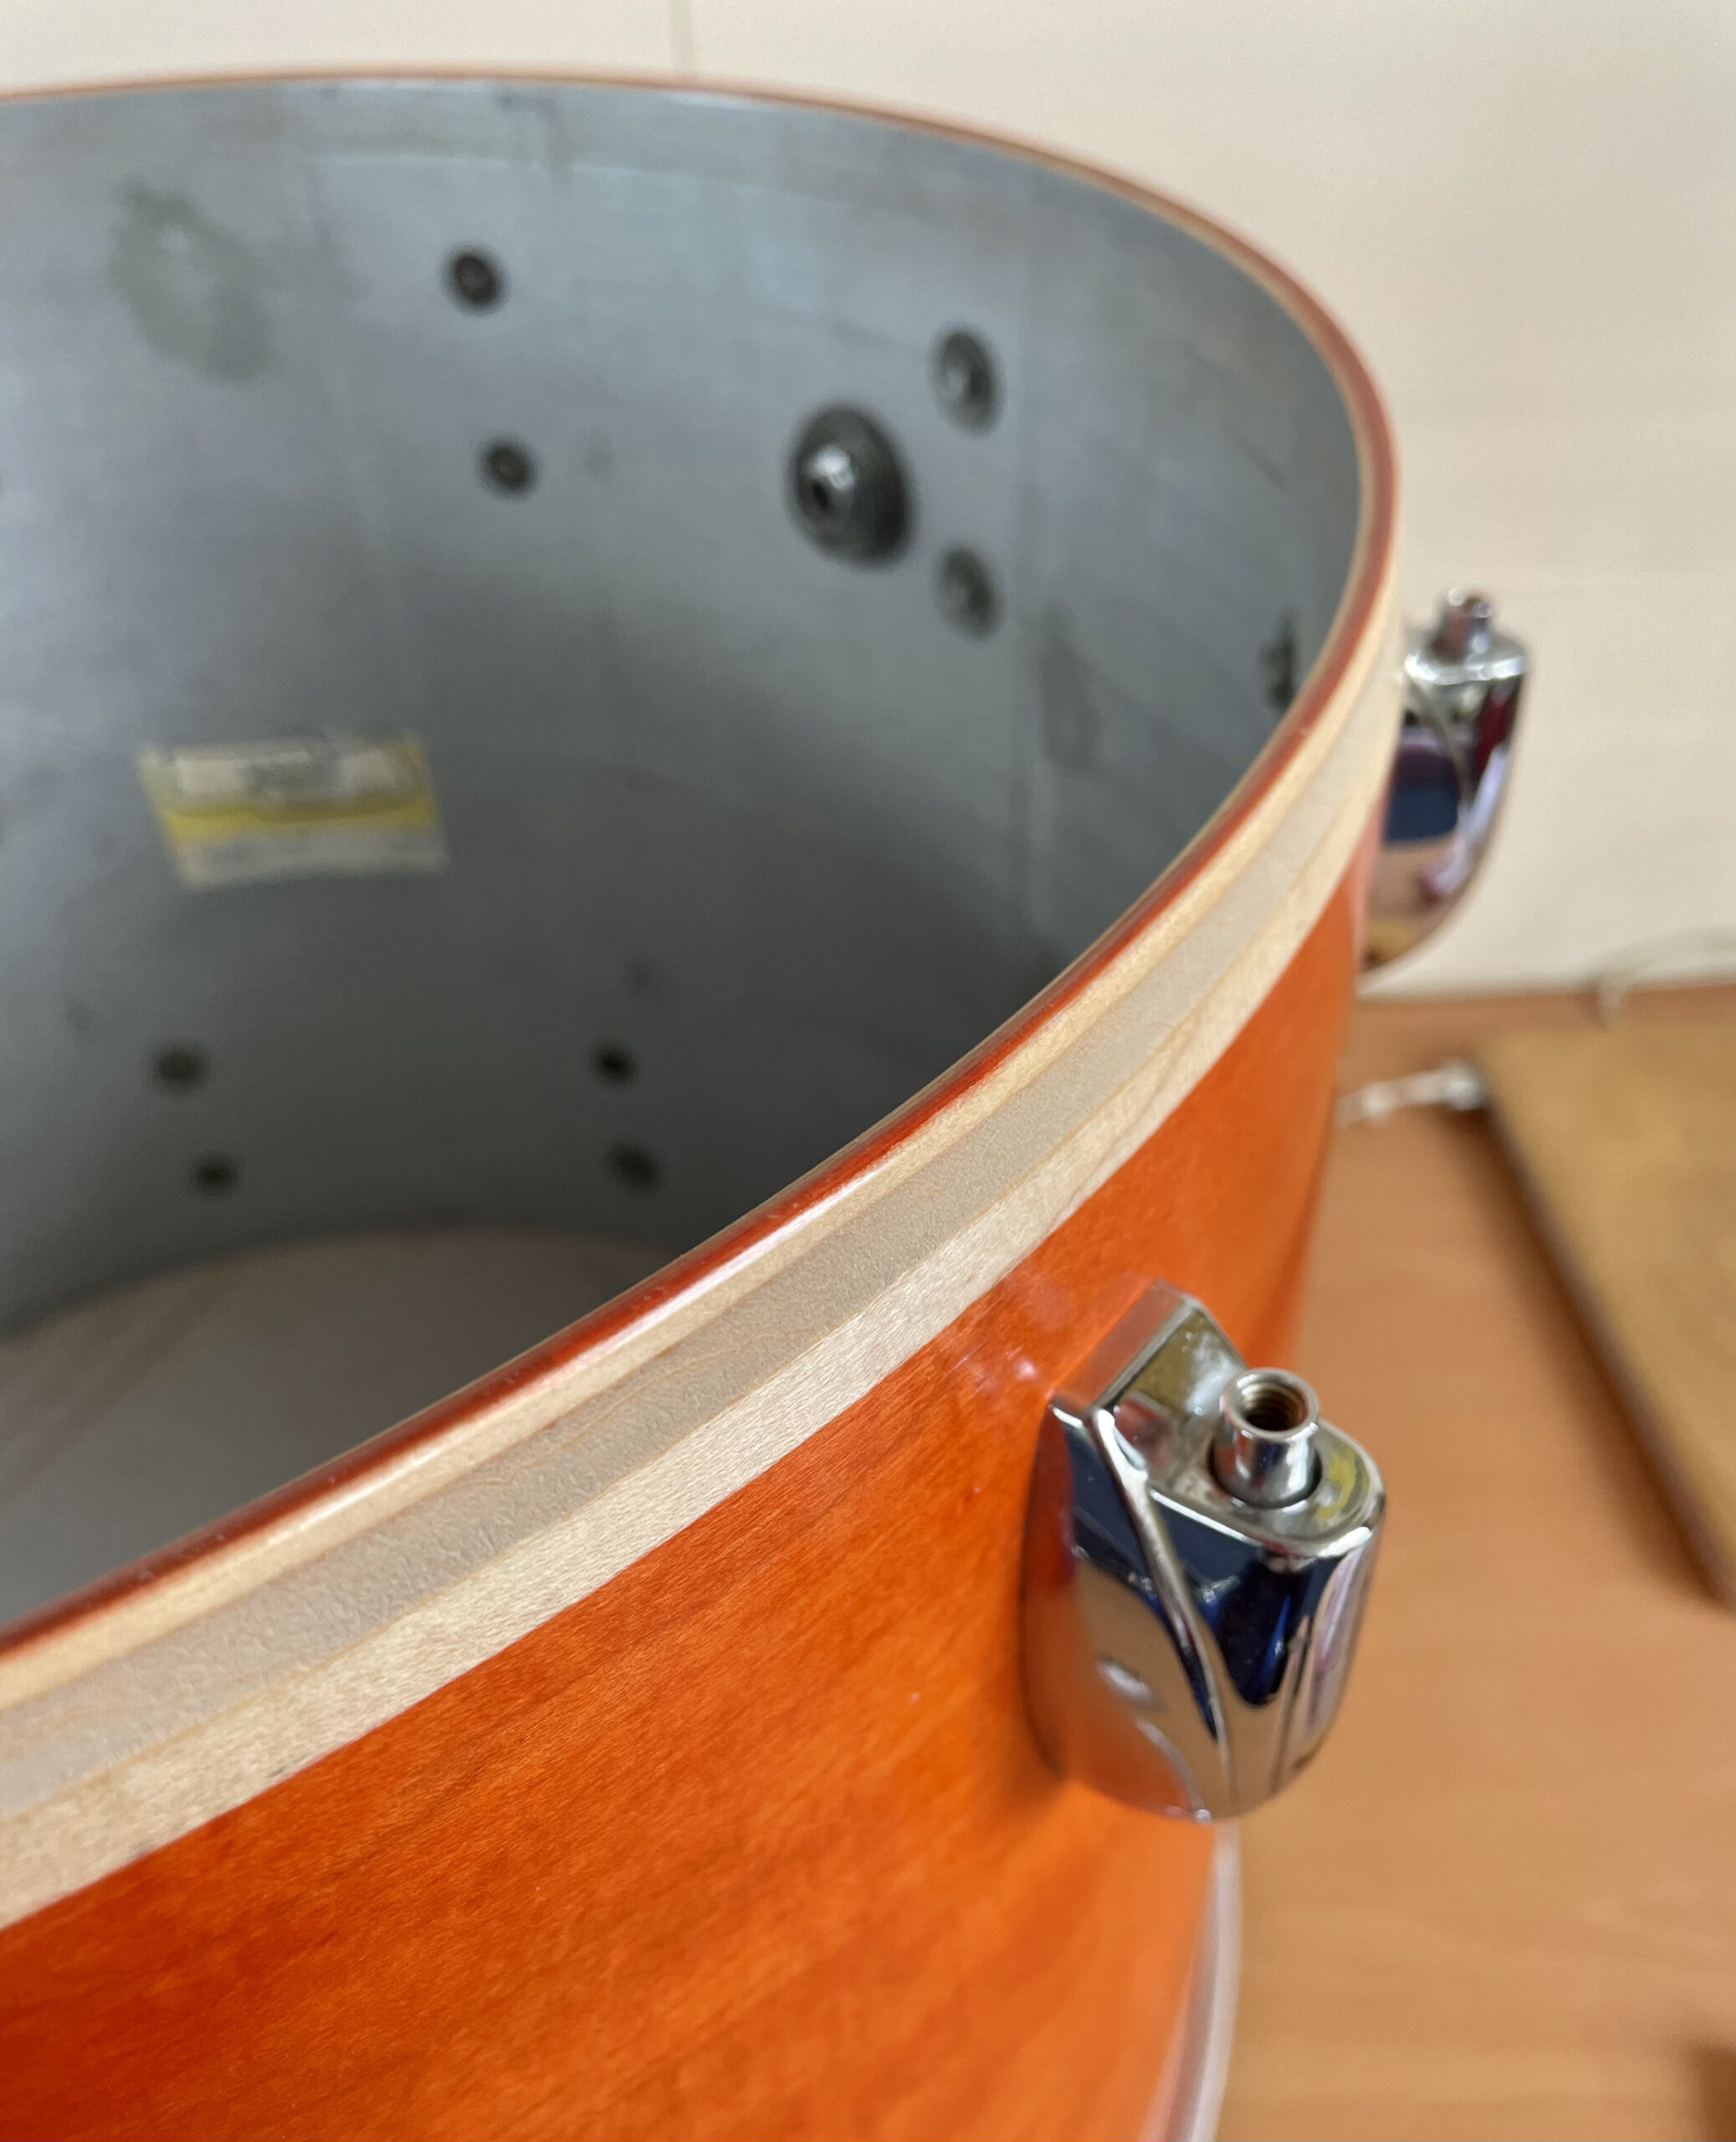
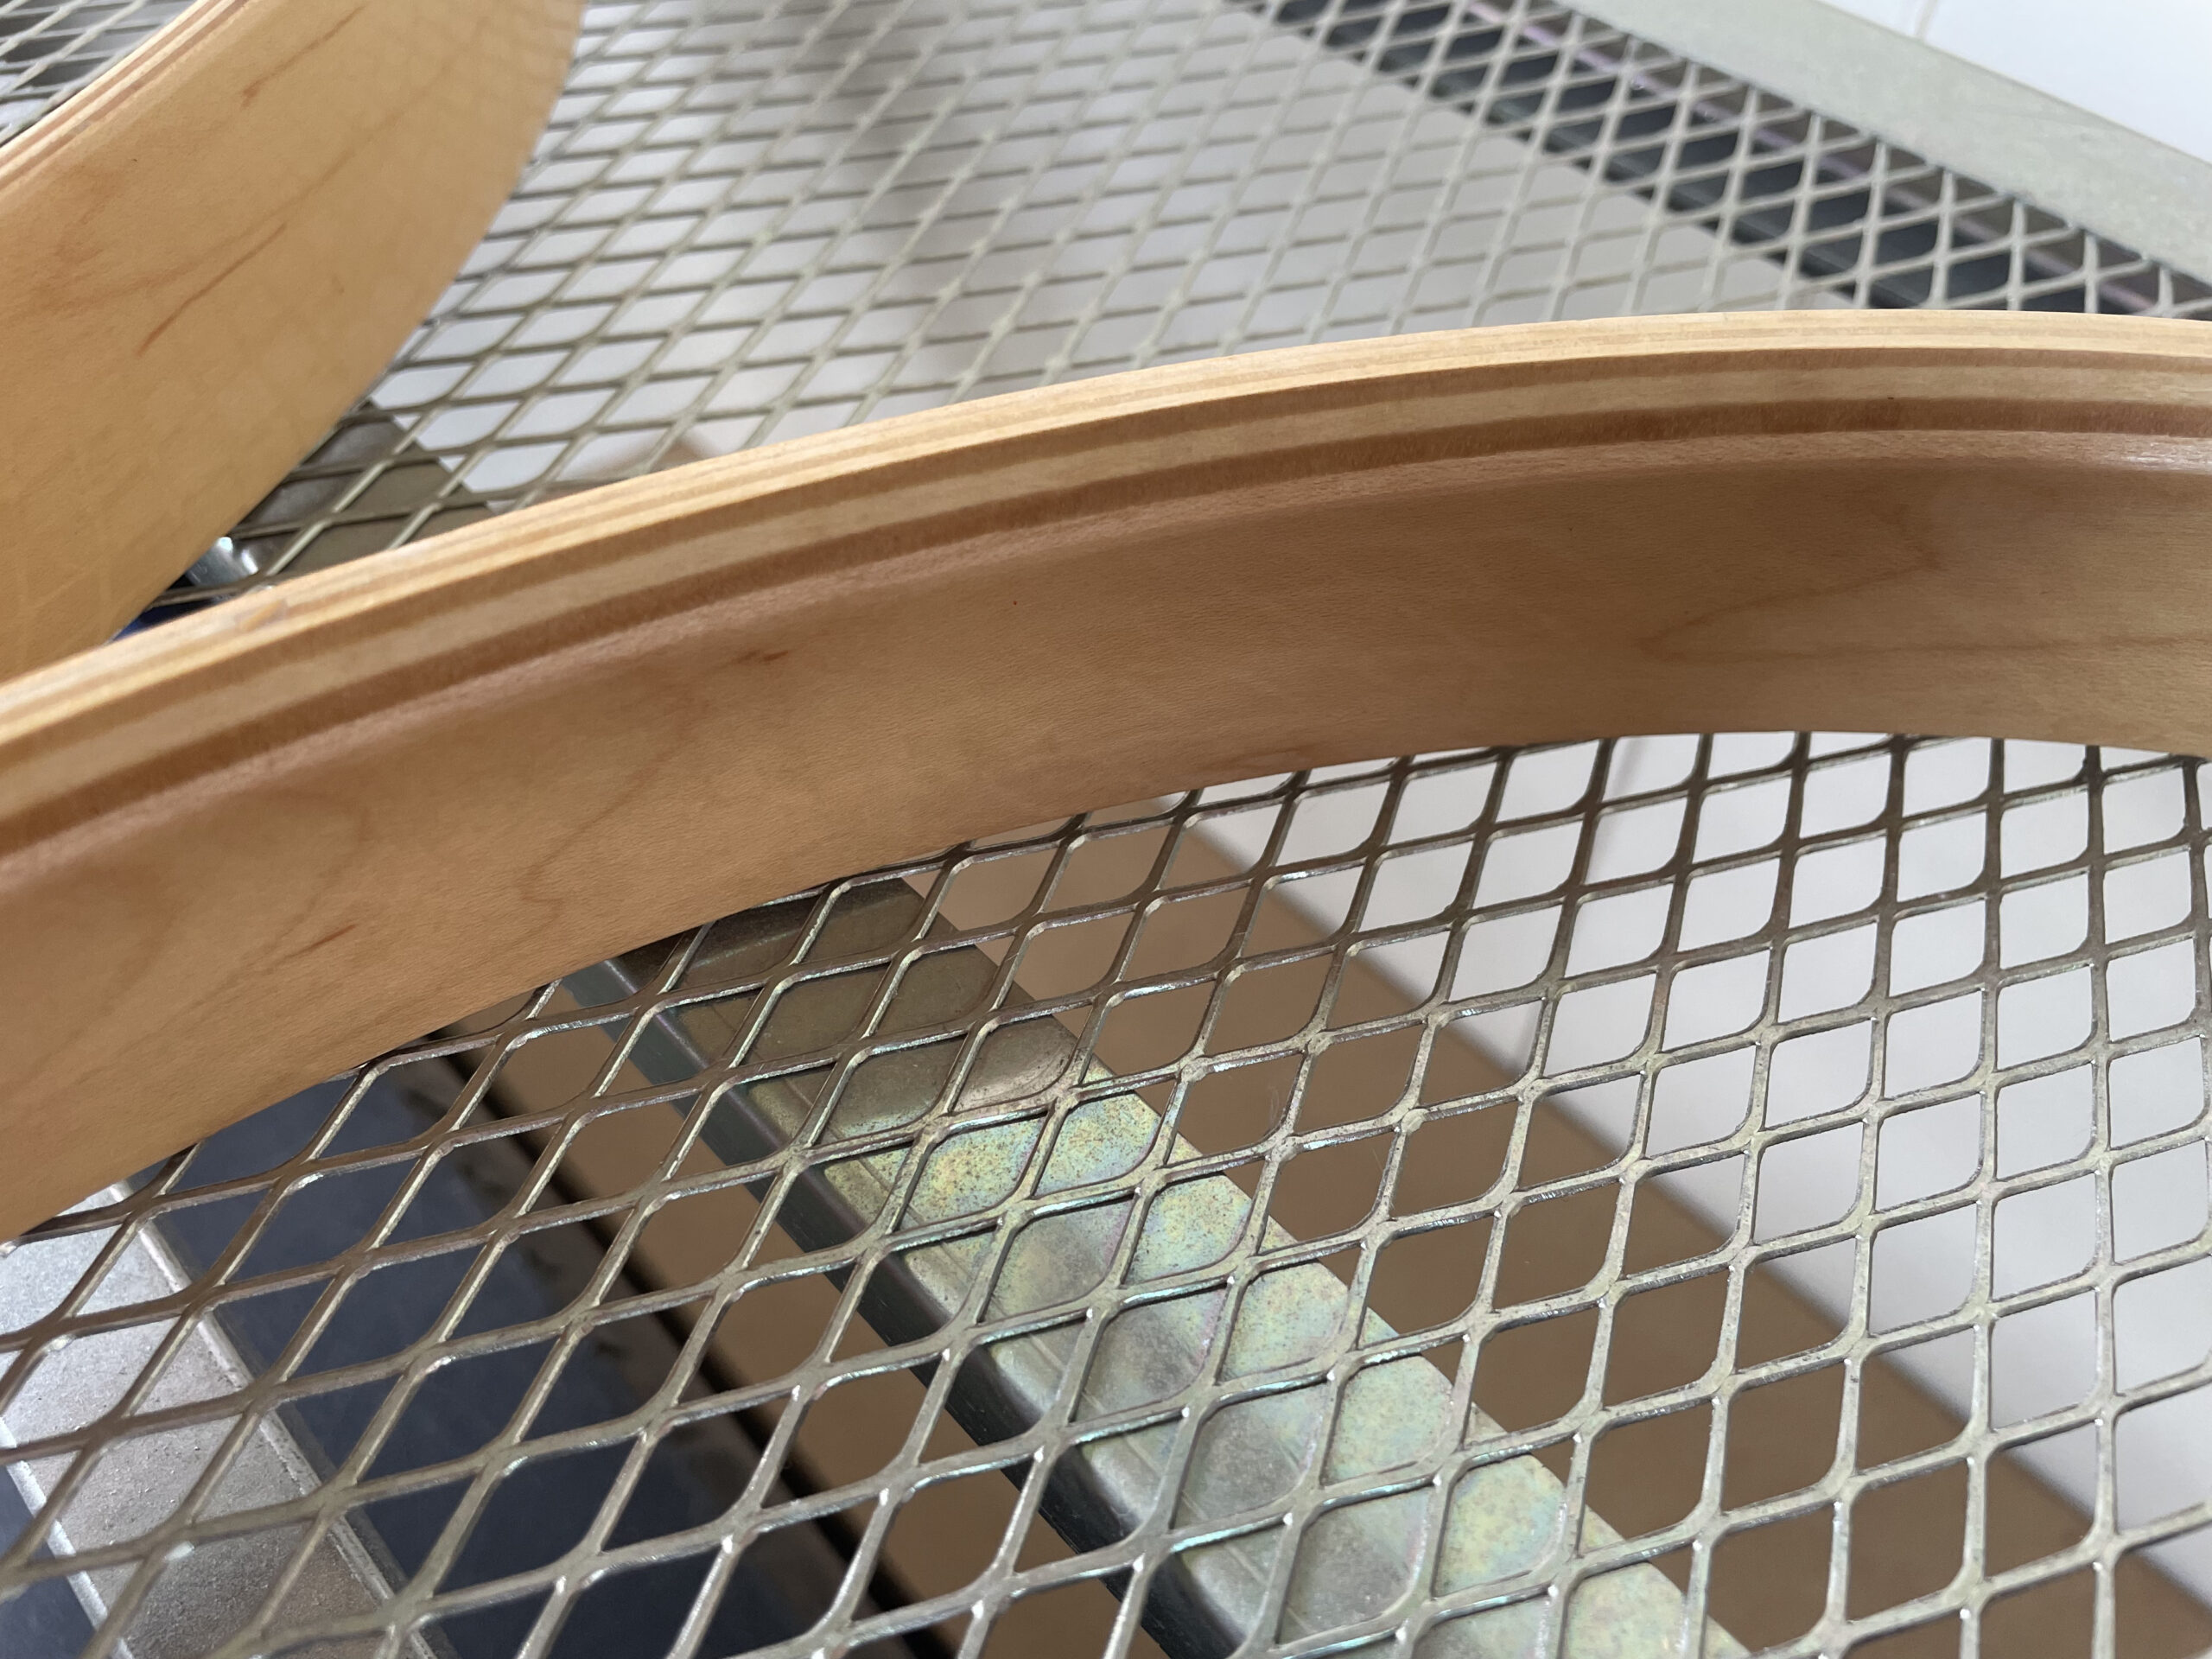
I had decided to take on the novel task of re-profiling the bearing edges and, to an extent, the outer edges of the drum shells. I had already undertaken a good deal of research on this subject and had weighed up the pros and cons of outside help, or DIY. My re-design aims were threefold:
1. ‘Minimal Loss’: Remove the least amount of wood and preserve a minimum 50% of the traditional Gretsch 30° inner edge. This bearing edge angle is, of course, commonly associated to the characteristic sound of these kits.
2. ‘ A R P ‘ = ‘Apex Re – Placement’: With a 45° angle, cut the outer bearing edge so that its ‘apex’ sits more within a modern drumhead’s natural curvature.
3. ‘ C C C ‘ or ‘ 3 C process ‘ = ‘Collar Clearance Cuts’: Create a long, tapered blend into the flat outer shell with enough clearance for the drumhead collar to sit unforced, so that it will tune properly.
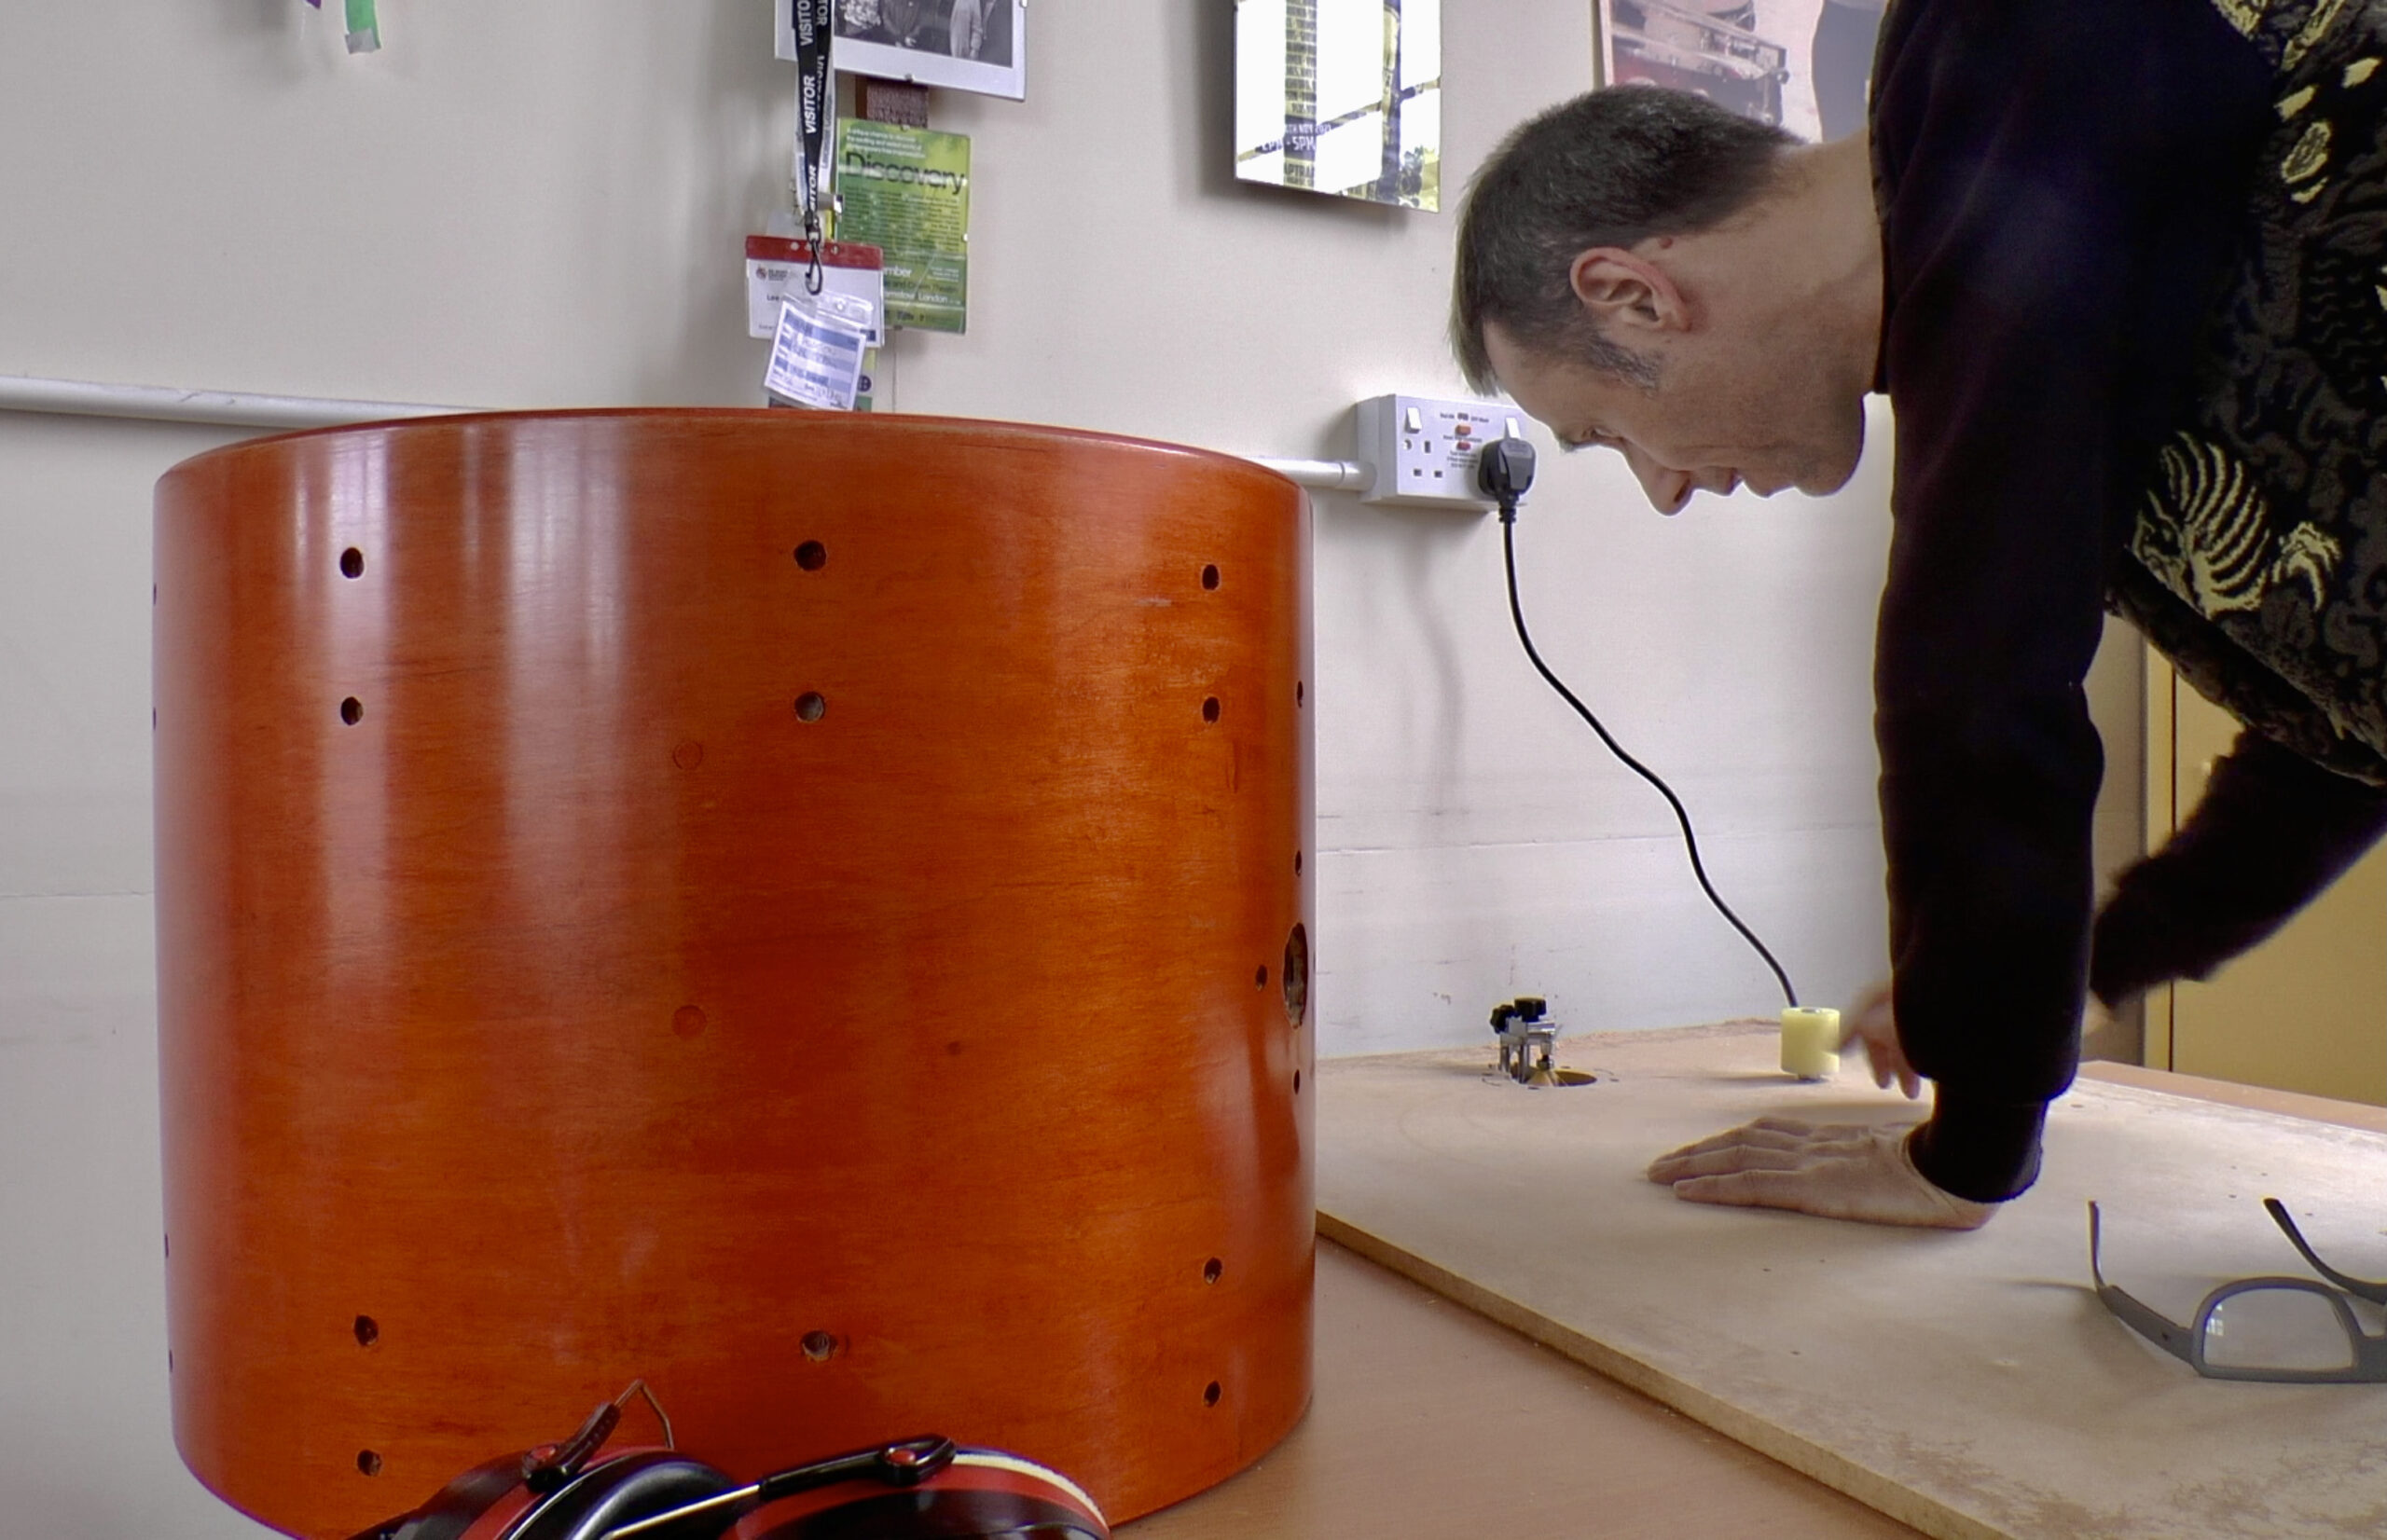
This is, essentially, almost rounding the outer bearing edge. Could I have simply used a curved router bit? Perhaps, but each drum is a different size; from subtly different eras – with each presenting its own issue – and each shell is a different thickness. With this system, we are customising the outer bearing edge cutting process for each individual drum.
I documented this process as a video blog, which you can see here:


After much patient and careful work on the bearing edge cuts, I deliberated over whether to get the varnish back out or to wax the now open, bare wood where the router cuts had been made. I didn’t like the idea of trying to match up new coats of varnish with the old, for fear of ridges. Having read lots of positive blogs about using wax for ‘dressing’ drum bearing edges, I ordered some Carnauba wax. As ever, online opinion differed as to the reasons for using this wax and also best practice for doing so. It made sense to me that the wax would seal the open edge of the wood from moisture and also provide lubrication for the head – under tension – thus aid tuning. I ran three passes of wax; wiped vigorously with a microfibre cloth – therefore gently heating, through friction – and smoothing the surface between each pass. There’s a detailed video of this process hosted on youTube, below:
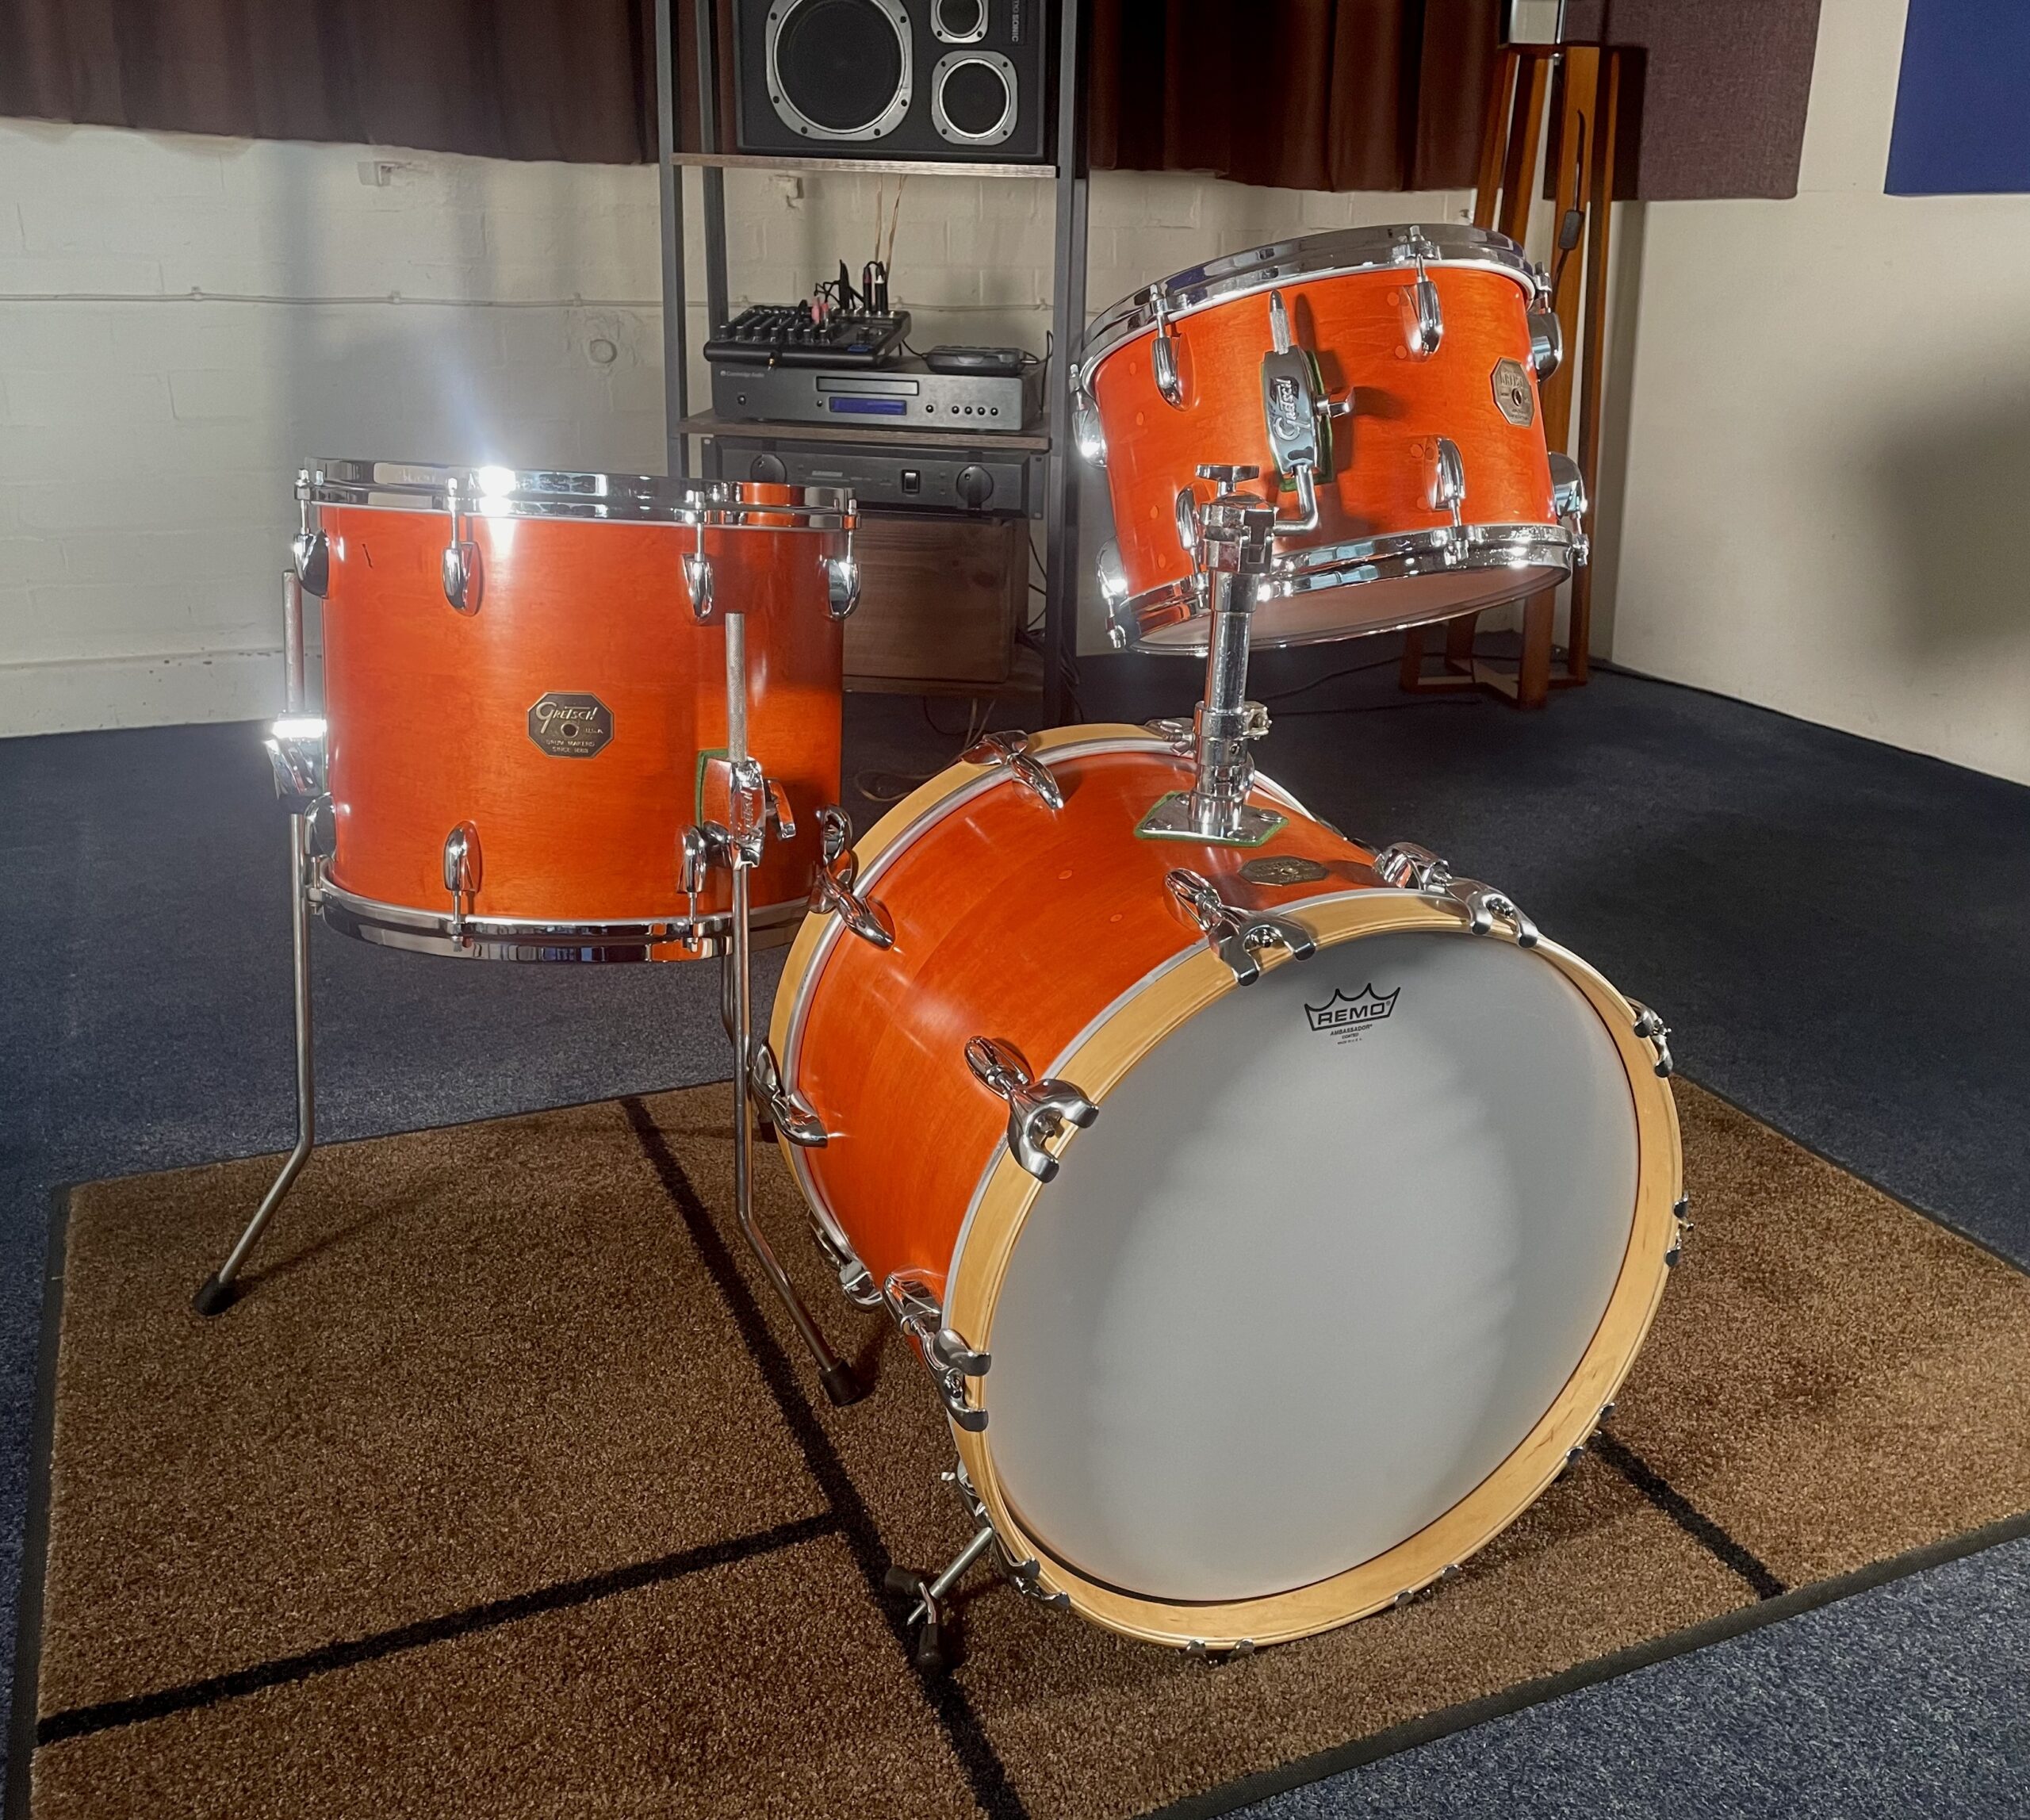
I guess in my mind, I felt I was on the run home at the assembly point. It really did look like, in terms of appearance at least, that this great experiment had worked!
12″ Tom with routing
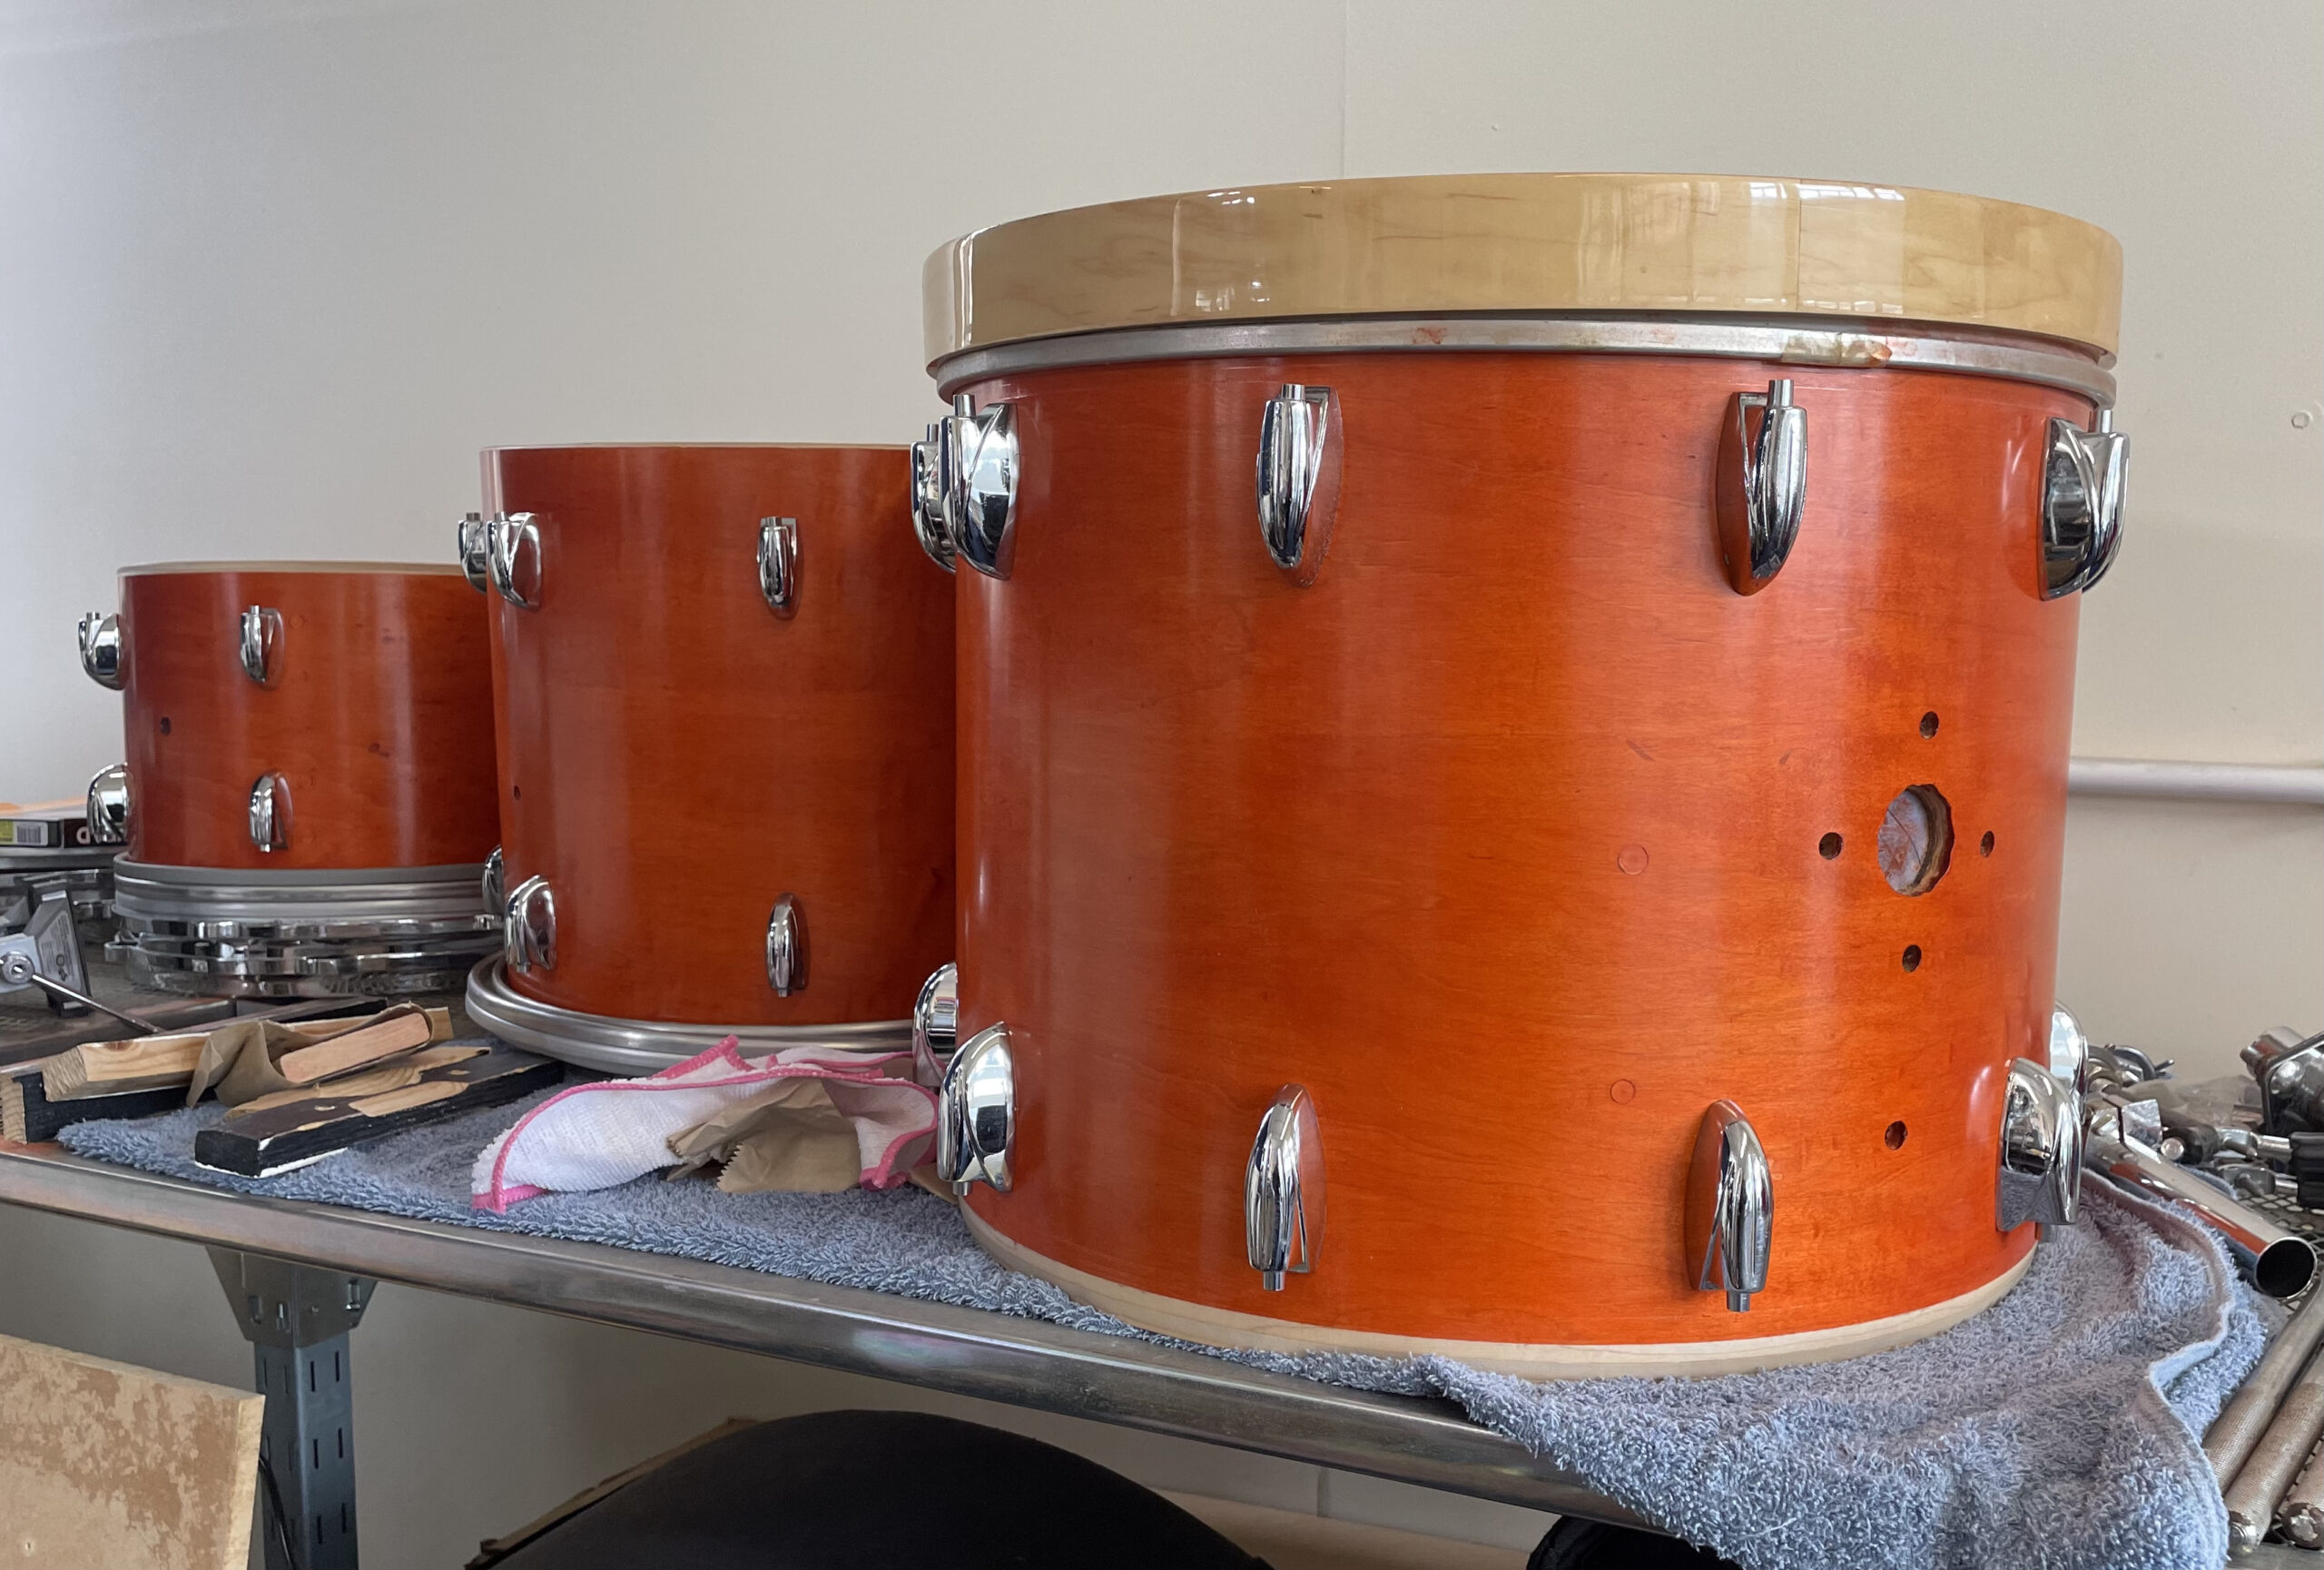
There were some minor tweaks to be made: the threaded inserts on a couple of the floor tom leg brackets weren’t quite right, but hacksawing a little off their lengths soon fixed that. A similar story for the bass drum leg bracket wing screws, though for these I wanted longer bolts, which were easily sourced online. The badges were held on by very old – but salvageable – grommets. I elected to glue the badges as well as re-fitting their grommets, as I couldn’t face the idea of them coming loose, twirling round and scratching perfect circles into my newly finished drum shells!
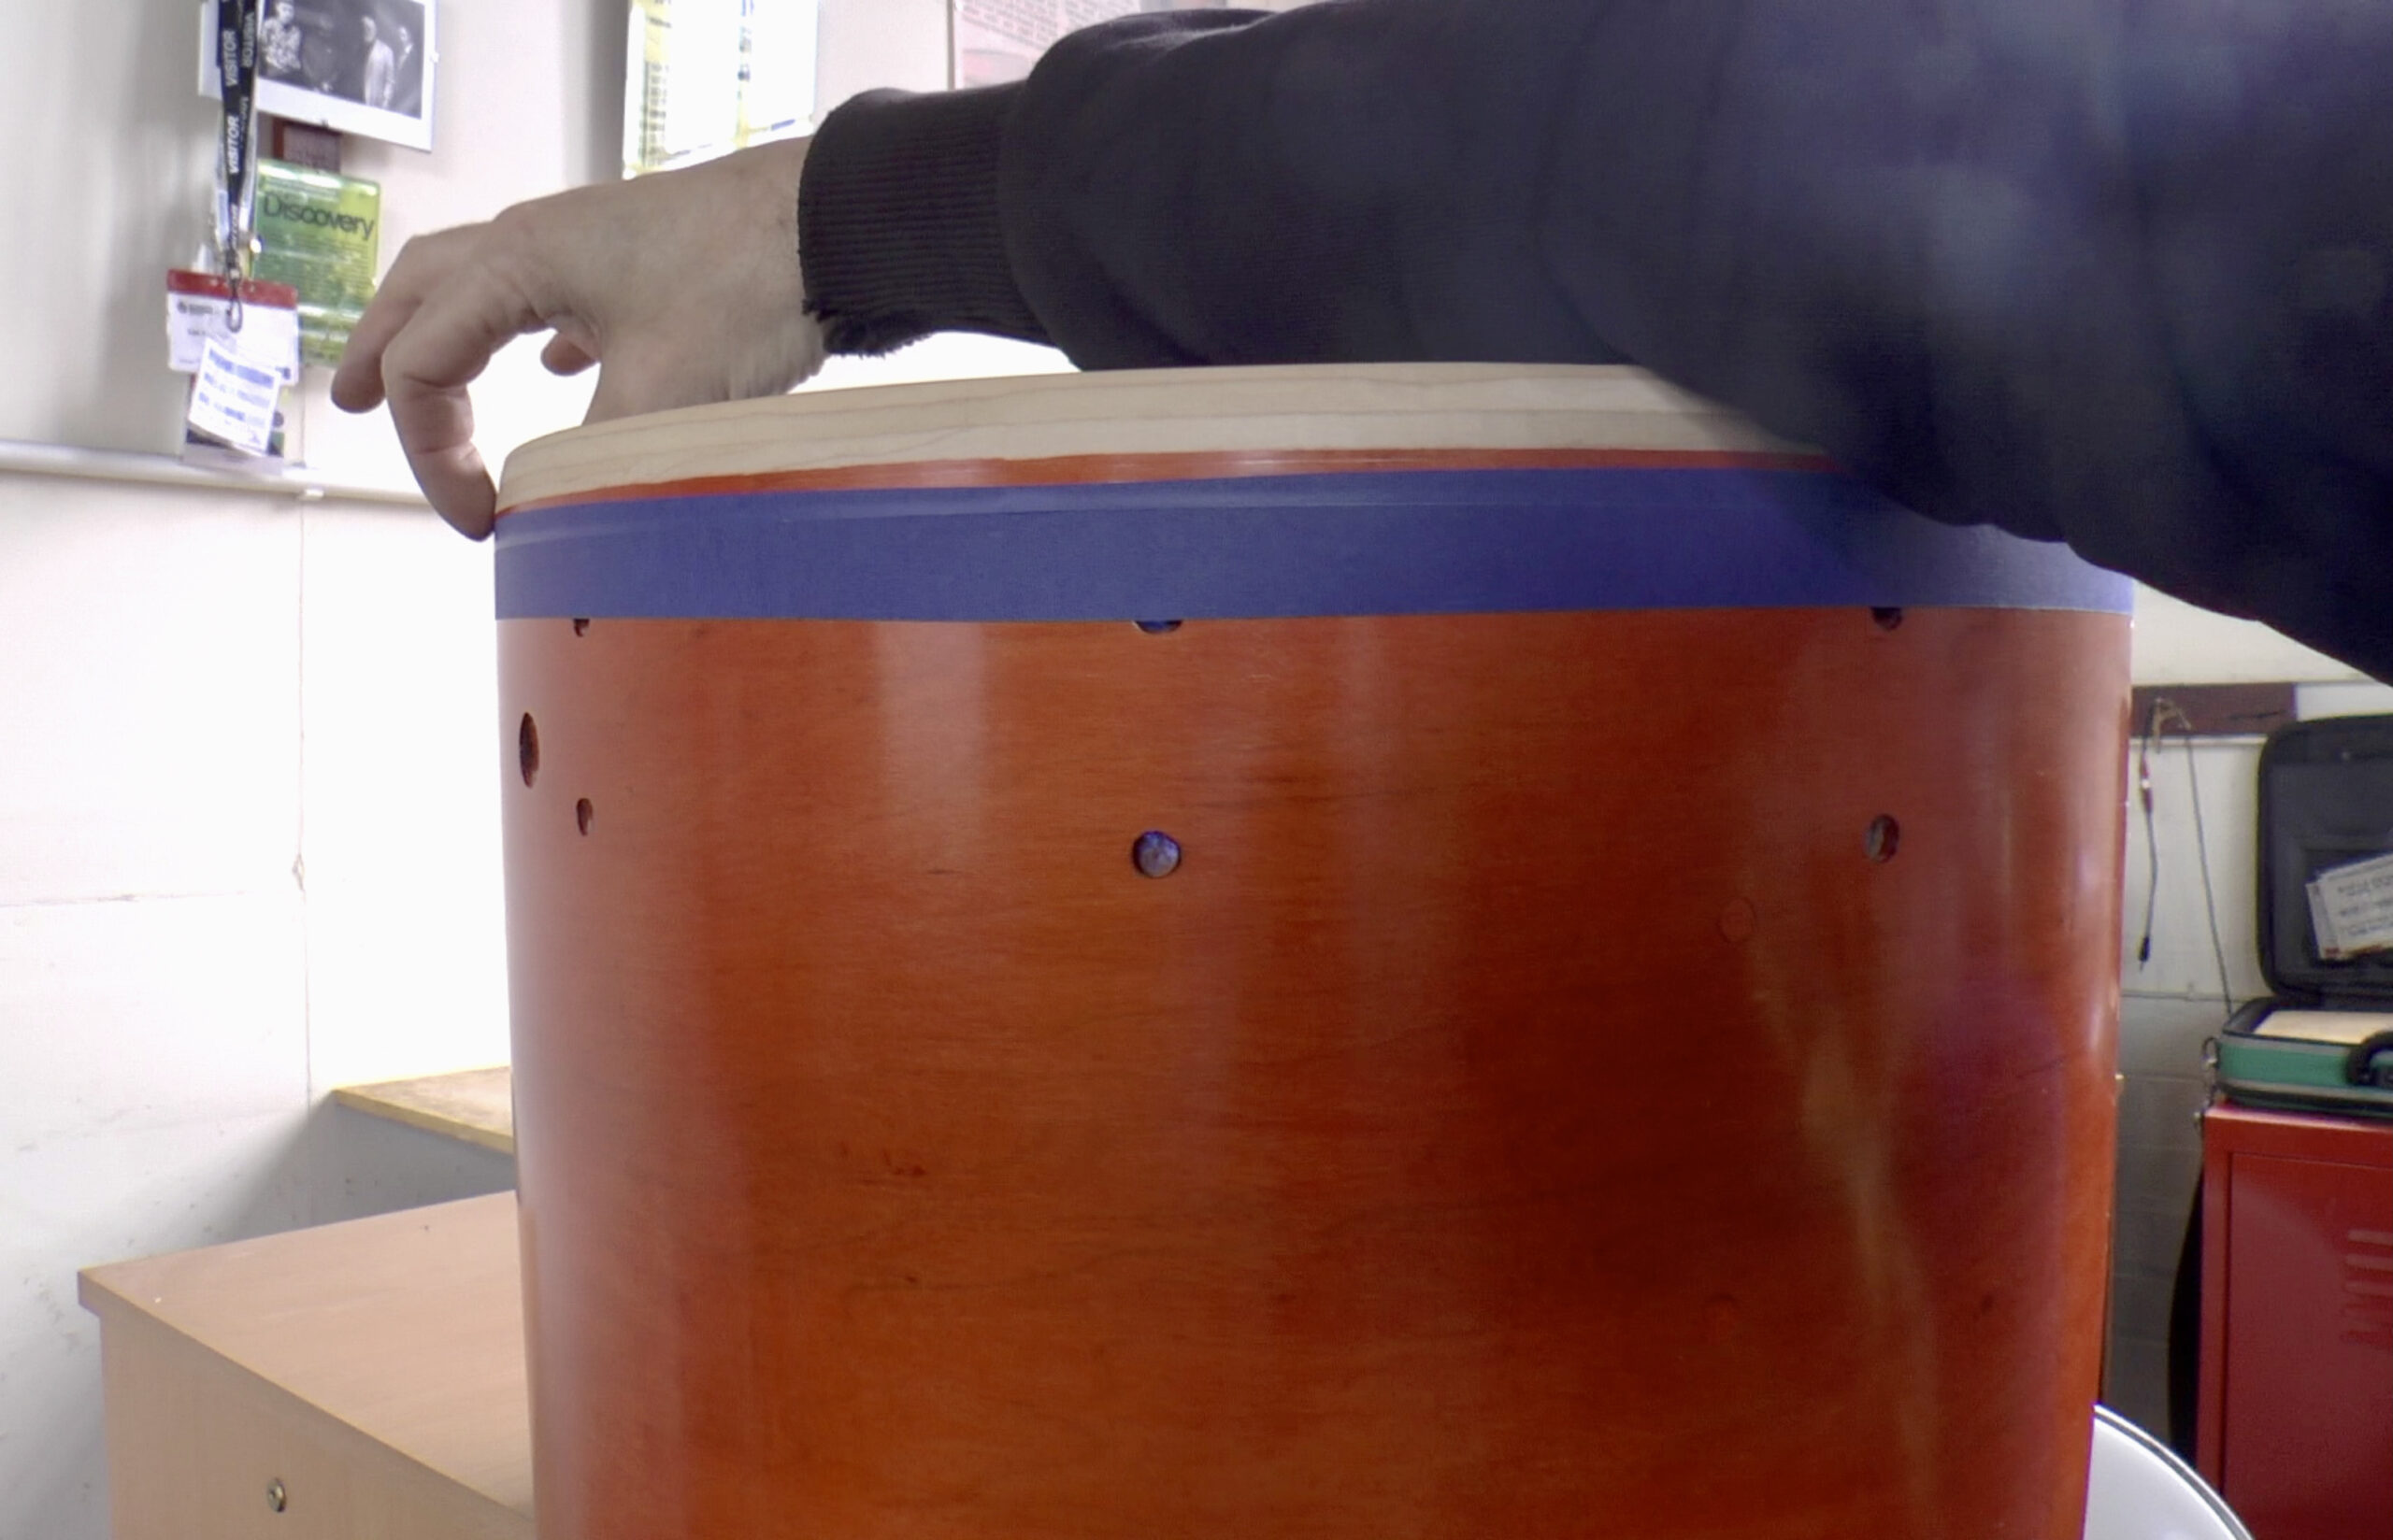
Alongside the bass drum renovation and custom approach to the bearing edges (see video), I also had to do some work on its new, natural maple bass drum hoops. These were just way too tight over the edge of the drum shell and I had already planned to split the amount of wood routing between the drum shell and the hoops, to give clear passage for the drum head. You can find a short video document of the process, here:
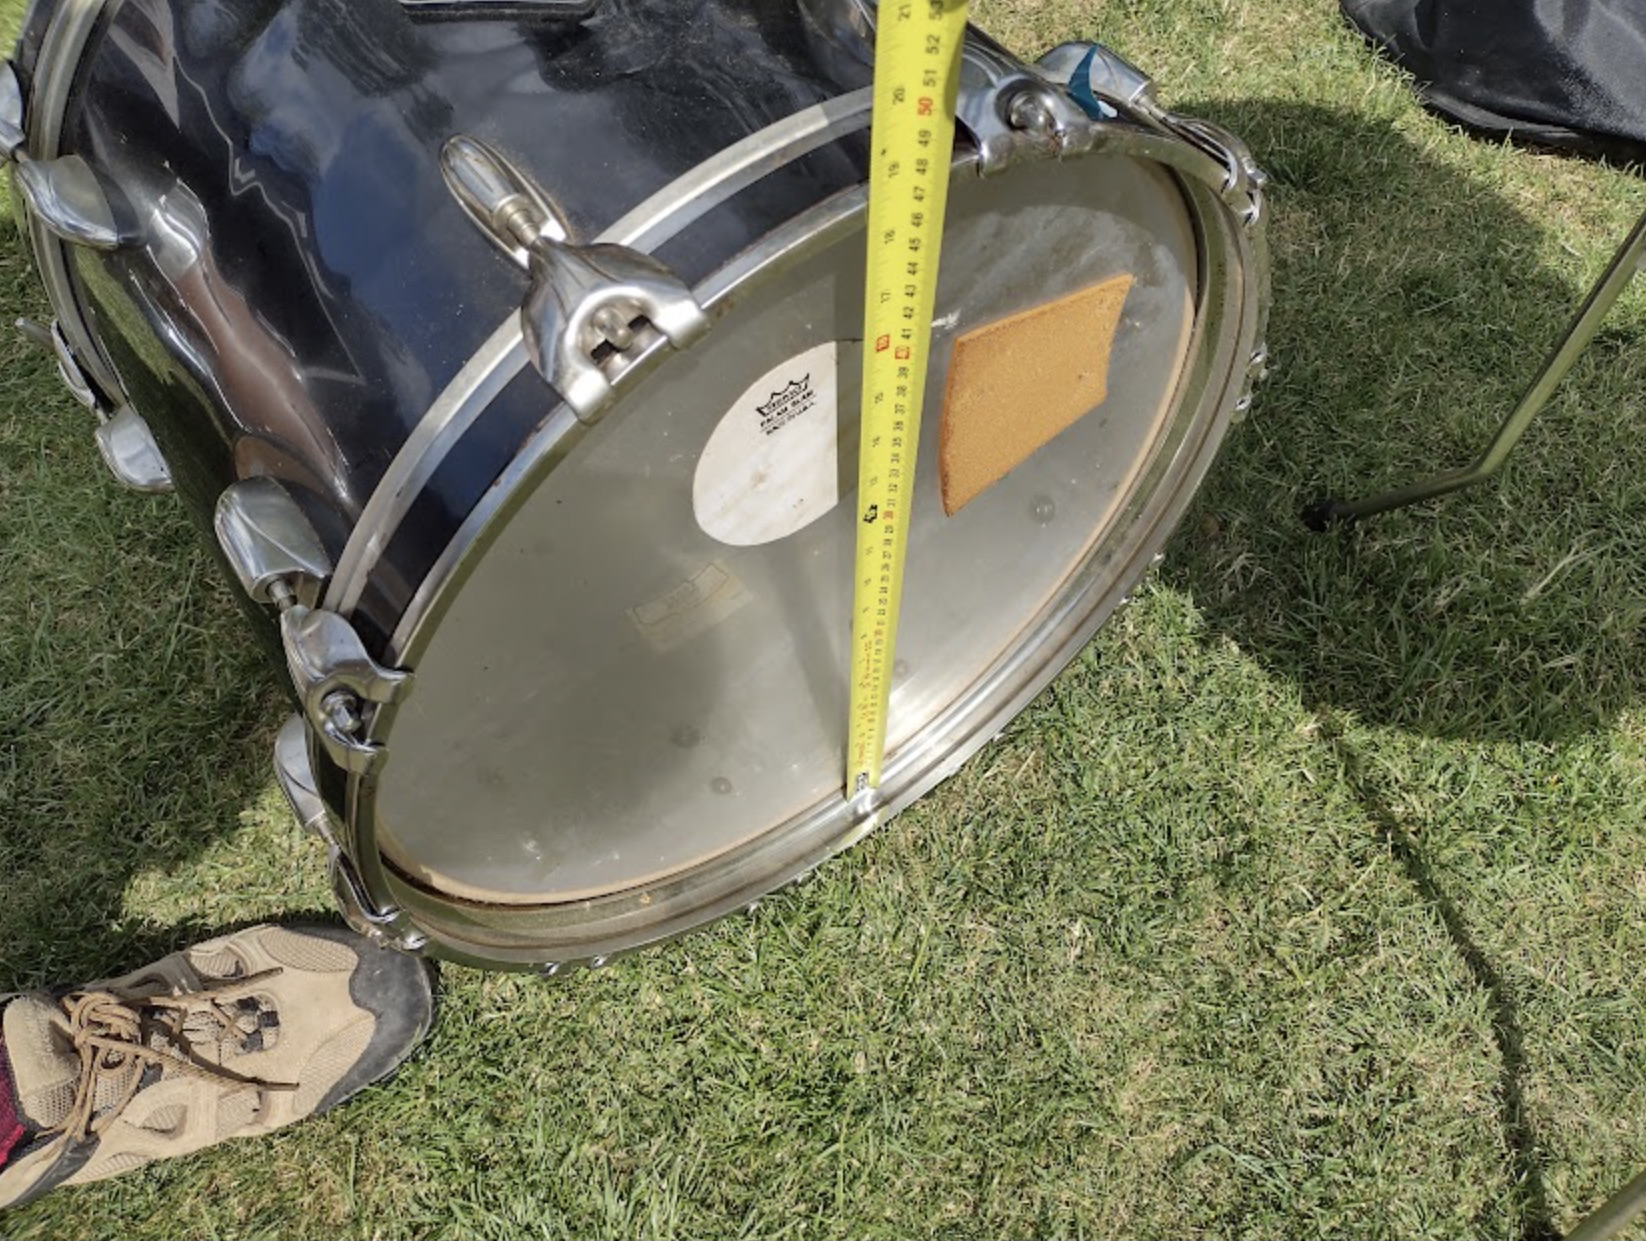
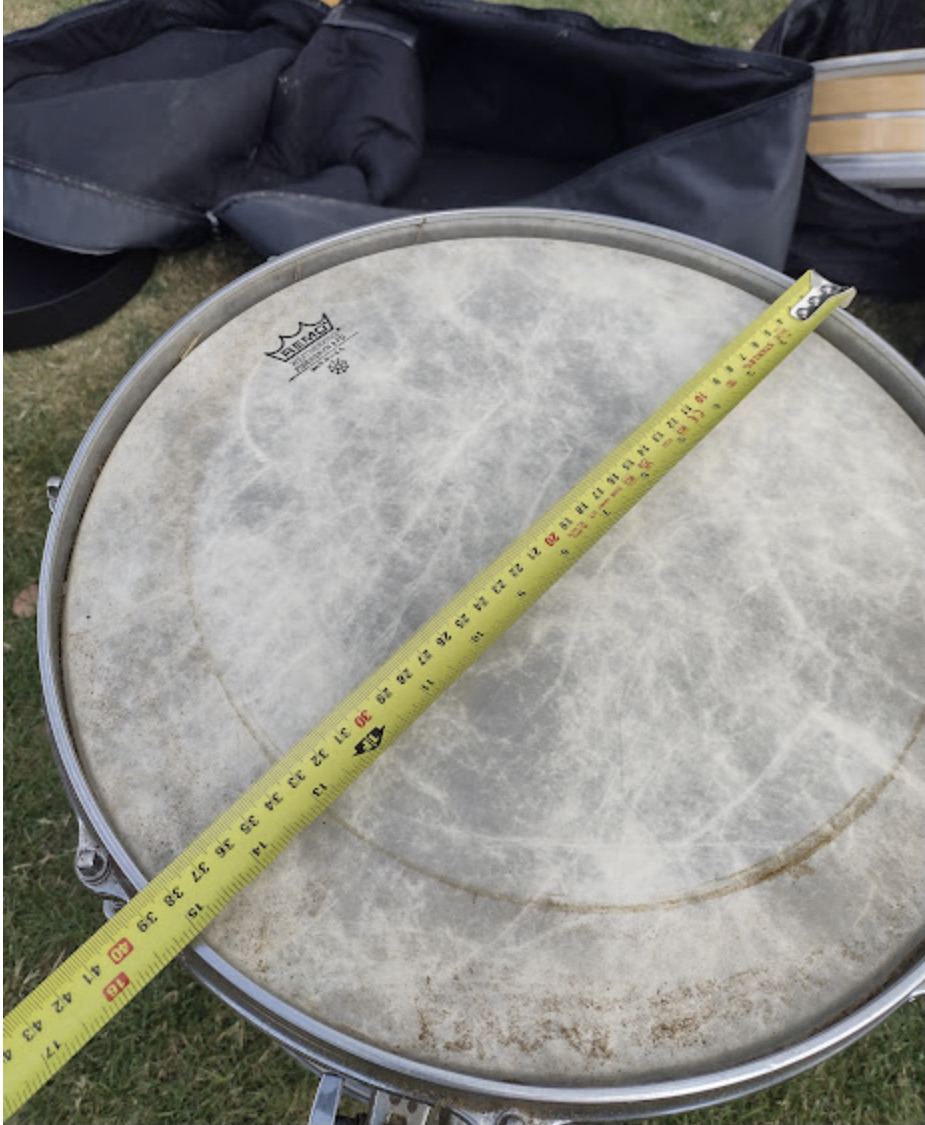
On the left picture (below) you can see the inner four plies of the bass drum hoop routed quite steeply; below right, you can see the shell’s bearing edge apex neatly seated into the mid-curvature of the drum head – and also the newly engineered clearance between the drum head collar and the shell.
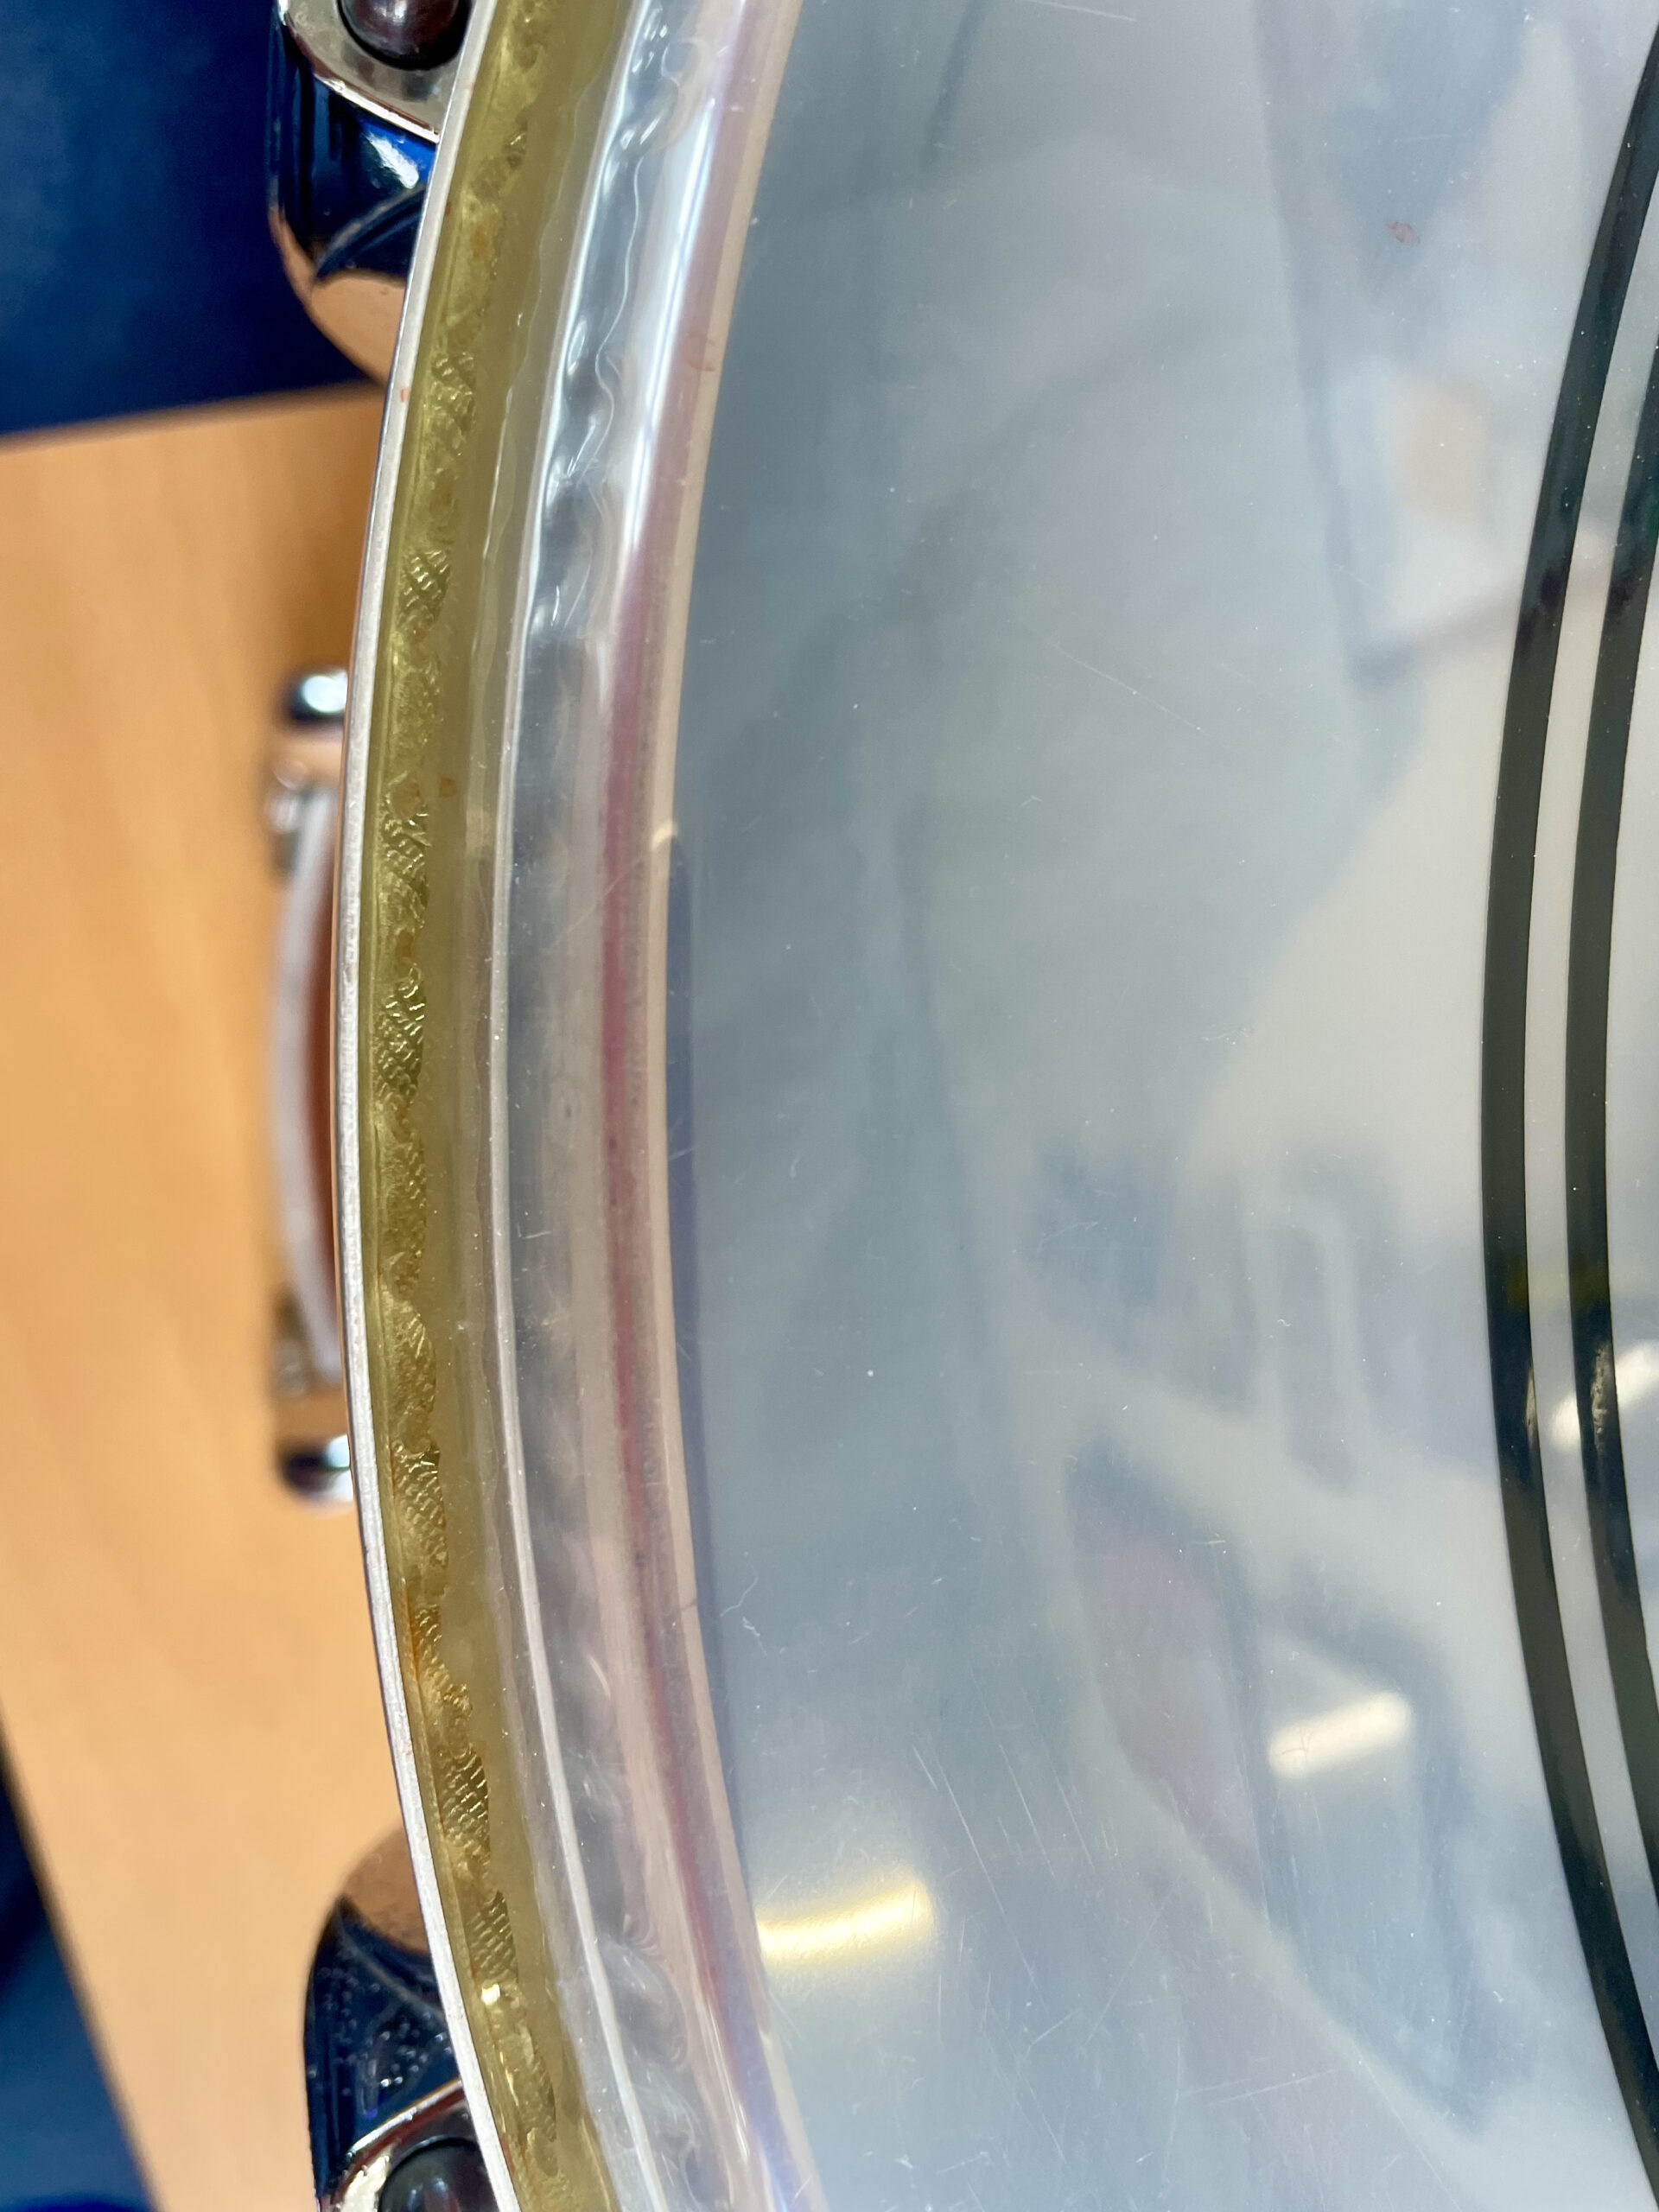
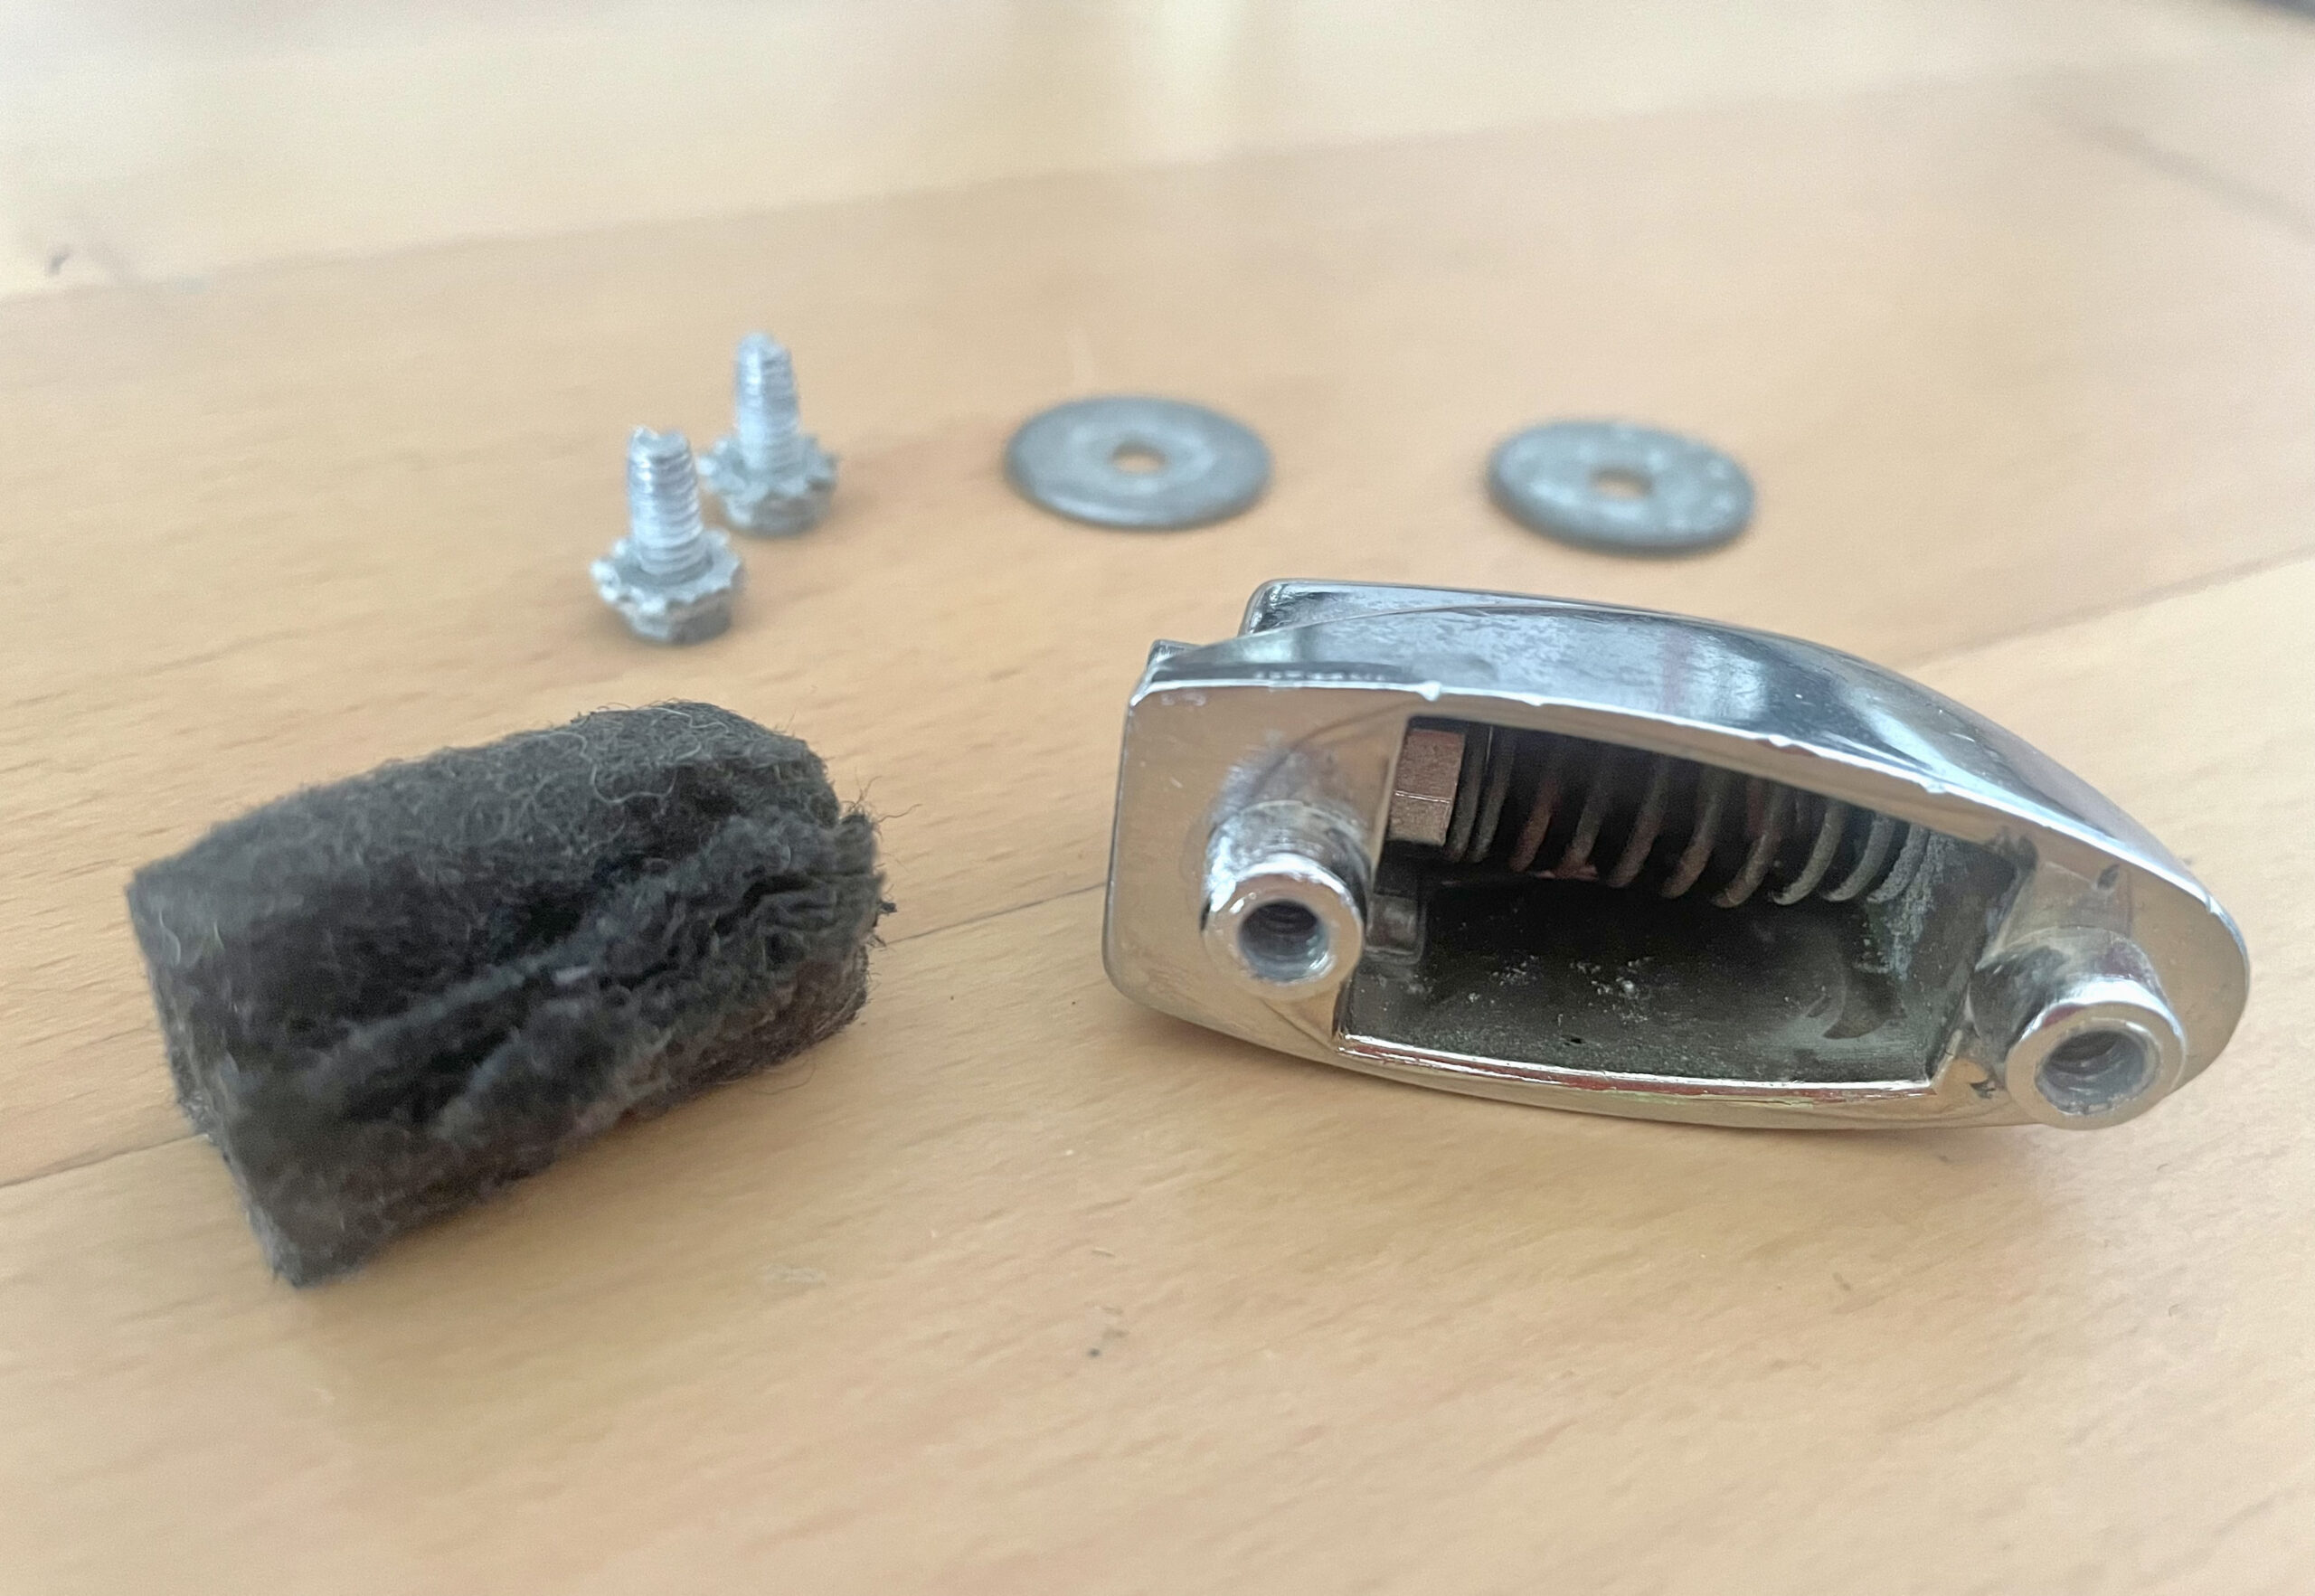
On final assembly, the bass drum presented yet another surprise. The Gretsch ‘bullet-style’ T-bolts (which I really do love the look of!) didn’t have enough thread available to pull the hoop down fully. It would appear that when the drum was cut down from a floor tom, the original floor tom lug placements were kept on the original side (which kind of makes sense) and the newly cut side adopted that same spacing between the lugs and edge of the shell. This is fine for its original tom tom tension bolts (which have thread for their full length) but not for these Gretsch bass drum T-bolts, where the threads stop slightly short! See the picture for comparison, below.
This renovation was a long journey, but totally worthwhile. I undertook the project full in the knowledge that I would need to learn some new skills – which is something I enjoy. The drums certainly presented surprises along the way and some of these challenges required novel solutions! In the end, I can only judge the success of this renovation by the sound, look, playability and flexibility of the kit. Happily, I can say in all honesty that I am not only delighted, but also quite surprised with all aspects of these results!

You can ‘Meet Lulu’ here:
Leave a Reply